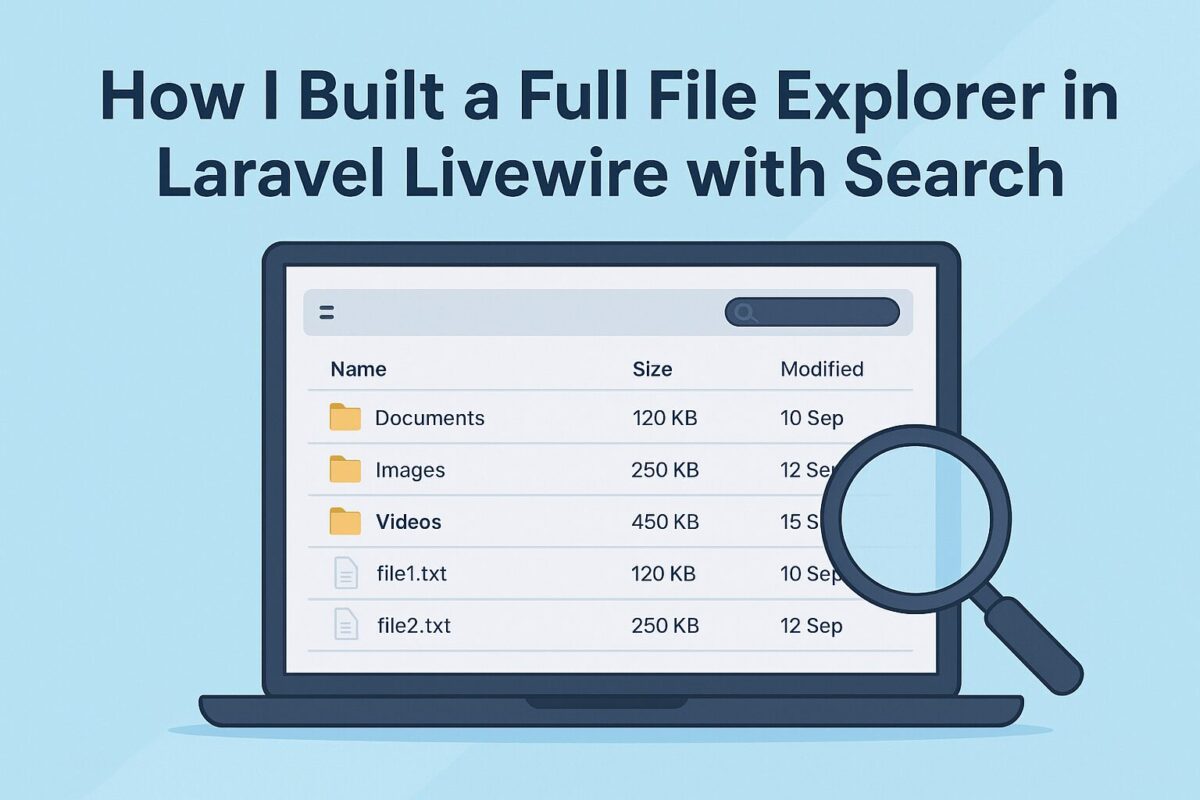
How I Built a Full File Explorer in Laravel Livewire with Search

Learn how to create a complete file explorer in Laravel using Livewire and Bootstrap – with folders, subfolders, and document search. Step-by-step tutorial with code.

Have you ever wanted to give your Laravel app a professional, desktop-like file explorer – with folders, nested subfolders and document search?

In this tutorial, I’ll walk you through building full file explorer using Laravel Livewire and Bootstrap 5. We’ll create a clean two-pane layout: the left sidebar displays your folder structure (applications and subfolders), while the right pane dynamically lists documents with instant search and filtering.

By the end, you’ll have a fully functional, real-time file manager where users can browse folders, search documents by name and group them by type – all powered by Livewire’s reactivity and Laravel’s filesystem magic.

What We’re Building

We’ll create a two-pane interface like a typical file explorer:

  • Left sidebar → list of applications/folders and nested subfolders.
  • Right pane → list of documents for the selected application.
  • Features:
    • Real-time search
    • Subfolder navigation
    • Document type–based organization

Step 1. Setting Up the Database

We’ll use two tables: applications and documents. applications table holds our folders and subfolders, while documents table holds all documents with name and path with application relation.

Schema::create('applications', function (Blueprint $table) {
    $table->id();
    $table->string('name');
    $table->foreignId('parent_id')->nullable()->constrained('applications')->cascadeOnDelete();
    $table->timestamps();
});

Schema::create('documents', function (Blueprint $table) {
    $table->id();
    $table->foreignId('application_id')->constrained()->cascadeOnDelete();
    $table->string('title');
    $table->string('file_path');  // e.g. "documents/report.pdf"
    $table->string('type')->nullable(); // e.g. "invoice", "report", "letter"
    $table->timestamps();
});

Step 2. Eloquent Relationships

Define relationships in models as follows,

// Application.php
class Application extends Model
{
    protected $fillable = ['name', 'parent_id'];

    public function parent()
    {
        return $this->belongsTo(Application::class, 'parent_id');
    }

    public function children()
    {
        return $this->hasMany(Application::class, 'parent_id');
    }

    public function documents()
    {
        return $this->hasMany(Document::class);
    }
}

// Document.php
class Document extends Model
{
    protected $fillable = ['application_id', 'title', 'file_path', 'type'];

    public function application()
    {
        return $this->belongsTo(Application::class);
    }
}

Step 3. The Livewire Component

Run the following command to create the livewire component:

php artisan make:livewire ApplicationExplorer

It will create 2 files as follows,

  • app/Http/Livewire/ApplicationExplorer.php for file explorer processing.
  • resources/views/livewire/application-explorer.blade.php for file explorer view.

Define all Processes

Open app/Http/Livewire/ApplicationExplorer.php and add the following code:

namespace App\Http\Livewire;

use Livewire\Component;
use App\Models\Application;
use App\Models\Document;
use Livewire\WithPagination;
use Illuminate\Support\Facades\Storage;
use ZipArchive;

class ApplicationExplorer extends Component
{
    use WithPagination;
    protected $paginationTheme = 'bootstrap';

    public $selectedAppId = null;
    public $search = '';
    public $filterType = '';

    public function updatingSearch()
    {
        $this->resetPage();
    }

    public function selectApp($appId)
    {
        $this->selectedAppId = $appId;
        $this->reset(['search', 'filterType']);
        $this->resetPage();
    }

    public function render()
    {
        $applications = Application::with('children')->whereNull('parent_id')->get();

        $selectedApp = $this->selectedAppId ? Application::find($this->selectedAppId) : null;

        $documents = collect();
        if ($selectedApp) {
            $documents = Document::where('application_id', $this->selectedAppId)
                ->when($this->filterType, fn($q) => $q->where('type', $this->filterType))
                ->when($this->search, fn($q) => $q->where('title', 'like', "%{$this->search}%"))
                ->paginate(10);
        }

        return view('livewire.application-explorer', [
            'applications' => $applications,
            'selectedApp'  => $selectedApp,
            'documents'    => $documents,
        ]);
    }
}

Update the View

To update the view, open resources/views/livewire/application-explorer.blade.php and add the below code,

<div class="container-fluid vh-100">
    <div class="row h-100">
        {{-- Sidebar --}}
        <div class="col-3 border-end bg-light p-0 overflow-auto">
            <div class="p-3 border-bottom"><h5 class="mb-0">Applications</h5></div>
            <ul class="list-group list-group-flush">
                @foreach($applications as $app)
                    @include('livewire.partials.sidebar-app', ['app' => $app, 'level' => 0])
                @endforeach
            </ul>
        </div>

        {{-- Right Pane --}}
        <div class="col-9 p-4">
            @if($selectedApp)
                <div class="d-flex justify-content-between align-items-center mb-3">
                    <h4 class="mb-0">Documents in "{{ $selectedApp->name }}"</h4>
                    <div class="d-flex gap-2 align-items-center" style="width:50%;">
                        <select class="form-select w-auto" wire:model="filterType">
                            <option value="">All Types</option>
                            <option value="invoice">Invoice</option>
                            <option value="report">Report</option>
                            <option value="letter">Letter</option>
                        </select>
                        <input type="text" class="form-control" placeholder="Search..." wire:model.debounce.300ms="search">
                    </div>
                </div>

                @if($documents->count())
                    <div class="table-responsive">
                        <table class="table table-striped table-bordered align-middle">
                            <thead class="table-dark">
                                <tr>
                                    <th>#</th>
                                    <th>Document</th>
                                    <th>Type</th>
                                    <th>Created</th>
                                    <th>Actions</th>
                                </tr>
                            </thead>
                            <tbody>
                                @foreach($documents as $i => $doc)
                                    <tr>
                                        <td>{{ $i + 1 }}</td>
                                        <td>📄 {{ $doc->title }}</td>
                                        <td>{{ $doc->type ?? '-' }}</td>
                                        <td>{{ $doc->created_at->format('d M Y') }}</td>
                                        <td><button class="btn btn-sm btn-primary">View</button></td>
                                    </tr>
                                @endforeach
                            </tbody>
                        </table>
                    </div>

                    {{ $documents->links() }}
                @else
                    <div class="text-muted fst-italic">No documents found.</div>
                @endif
            @else
                <div class="text-muted fst-italic">Select an application to view documents.</div>
            @endif
        </div>
    </div>
</div>

For sidebar, create a new file at resources/views/livewire/partials/sidebar-app.blade.php and add the following code,

<li class="list-group-item p-0 d-flex justify-content-between align-items-center">
    <button wire:click="selectApp({{ $app->id }})"
            class="btn flex-grow-1 text-start px-3 py-2 {{ $selectedAppId === $app->id ? 'btn-secondary' : 'btn-light' }}"
            style="padding-left: {{ 12 + ($level * 15) }}px;">
        📁 <span class="ms-2">{{ $app->name }}</span>
    </button>
</li>

@if($app->children->count())
    <ul class="list-group list-group-flush">
        @foreach($app->children as $child)
            @include('livewire.partials.sidebar-app', ['app' => $child, 'level' => $level + 1])
        @endforeach
    </ul>
@endif

Step 4. File Storage Notes

Documents are uploaded to storage/app/public/documents/.... So, make sure that your public link exists:

php artisan storage:link

Always use:

Storage::disk('public')->exists($path);
Storage::disk('public')->path($path);

This ensures correct behavior since your files are under the public disk.

Step 5. Directory Structure by Document Type

When uploading new documents, if you want to make a directory structure based on document types, you can follow this approach:

$file->store("documents/{$applicationId}/" . strtolower($type), 'public');

This automatically creates folders like:

/storage/app/public/documents/3/invoices/file.pdf

Final Result

  • Left Sidebar: Displays all applications + nested subfolders.
  • Right Pane: Shows searchable, paginated, filterable document table.

Conclusion

And there you have it – a complete file explorer built with Laravel Livewire, featuring a responsive sidebar, real-time search and type-based organization.

This approach not only showcases the power of Livewire for dynamic interfaces but also demonstrates how easily Laravel’s Storage, and Eloquent relationships can come together to create a feature-rich, production-ready document management system.

From here, you can take it even further – add drag-and-drop uploads, access control, file previews, download all files in single zip with complete folder structure or even integrate third-party storage like AWS S3. With this foundation, your Laravel app can handle documents as efficiently as any modern file manager.

How to Use TinyMCE with Livewire and Sortable.js in a Dynamic Form Builder

Learn how to integrate TinyMCE with Livewire and Sortable.js in a dynamic form builder. Build interactive forms with drag-and-drop and rich text editing in Laravel.

When building a drag-and-drop form builder with Laravel Livewire, a common challenge is integrating rich text editors like TinyMCE while also supporting sortable components and repeaters.

Checkout my article to build dynamic form builder using Laravel Livewire here.

This guide walks you through a working setup where:

  • Components can be added dynamically.
  • Fields can include TinyMCE editors.
  • Components can be dragged and reordered using Sortable.js.
  • TinyMCE properly initializes and syncs data back to Livewire.

Step 1: Create Your TinyMCE Field Partial

Inside your Blade view for form fields, create a partial for TinyMCE:

<div wire:ignore>
    <textarea
        id="{{ $editorId }}"
        class="tinymce"
        data-model="{{ $modelPath }}"
    >{{ is_string($value) ? $value : '' }}</textarea>
</div>
  • wire:ignore ensures Livewire doesn’t overwrite the editor.
  • data-model stores the Livewire binding path for syncing.

Step 2: Add TinyMCE + Sortable.js JavaScript

Include TinyMCE and Sortable.js in your layout:

<script src="https://cdn.tiny.cloud/1/no-api-key/tinymce/6/tinymce.min.js" referrerpolicy="origin"></script>
<script src="https://cdn.jsdelivr.net/npm/sortablejs@1.15.0/Sortable.min.js"></script>

Now initialize editors and handle drag-and-drop:

<script>
    function initTinyMCEEditors() {
        document.querySelectorAll('textarea.tinymce').forEach((el) => {
            if (!el.id || tinymce.get(el.id)) return;

            tinymce.init({
                selector: `#${el.id}`,
                menubar: false,
                plugins: 'link lists code image table',
                toolbar: 'undo redo | bold italic underline | alignleft aligncenter alignright | bullist numlist | link image code',
                setup: function (editor) {
                    editor.on('init', () => {
                        editor.setContent(el.value || '');
                    });
                    editor.on('Change KeyUp', () => {
                        const model = el.dataset.model;
                        if (model) {
                            Livewire.dispatch('input', { name: model, value: editor.getContent() });
                        }
                    });
                }
            });
        });
    }

    function destroyTinyMCEEditors() {
        document.querySelectorAll('textarea.tinymce').forEach((el) => {
            const editor = tinymce.get(el.id);
            if (editor) {
                editor.destroy();
            }
        });
    }

    function syncAllTinyMCEDataToLivewire() {
        document.querySelectorAll('textarea.tinymce').forEach((el) => {
            const editor = tinymce.get(el.id);
            if (editor) {
                const model = el.dataset.model;
                if (model) {
                    Livewire.dispatch('input', { name: model, value: editor.getContent() });
                }
            }
        });
    }

    document.addEventListener('DOMContentLoaded', function () {
        const el = document.getElementById('components-sortable');

        if (el) {
            new Sortable(el, {
                animation: 150,
                handle: '.drag-handle',
                onStart: destroyTinyMCEEditors,
                onEnd: () => {
                    setTimeout(() => {
                        Livewire.dispatch('reorderUpdated');
                        initTinyMCEEditors();
                    }, 100);
                }
            });
        }

        initTinyMCEEditors();
        Livewire.hook('message.processed', initTinyMCEEditors);
    });
</script>

Step 3: Sortable Container Blade Example

<ul id="components-sortable">
    @foreach ($components as $index => $component)
        <li class="component-item">
            <div class="drag-handle cursor-move">⠿</div>

            @include('form-fields', [
                'fields' => $component['fields'],
                'modelPath' => "components.{$index}.fields"
            ])
        </li>
    @endforeach
</ul>

Step 4: Sync TinyMCE Data Before Save

Since TinyMCE keeps data internally, Livewire won’t automatically have the latest content.

Fix this by syncing before save:

<button type="button" onclick="syncAllTinyMCEDataToLivewire(); Livewire.find('{{ $this->id }}').save()">Save</button>

And in your Livewire component:

protected $listeners = ['save-form' => 'save'];

public function save()
{
    // At this point, TinyMCE data is synced
}

Conclusion

Integrating TinyMCE with Livewire and Sortable.js in a dynamic form builder may seem complex at first, but once set up correctly, it opens up powerful possibilities for building highly interactive and user-friendly applications. By combining the real-time reactivity of Livewire, the drag-and-drop flexibility of Sortable.js, and the rich editing features of TinyMCE, you can create a seamless experience where users can easily manage, reorder, and edit dynamic content without page reloads.

This approach not only improves usability but also ensures that your forms remain scalable and maintainable as your project grows. With the right configuration and careful handling of event updates, you’ll have a robust solution ready for production.