How to Add Laravel Livewire Checkout to Product Booking System (Part 2)

Learn how to build a Laravel Livewire checkout system for product booking cart. Step-by-step guide with database, Livewire component, and order storage.

In Part 1, we built a complete Product Booking System with Cart using Laravel Livewire, where users could:

  • Select a product
  • Choose a booking date
  • Select quantity
  • Add multiple products to cart
  • Merge identical cart entries

Now in Part 2, we will extend that system and add Laravel Livewire Checkout Form to make it fully working, where:

✔ User enters billing details
✔ Cart items are validated
✔ Orders are saved in database
✔ Cart clears after successful checkout
✔ Ready for payment integration

Let’s build it step-by-step.


Step 1: Create Order Tables

When a user places an order, we must store:

  • Who placed the order
  • Their contact details
  • The total order amount

Instead of saving everything in one table, we follow proper e-commerce structure and create 2 tables as follows:

  • orders: To store contact details and order related information
  • order_items: To store multiple order items for the order

This keeps your database clean and scalable.

Use the following migration command to create orders table:

php artisan make:migration create_orders_table

It will create a migration file xxxx_xx_xx_xxxxxx_create_orders_table.php inside database/migrations folder. Open this file and add the following code:

Schema::create('orders', function (Blueprint $table) {
$table->id();
$table->string('name');
$table->string('email');
$table->string('phone');
$table->text('address');
$table->decimal('total_amount', 10, 2);
$table->timestamps();
});

Similarly, use the same artisan command to create order_items table as follows,

php artisan make:migration create_order_items_table

And copy the following code to the generated migration file xxxx_xx_xx_xxxxxx_create_order_items_table.php:

Schema::create('order_items', function (Blueprint $table) {
$table->id();
$table->foreignId('order_id')->constrained()->cascadeOnDelete();
$table->foreignId('product_id');
$table->date('booking_date');
$table->integer('quantity');
$table->decimal('price', 10, 2);
$table->decimal('total', 10, 2);
$table->timestamps();
});

After both migrations, run the below migrate command to execute created migrations:

php artisan migrate

Step 2: Create Checkout Livewire Component

Create a checkout form livewire component using the following artisan command:

php artisan make:livewire CheckoutForm

It will create 2 files for product booking,

  • Class File: app/Livewire/CheckoutForm.php
  • Blade File: resources/views/livewire/checkout-form.blade.php

Livewire Component Logic

Open app/Livewire/CheckoutForm.php file and copy the following component login in it.

namespace App\Livewire;

use App\Models\Order;
use App\Models\OrderItem;
use App\Services\CartService;
use Livewire\Component;

class CheckoutForm extends Component
{
    public $name, $email, $phone, $address;

    protected $rules = [
        'name'    => 'required|string|min:3',
        'email'   => 'required|email',
        'phone'   => 'required',
        'address' => 'required|min:10',
    ];

    public function placeOrder()
    {
        $this->validate();

        $cart = CartService::all();

        if (empty($cart)) {
            session()->flash('error', 'Cart is empty!');
            return;
        }

        $total = array_sum(array_column($cart, 'total'));

        $order = Order::create([
            'name'         => $this->name,
            'email'        => $this->email,
            'phone'        => $this->phone,
            'address'      => $this->address,
            'total_amount' => $total,
        ]);

        foreach ($cart as $item) {
            OrderItem::create([
                'order_id'     => $order->id,
                'product_id'   => $item['product_id'],
                'booking_date' => $item['date'],
                'quantity'     => $item['quantity'],
                'price'        => $item['price'],
                'total'        => $item['total'],
            ]);
        }

        CartService::clear();

        return redirect()->route('order.success');
    }

    public function render()
    {
        return view('livewire.checkout-form', [
            'cart' => CartService::all()
        ]);
    }
}

Blade View with Message

Add the following code to the resources/views/livewire/checkout-form.blade.php.

<div class="row">

    <div class="col-md-7">
        <h4>Billing Details</h4>

        <input type="text" wire:model="name" placeholder="Full Name" class="form-control mb-2">
        <input type="email" wire:model="email" placeholder="Email" class="form-control mb-2">
        <input type="text" wire:model="phone" placeholder="Phone" class="form-control mb-2">
        <textarea wire:model="address" placeholder="Address" class="form-control mb-3"></textarea>

        <button wire:click="placeOrder" class="btn btn-success w-100">
            Place Order
        </button>
    </div>

    <div class="col-md-5">
        <h4>Order Summary</h4>

        @foreach($cart as $item)
            <div class="border-bottom mb-2 pb-2">
                {{ $item['name'] }} <br>
                Date: {{ $item['date'] }} <br>
                Qty: {{ $item['quantity'] }} <br>
                ₹{{ $item['total'] }}
            </div>
        @endforeach

        <h5 class="mt-3">
            Total: ₹{{ array_sum(array_column($cart, 'total')) }}
        </h5>
    </div>

</div>

It contains user details form with Place Order button to complete the order and Cart Summary with all items and total amount to be payed.

Apply CSS according to your project requirements and you can also add more fields to the checkout form.


Step 3: Add Checkout Route

Add a route to routes/web.php file as follows and point to checkout view.

Route::get('/checkout', function () {
return view('checkout');
})->name('checkout');

Route is point to checkout view. So, create resources/views/checkout.blade.php file and copy the following content to it:

@extends('layouts.app')@section('content')
<div class="container py-5">
<livewire:checkout-form />
</div>
@endsection

Checkout form livewire component is attached in above view file.


What Happens Now?

When user clicks Place Order the following process is being done inside CheckoutForm.php

  1. It validates billing data and creates order record.
  2. It retrieves cart items from session and save them to order items table.
  3. It clears the cart and redirects the user to success page.

You now have a fully working product booking checkout system in Laravel Livewire.


Optional Enhancements

To make this production-ready, you can add:

  • Integrate Stripe / Razorpay payment gateway for actual payment
  • Send email confirmation to admin as well as user
  • Generate invoice on place order or after payment complete or after mark order completed from admin panel.
  • Create order panel using filament to list all orders
  • Order status management

Build a Dynamic FullCalendar Component in Laravel Livewire

Learn how to build a dynamic FullCalendar component using Laravel Livewire 3. Load events based on calendar view, update without page reloads, and open event pages on click. Includes complete code, SEO tips, FAQ schema, and featured image.

If you’re building appointment systems, booking apps, task planners, or admin dashboards in Laravel, integrating a dynamic FullCalendar with Livewire 3 is one of the most powerful UI improvements you can make.

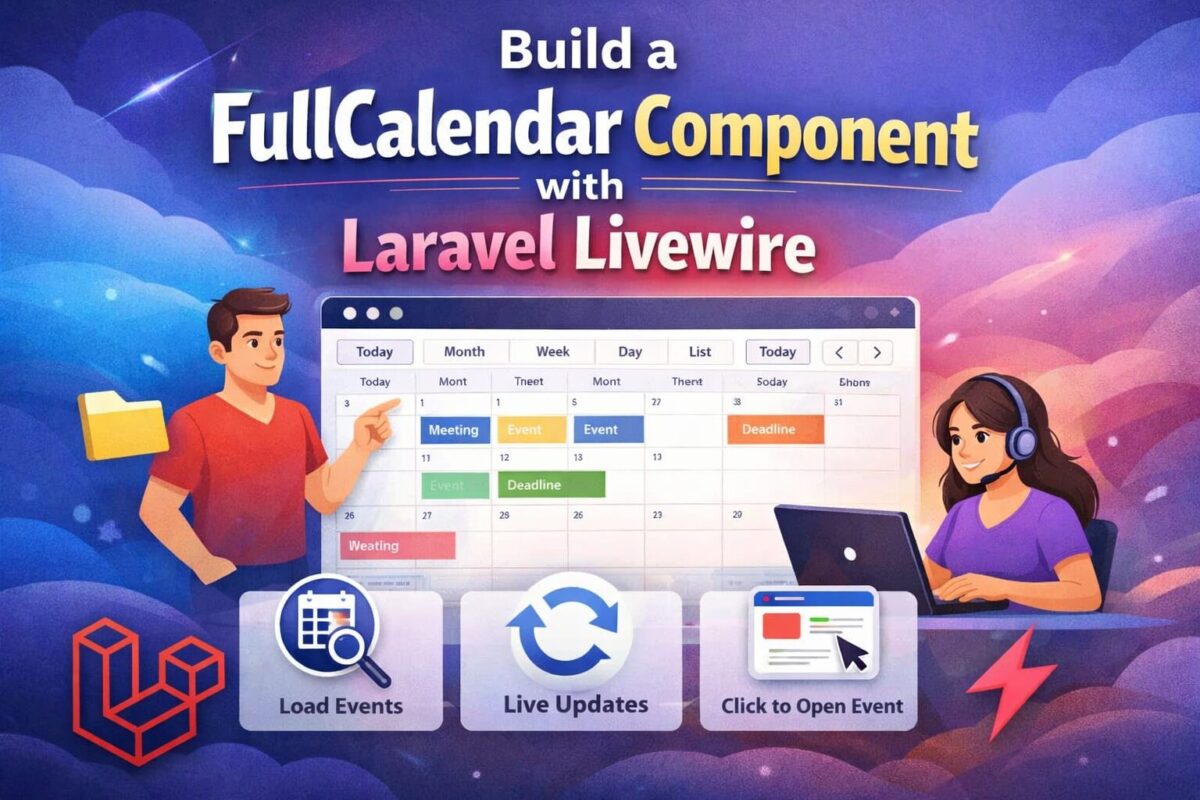
In this guide, we will create a SEO-optimized, production-ready FullCalendar component that:

  • Displays events dynamically
  • Loads events based on current calendar view (month/week/day)
  • Fetches events when navigation buttons are clicked
  • Refreshes events without breaking Livewire
  • Opens a single event page on event click

This tutorial is perfect for Livewire developers who want to build modern, reactive calendar features in Laravel.


Why Use FullCalendar With Livewire 3?

FullCalendar is one of the most flexible JavaScript calendar libraries available today. When combined with Livewire 3’s reactive power, you get:

  • Zero page reloads
  • Fast real-time interactions
  • Server-driven event handling
  • Clean API for filtering, loading & clicking events
  • Reusable UI components

Step 1: Install FullCalendar

Add CDN links in your layout:

<link href="https://cdn.jsdelivr.net/npm/fullcalendar@6.1.9/index.global.min.css" rel="stylesheet">
<script src="https://cdn.jsdelivr.net/npm/fullcalendar@6.1.9/index.global.min.js"></script>

Step 2: Create the Livewire Calendar Component

Run the following artisan command to create a livewire component,

php artisan make:livewire calendar

It will create the following files,

  • app/Livewire/Calendar.php
  • resources/views/livewire/calendar.blade.php

Step 3: Livewire Component Logic (Calendar.php)

Copy this core logic to app/Livewire/Calendar.php file.

<?php

namespace App\Livewire;

use App\Models\Event;
use Livewire\Component;

class Calendar extends Component
{
    public $events = [];

    protected $listeners = [
        'fetchEvents' => 'loadEvents',
    ];

    public function mount()
    {
        $this->loadEvents(now()->startOfMonth(), now()->endOfMonth());
    }

    public function loadEvents($start, $end)
    {
        $this->events = Event::whereDate('start_date', '<=', $end)
            ->whereDate('end_date', '>=', $start)
            ->get()
            ->map(fn($e) => [
                'id'    => $e->id,
                'title' => $e->title,
                'start' => $e->start_date,
                'end'   => $e->end_date,
                'url'   => route('event.details', ['slug' => $e->slug])
            ])
            ->toArray();

        $this->dispatch('refreshCalendar', $this->events);
    }
    
    public function render()
    {
        return view('livewire.calendar');
    }
}

This ensures all events are always pushed correctly to the frontend.


Step 4: Blade View With Event Click Redirect

<div wire:ignore x-data="calendarComponent()" x-init="initCalendar()">
    <div id="calendar"></div>
</div>

<script>
    function calendarComponent() {
        return {
            calendar: null,

            initCalendar() {
                const calendarEl = document.getElementById('calendar');

                this.calendar = new FullCalendar.Calendar(calendarEl, {
                    initialView: 'dayGridMonth',
                    selectable: true,
                    events: @json($events),
                    headerToolbar: {
                        left: 'prev,next today',
                        center: 'title',
                        right: 'dayGridMonth,dayGridWeek,timeGridDay,listWeek'
                    },

                    datesSet: (info) => {
                        // Date range changed → fetch events
                        Livewire.dispatch('fetchEvents', {
                            start: info.startStr,
                            end: info.endStr
                        });
                    },

                    eventClick(info) {
                        info.jsEvent.preventDefault();
                        if (info.event.url) {
                            window.location.href = info.event.url;
                        }
                    },
                });

                this.calendar.render();

                // Updating events when Livewire refreshes
                Livewire.on('refreshCalendar', (events) => {
                    this.calendar.refetchEvents();
                });
            }
        }
    }
</script>

This creates a perfectly working FullCalendar with:

  • Navigational event loading
  • Correct date range handling
  • Click-to-redirect event pages
  • Safe event refresh

Step 5: Create SEO-Friendly Event URLs

Route::get('/events/{event}', [EventController::class, 'show'])->name('events.show');

Now every event opens its own page, improving SEO with schema-friendly URLs.


Benefits of This Implementation

  • Lightning-fast Livewire updates
  • Works with any event table structure
  • Perfect for admin dashboards, booking systems & CRMs
  • No page reloads
  • Mobile-friendly
  • Great for SEO (event URLs help Google index your content)

FAQ Section

1. Why are my events not appearing in FullCalendar?

Because FullCalendar requires start, end, and title fields in a strict structure.
The tutorial fixes this by mapping events manually.

2. Can I open a popup instead of redirecting on event click?

Yes. You can use Bootstrap, Alpine, Filament modal, or Livewire modal.
Just tell the preferred method.

3. Does this support drag & drop?

FullCalendar supports it.
Livewire can listen to eventDrop and update your event in DB.

4. How do I load events filtered by category or user?

Inside loadEvents(), simply add:

->where('category_id', $this->selectedCategory)

5. Does this support recurring events?

Yes — FullCalendar can expand recurring event rules during load.

Livewire Event List with Day and Week Filters Using Bootstrap 5

Learn how to build a Laravel Livewire event list with today, next 7 days, and next 30 days filters using Bootstrap 5. Step-by-step tutorial.

Building a dynamic Laravel Livewire event list with date-based filters is a common requirement for dashboards, admin panels, and booking systems.

In this tutorial, you’ll learn how to create a Livewire event list with Today, Next 7 Days, and next 30 Days filters, styled using Bootstrap 5, without page reloads.

Prerequisites

Before starting, make sure you have:

  • Laravel 10+
  • Livewire installed
  • Bootstrap 5 included in your project
  • Basic knowledge of Laravel models and Blade templates

Step 1: Create Events Table

Before building the Livewire component, we need a proper database table to store events. This migration ensures date-based filtering works correctly for today, next 7 days, and next 30 days views.

Run the following artisan command to generate migration:

php artisan make:migration create_events_table

It will create xxxx_xx_xx_xxxxxx_create_events_table.php migration file inside database/migrations folder. Open the generated migration file and update it as follows:

<?php

use Illuminate\Database\Migrations\Migration;
use Illuminate\Database\Schema\Blueprint;
use Illuminate\Support\Facades\Schema;

return new class extends Migration {
    public function up(): void
    {
        Schema::create('events', function (Blueprint $table) {
            $table->id();
            $table->string('title');
            $table->text('description')->nullable();
            $table->date('event_date');
            $table->timestamps();

            // Performance optimization for date filtering
            $table->index('event_date');
        });
    }

    public function down(): void
    {
        Schema::dropIfExists('events');
    }
};

Execute the migration using:

php artisan migrate

It will create events table in your project database.

Step 2: Create the Livewire Component

Run the following artisan command:

php artisan make:livewire EventList

This will generate following 2 files:

  • app/Livewire/EventList.php
  • resources/views/livewire/event-list.blade.php

Step 3: Livewire Component Logic

Open app/Livewire/EventList.php and add the following code:

<?php

namespace App\Livewire;

use Livewire\Component;
use App\Models\Event;

class EventList extends Component
{
    public string $mode = 'month'; // month | week | day

    public function mount()
    {
        $this->mode = 'month';
    }

    public function showMonth()
    {
        $this->mode = 'month';
    }

    public function showWeek()
    {
        $this->mode = 'week';
    }

    public function showDay()
    {
        $this->mode = 'day';
    }

    public function getEventsProperty()
    {
        return match ($this->mode) {

            // Today only
            'day' => Event::whereDate('event_date', today())
                ->orderBy('event_date')
                ->get(),

            // Next 7 days (today + next 6 days)
            'week' => Event::whereDate('event_date', '>=', today())
                ->whereDate('event_date', '<=', today()->copy()->addDays(6))
                ->orderBy('event_date')
                ->get(),

            // Last 30 days (default)
            default => Event::whereDate('event_date', '<=', today()->addDays(30))
                ->orderBy('event_date')
                ->get(),
        };
    }

    public function render()
    {
        return view('livewire.event-list');
    }
}

Why We Use whereDate()

  • Prevents time-related filtering bugs
  • Works correctly for both DATE and DATETIME
  • Avoids issues where week filters accidentally show all events

Step 4: Blade View Using Bootstrap 5

Add following code to resources/views/livewire/event-list.blade.php :

<div>

    <!-- Filter Buttons -->
    <div class="btn-group mb-3" role="group">
        <button
            wire:click="showMonth"
            class="btn {{ $mode === 'month' ? 'btn-primary' : 'btn-outline-primary' }}">
            Next 30 Days
        </button>

        <button
            wire:click="showWeek"
            class="btn {{ $mode === 'week' ? 'btn-primary' : 'btn-outline-primary' }}">
            Next 7 Days
        </button>

        <button
            wire:click="showDay"
            class="btn {{ $mode === 'day' ? 'btn-primary' : 'btn-outline-primary' }}">
            Today
        </button>
    </div>

    <!-- Events List -->
    <div class="card">
        <div class="list-group list-group-flush">
            @forelse ($this->events as $event)
                <div class="list-group-item">
                    <div class="d-flex justify-content-between align-items-center">
                        <h6 class="mb-1">{{ $event->title }}</h6>
                        <small class="text-muted">
                            {{ \Carbon\Carbon::parse($event->event_date)->format('d M Y') }}
                        </small>
                    </div>

                    @if($event->description)
                        <p class="mb-0 text-muted small">
                            {{ $event->description }}
                        </p>
                    @endif
                </div>
            @empty
                <div class="list-group-item text-center text-muted py-4">
                    No events found
                </div>
            @endforelse
        </div>
    </div>

</div>

Step 5: Use the Component

To add the Livewire component, add the following code anywhere in your Blade file:

<livewire:event-list />

Final Result

  • Loads next 30 days by default
  • Shows today’s events instantly
  • Displays next 7 days events correctly
  • No page reloads
  • Clean Bootstrap UI

Conclusion

This Livewire + Bootstrap solution is perfect for dashboards, admin panels, and public event listings. It’s easy to extend with pagination, previous/next navigation, or even a calendar view.

Laravel Livewire Day-Wise Schedule Viewer with Bootstrap 5

Learn how to build a day-wise schedule viewer in Laravel Livewire using Bootstrap 5. Includes migration, seeder, navigation buttons, and UX best practices.

Managing schedules by day is a common requirement in admin dashboards, booking systems, internal tools, and SaaS applications. In this tutorial, you’ll learn how to build a day-wise schedule viewer using Laravel Livewire, styled with Bootstrap 5, and powered by weekday-based database records.

This guide covers everything from database migration and seeding to Livewire navigation logic and UX improvements.

What You’ll Learn in This Tutorial

  • How to store weekday-based schedules in Laravel
  • Build a Livewire component to show schedules dynamically
  • Navigate schedules using Previous / Next buttons
  • Disable invalid navigation (like going before today)
  • Seed realistic day-wise data (max 6 events per day)
  • Create a Bootstrap 5 UI without JavaScript

Tech stack used

  • Laravel 10+
  • Livewire 3
  • Bootstrap 5
  • Carbon (Date handling)
  • MySQL / MariaDB

Database Migration

Before creating the model, seeder, and Livewire component, we need a database table to store weekday-based schedules.

Each record represents one event for a specific weekday (Monday–Sunday).

Create Migration

To create a migration file, run the following command,

php artisan make:migration create_weekday_schedules_table

It will create a migration file named xxxx_xx_xx_create_weekday_schedules_table.php in the database/migrations folder.

Migration File

Open the migration file and add the following code into it,

use Illuminate\Database\Migrations\Migration;
use Illuminate\Database\Schema\Blueprint;
use Illuminate\Support\Facades\Schema;

return new class extends Migration
{
    public function up(): void
    {
        Schema::create('weekday_schedules', function (Blueprint $table) {
            $table->id();

            // 1 = Monday, 7 = Sunday (ISO-8601)
            $table->unsignedTinyInteger('weekday')->index();

            $table->string('title');
            $table->time('start_time');
            $table->time('end_time');
            $table->text('description')->nullable();

            $table->timestamps();
        });
    }

    public function down(): void
    {
        Schema::dropIfExists('weekday_schedules');
    }
};

Now, this migration file is ready to be run.

Run Migration

Run the migration using the following artisan command,

php artisan migrate

Eloquent Model

Now, create a model for weekday schedules table, created by the migration. To create an eloquent model, run the following command,

php artisan make:model WeekdaySchedule

It will create a model file named WeekdaySchedule.php inside app/Models folder. Open that model file and add the following code in the file,

namespace App\Models;

use Illuminate\Database\Eloquent\Model;

class WeekdaySchedule extends Model
{
    protected $fillable = [
        'weekday',
        'title',
        'start_time',
        'end_time',
        'description',
    ];
}

Database migration and models files are ready. It is time to create a livewire component for day-wise schedule.

Livewire Component

Livewire components can be easily created using the artisan livewire command as follows,

php artisan make:livewire DaySchedule

This command will create two files as follows,

  • Component file named DaySchedule.php inside app/Livewire folder,
  • Component view blade file named day-schedule.blade.php inside resources/views/livewire folder.

Open the DaySchedule.php file and add the following code into it,

namespace App\Livewire;

use Livewire\Component;
use Carbon\Carbon;
use App\Models\WeekdaySchedule;

class DaySchedule extends Component
{
    public Carbon $currentDate;

    public function mount()
    {
        $this->currentDate = now();
    }

    public function previousDay()
    {
        if ($this->currentDate->isToday()) {
            return;
        }

        $this->currentDate = $this->currentDate->copy()->subDay();
    }

    public function nextDay()
    {
        $this->currentDate = $this->currentDate->copy()->addDay();
    }

    public function getSchedulesProperty()
    {
        return WeekdaySchedule::where(
            'weekday',
            $this->currentDate->dayOfWeekIso
        )->get();
    }

    public function render()
    {
        return view('livewire.day-schedule');
    }
}

And open the component view file to add the following code,

<div class="card shadow-sm">

    <div class="card-header d-flex justify-content-between align-items-center">

        <button
            wire:click="previousDay"
            class="btn btn-outline-secondary btn-sm"
            @if($currentDate->isToday()) disabled @endif
        >
            ← Previous
        </button>

        <h5 class="mb-0 fw-semibold">
            {{ $currentDate->format('l, d M Y') }}
        </h5>

        <button
            wire:click="nextDay"
            class="btn btn-outline-secondary btn-sm"
        >
            Next →
        </button>

    </div>

    <div class="card-body">
        @forelse ($this->schedules as $schedule)
            <div class="border rounded p-3 mb-3">
                <div class="d-flex justify-content-between">
                    <strong>{{ $schedule->title }}</strong>
                    <span class="badge bg-primary">
                        {{ $schedule->start_time }} – {{ $schedule->end_time }}
                    </span>
                </div>

                @if($schedule->description)
                    <small class="text-muted d-block mt-1">
                        {{ $schedule->description }}
                    </small>
                @endif
            </div>
        @empty
            <div class="alert alert-light text-center mb-0">
                No schedule available for this day.
            </div>
        @endforelse
    </div>

</div>

This component is now ready. But, we don’t have any data to display. So, for data, create a seeder.

Daywise Seeder

Create a seeder using the following artisan command,

php artisan make:seeder WeekdayScheduleSeeder

This will create a file inside database/seeders folder named as WeekdayScheduleSeeder.php.

namespace Database\Seeders;

use Illuminate\Database\Seeder;
use App\Models\WeekdaySchedule;

class WeekdayScheduleSeeder extends Seeder
{
    public function run(): void
    {
        $weeklyData = [
            1 => [
                ['Standup Meeting', '09:00', '09:15', 'Daily sync'],
                ['Development', '09:30', '12:30', 'Feature work'],
                ['Lunch', '12:30', '13:30', 'Break'],
                ['Code Review', '13:30', '15:00', 'Review PRs'],
                ['Client Call', '15:15', '16:00', 'Client discussion'],
                ['Wrap Up', '16:15', '17:00', 'Day end'],
            ],
            2 => [
                ['Standup', '09:00', '09:15', 'Team sync'],
                ['Development', '09:30', '12:30', 'Coding'],
                ['Learning', '13:30', '14:30', 'Upskilling'],
                ['Bug Fixing', '14:30', '16:00', 'Fix issues'],
            ],
            7 => [
                ['Off Day', '00:00', '23:59', 'No work scheduled'],
            ],
        ];

        foreach ($weeklyData as $weekday => $events) {
            foreach (array_slice($events, 0, 6) as $event) {
                WeekdaySchedule::create([
                    'weekday' => $weekday,
                    'title' => $event[0],
                    'start_time' => $event[1],
                    'end_time' => $event[2],
                    'description' => $event[3],
                ]);
            }
        }
    }
}

Run seeder using the following command,

php artisan db:seed --class=WeekdayScheduleSeeder

With component code and some data, it is now ready to be display on any page. To attach this livewire component, use the following code,

<livewire:day-schedule />

Final Results

  • Users see today’s schedule by default
  • Can navigate future days using Next
  • Previous button is disabled on today
  • Clean Bootstrap UI
  • Fully reactive Livewire experience
  • Easily extendable for Filament or APIs

Conclusion

This approach provides a clean, scalable way to manage day-wise schedules in Laravel using Livewire and Bootstrap 5. It avoids JavaScript complexity, keeps logic server-driven, and delivers a smooth UX.

If you’re building dashboards, booking systems, or internal tools — this pattern fits perfectly.

Laravel Livewire Tutorial: Add ZIP Download Feature to Your File Explorer

Learn how to add a ‘Download All as ZIP’ feature to your Laravel Livewire file explorer. Compress all files in a folder – grouped by type – into a single ZIP using Laravel Storage and PHP ZipArchive.

When I first built a file explorer using Laravel Livewire, browsing and viewing documents worked great — but there was one feature missing: a simple way to download everything at once.

In this article, I’ll show you how I added a “Download” button that compresses every file in a folder (even grouped by document type) into a single ZIP, ready for instant download. Using just a few lines of code with Laravel’s Storage facade and PHP’s ZipArchive, you’ll learn how to turn your file explorer into a fully functional, production-ready document manager.

Step 1. Preparing Your Storage

All documents are stored inside:

storage/app/public/documents/

and referenced in the database via a file_path column.

Make sure your storage is linked:

php artisan storage:link

Step 2. Update the Livewire Component

Open your ApplicationExplorer Livewire component and add the following import statements at the top:

use Illuminate\Support\Facades\Storage;
use ZipArchive;

Then add the new method:

public function downloadAppDocuments($appId)
{
    $app = \App\Models\Application::with('documents')->findOrFail($appId);

    if ($app->documents->isEmpty()) {
        session()->flash('message', 'No documents to download for this application.');
        return;
    }

    $zipFileName = 'application_' . $app->id . '_documents.zip';
    $zipPath = storage_path('app/temp/' . $zipFileName);

    // Make sure temp directory exists
    if (!file_exists(storage_path('app/temp'))) {
        mkdir(storage_path('app/temp'), 0777, true);
    }

    $zip = new ZipArchive;
    if ($zip->open($zipPath, ZipArchive::CREATE | ZipArchive::OVERWRITE) === TRUE) {
        foreach ($app->documents as $doc) {
            // Access the public disk
            if (Storage::disk('public')->exists($doc->file_path)) {
                // Add subfolder by document type (optional)
                $folder = $doc->type ? $doc->type . '/' : '';
                $zip->addFile(
                    Storage::disk('public')->path($doc->file_path),
                    $folder . basename($doc->file_path)
                );
            }
        }
        $zip->close();
    }

    return response()->download($zipPath)->deleteFileAfterSend(true);
}

How It Works

  1. The method loads the selected application with all its documents.
  2. It creates a temporary ZIP file in storage/app/temp.
  3. It loops through each document, checking if it exists on the public disk.
  4. Each document is added to the ZIP file, optionally organized into subfolders based on document type.
  5. Finally, Laravel’s response()->download() streams the file to the user and deletes it after sending.

Step 3. Add the “Download” Button in the UI

In your Livewire Blade view (application-explorer.blade.php), add this button next to the search bar:

<button wire:click="downloadAppDocuments({{ $selectedApp->id }})" 
        class="btn btn-success">
    Download
</button>

Or, if you prefer to show it beside each folder in the sidebar, update your partial (sidebar-app.blade.php):

<button wire:click.stop="downloadAppDocuments({{ $app->id }})"
        class="btn btn-sm btn-outline-primary me-2"
        title="Download all documents">
    ⬇️
</button>

The .stop modifier ensures this button doesn’t also trigger folder selection.

Step 4. Organizing Documents by Type

If you store files based on type (like invoices, reports, letters), your upload logic should look like this:

$file->store("applications/{$applicationId}/" . strtolower($type), 'public');

Then, in the ZIP creation logic, the $doc->type value creates the corresponding subfolder inside the ZIP.

Example folder structure in ZIP:

application_3_documents.zip
├── invoices/
│   ├── invoice1.pdf
│   └── invoice2.pdf
├── reports/
│   └── report1.pdf
└── letters/
    └── letter1.pdf

Step 5. Handling Missing Files Gracefully

If a document record exists but the file is missing from storage, Storage::disk('public')->exists() safely skips it.

You can also log missing files for auditing:

if (!Storage::disk('public')->exists($doc->file_path)) {
    \Log::warning("Missing file: {$doc->file_path}");
    continue;
}

Step 6. Testing the Download

  1. Select a folder in your explorer.
  2. Click “Download All”.
  3. A .zip file should download automatically.
  4. Extract it — files are grouped by type (if configured).

If you see “file not found” messages, verify:

  • The file_path in the database points to documents/...
  • The disk is correctly set in .env:
FILESYSTEM_DISK=public

Conclusion

And just like that, your Laravel Livewire file explorer now has the power to download everything in one click. No extra packages, no complicated setup — just smart use of Laravel’s Storage facade and PHP’s native ZipArchive.

This simple addition dramatically improves user experience, especially when handling large sets of documents. It also showcases how flexible Livewire can be for real-time, interactive Laravel apps.

From here, you can expand even further: add selective downloads, handle nested folders recursively, or generate temporary signed URLs for secure file sharing. With this foundation in place, your file explorer isn’t just a viewer anymore — it’s a complete, dynamic file management solution.