Build a Product Booking System with Cart Using Laravel Livewire

Learn how to build a complete Laravel Livewire v3 product booking system with date selection, quantity controls, cart merging, and a real-time sidebar cart. Step-by-step code included.

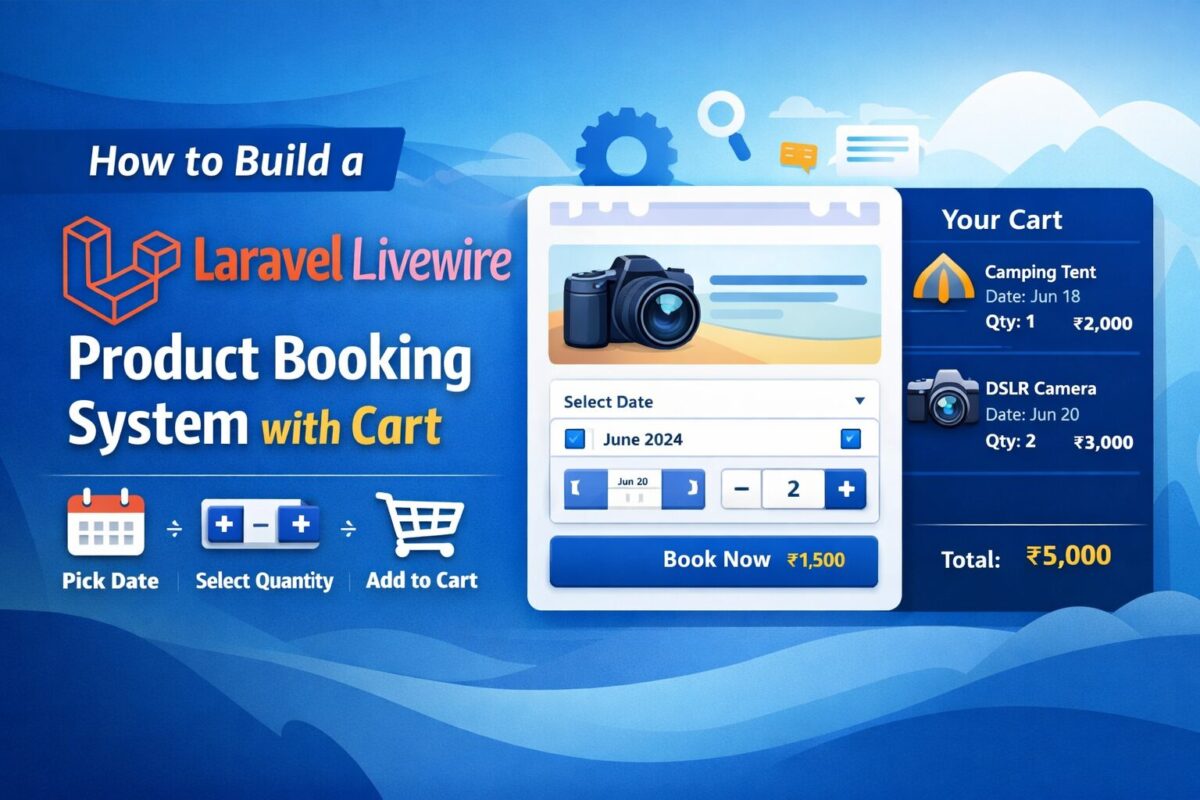
If you run an online store that sells products requiring date-based booking (for example rental products, events, workshops, or personalized items), then having a dynamic booking form with an integrated cart is essential. In this guide, you will learn how to build a complete Product Booking System + Cart using Laravel Livewire, where users can:

  • Select a product
  • Choose a date (mandatory)
  • Select quantity with + / – controls
  • Add multiple products to a single cart
  • Automatically merge identical items (same product + same date)
  • View the cart in a real-time sidebar

This is a fully working solution you can directly implement in your Laravel application.

Step 1: Update Your Database Structure

Create your products table:

Schema::create('products', function (Blueprint $table) {
    $table->id();
    $table->string('name');
    $table->text('description')->nullable();
    $table->decimal('price', 10, 2);
    $table->timestamps();
});

Step 2: Add Route for Product Details

Add a route to display products page, where we can display cart booking system,

Route::get('/products/{product}', function (\App\Models\Product $product) {
    return view('product-details', compact('product'));
})->name('product.details');

Step 3: Create Cart Service

Create a service app/Services/CartService.php to handle cart related actions from anywhere. This service simplifies the process to handle cart with session.

namespace App\Services;

class CartService
{
    const KEY = 'product_cart';

    public static function all()
    {
        return session()->get(self::KEY, []);
    }

    public static function add($item)
    {
        $cart = self::all();
        $found = false;

        foreach ($cart as &$cartItem) {
            if (
                $cartItem['product_id'] == $item['product_id'] &&
                $cartItem['date'] == $item['date']
            ) {
                $cartItem['quantity'] += $item['quantity'];
                $cartItem['total'] = $cartItem['quantity'] * $cartItem['price'];
                $found = true;
                break;
            }
        }

        if (!$found) {
            $cart[] = $item;
        }

        session()->put(self::KEY, $cart);
    }

    public static function clear()
    {
        session()->forget(self::KEY);
    }
}

This ensures:

  • Users can add multiple different products
  • If a product with the same date already exists → quantities merge

Step 4: Create Livewire Component – Product Booking Form

Create a product booking component using the following artisan command:

php artisan make:livewire BookProductForm

It will create 2 files for product booking,

  • Class File: app/Livewire/BookProductForm.php
  • Blade File: resources/views/livewire/book-product-form.blade.php

Livewire Component Logic

Add the below product booking logic code to the app/Livewire/BookProductForm.php file.

namespace App\Livewire;

use App\Models\Product;
use App\Services\CartService;
use Livewire\Component;

class BookProductForm extends Component
{
    public Product $product;
    public $date;
    public $quantity = 1;

    protected $rules = [
        'date' => 'required|date'
    ];

    public function incrementQty()
    {
        $this->quantity++;
    }

    public function decrementQty()
    {
        if ($this->quantity > 1) {
            $this->quantity--;
        }
    }

    public function bookNow()
    {
        $this->validate();

        CartService::add([
            'product_id' => $this->product->id,
            'name'       => $this->product->name,
            'price'      => $this->product->price,
            'date'       => $this->date,
            'quantity'   => $this->quantity,
            'total'      => $this->quantity * $this->product->price
        ]);

        $this->dispatch('cart-updated');

        $this->reset('date', 'quantity');

        session()->flash('success', 'Product added to cart!');
    }

    public function render()
    {
        return view('livewire.book-product-form');
    }
}

Blade View with Message

Add the following code to the resources/views/livewire/book-product-form.blade.php.

<div class="card p-4 shadow-sm">

    @if(session('success'))
        <div class="alert alert-success">{{ session('success') }}</div>
    @endif

    <h4 class="mb-3">Book: {{ $product->name }}</h4>

    <div class="mb-3">
        <label>Date <span class="text-danger">*</span></label>
        <input type="date" class="form-control" wire:model="date">
        @error('date') <small class="text-danger">{{ $message }}</small> @enderror
    </div>

    <div class="mb-3">
        <label>Quantity</label>
        <div class="input-group" style="width: 150px;">
            <button class="btn btn-outline-secondary" wire:click="decrementQty">-</button>
            <input type="text" class="form-control text-center" wire:model="quantity" readonly>
            <button class="btn btn-outline-secondary" wire:click="incrementQty">+</button>
        </div>
    </div>

    <button class="btn btn-primary w-100" wire:click="bookNow">
        Book Now (₹{{ number_format($product->price, 2) }})
    </button>
</div>

Step 5: Create Livewire Cart Sidebar Component

Cart booking form is ready, but on clicking add to cart button, product is added to the cart. To display this cart, create a cart sidebar livewire component using the below artisan command:

php artisan make:livewire CartSidebar

Component class and blade files will be created as follows,

  • Class File: app/Livewire/CartSidebar.php
  • Blade File: resources/views/livewire/cart-sidebar.blade.php

Livewire Component Logic

Cart sidebar should display all cart products from the cart service. Add the below code to app/Livewire/CartSidebar.php file,

namespace App\Livewire;

use App\Services\CartService;
use Livewire\Component;

class CartSidebar extends Component
{
    protected $listeners = ['cart-updated' => '$refresh'];

    public function render()
    {
        return view('livewire.cart-sidebar', [
            'cart' => CartService::all()
        ]);
    }
}

Blade view with Total Amount

The below code is for resources/views/livewire/cart-sidebar.blade.php file, to display all cart products and the total amount of the cart.

<div class="card p-3 shadow-sm" style="position: sticky; top: 10px;">

    <h5 class="mb-3">Your Cart</h5>

    @if(empty($cart))
        <p>No products in cart.</p>
    @else
        @foreach($cart as $item)
            <div class="border-bottom pb-2 mb-2">
                <strong>{{ $item['name'] }}</strong><br>
                Date: {{ $item['date'] }}<br>
                Qty: {{ $item['quantity'] }}<br>
                <span class="fw-bold">₹{{ $item['total'] }}</span>
            </div>
        @endforeach

        <div class="text-end fw-bold">
            Total: ₹{{ array_sum(array_column($cart, 'total')) }}
        </div>
    @endif
</div>

Step 6: Using Livewire Components

Finally, both of the components are ready. They are ready to be used anywhere. To test, add both these components to product details page as follows,

@extends('layouts.app')

@section('content')
<div class="container py-5">
    <div class="row">

        <div class="col-md-8">
            <h2>{{ $product->name }}</h2>
            <p>{{ $product->description }}</p>
            <p class="fw-bold">Price: ₹{{ number_format($product->price, 2) }}</p>

            <livewire:book-product-form :product="$product" />
        </div>

        <div class="col-md-4">
            <livewire:cart-sidebar />
        </div>

    </div>
</div>
@endsection

Conclusion

You now have a complete Laravel Livewire v3 product booking system with:

✔ Date-based booking
✔ Quantity controls
✔ Real-time sidebar cart
✔ Merging duplicate entries

Can a user add multiple products to the cart?

Yes. Users can add unlimited products, each with separate date and quantity options.

Does the system merge identical cart items?

Yes. If users select the same product with the same date again, quantity is merged.

Is Livewire v3 required?

Yes. This tutorial uses Livewire v3 components, events, and reactive structure.

Can I add checkout or payment later?

Absolutely! This system is designed to extend into a full checkout workflow with payment gateway.

Build a Dynamic FullCalendar Component in Laravel Livewire

Learn how to build a dynamic FullCalendar component using Laravel Livewire 3. Load events based on calendar view, update without page reloads, and open event pages on click. Includes complete code, SEO tips, FAQ schema, and featured image.

If you’re building appointment systems, booking apps, task planners, or admin dashboards in Laravel, integrating a dynamic FullCalendar with Livewire 3 is one of the most powerful UI improvements you can make.

In this guide, we will create a SEO-optimized, production-ready FullCalendar component that:

  • Displays events dynamically
  • Loads events based on current calendar view (month/week/day)
  • Fetches events when navigation buttons are clicked
  • Refreshes events without breaking Livewire
  • Opens a single event page on event click

This tutorial is perfect for Livewire developers who want to build modern, reactive calendar features in Laravel.


Why Use FullCalendar With Livewire 3?

FullCalendar is one of the most flexible JavaScript calendar libraries available today. When combined with Livewire 3’s reactive power, you get:

  • Zero page reloads
  • Fast real-time interactions
  • Server-driven event handling
  • Clean API for filtering, loading & clicking events
  • Reusable UI components

Step 1: Install FullCalendar

Add CDN links in your layout:

<link href="https://cdn.jsdelivr.net/npm/fullcalendar@6.1.9/index.global.min.css" rel="stylesheet">
<script src="https://cdn.jsdelivr.net/npm/fullcalendar@6.1.9/index.global.min.js"></script>

Step 2: Create the Livewire Calendar Component

Run the following artisan command to create a livewire component,

php artisan make:livewire calendar

It will create the following files,

  • app/Livewire/Calendar.php
  • resources/views/livewire/calendar.blade.php

Step 3: Livewire Component Logic (Calendar.php)

Copy this core logic to app/Livewire/Calendar.php file.

<?php

namespace App\Livewire;

use App\Models\Event;
use Livewire\Component;

class Calendar extends Component
{
    public $events = [];

    protected $listeners = [
        'fetchEvents' => 'loadEvents',
    ];

    public function mount()
    {
        $this->loadEvents(now()->startOfMonth(), now()->endOfMonth());
    }

    public function loadEvents($start, $end)
    {
        $this->events = Event::whereDate('start_date', '<=', $end)
            ->whereDate('end_date', '>=', $start)
            ->get()
            ->map(fn($e) => [
                'id'    => $e->id,
                'title' => $e->title,
                'start' => $e->start_date,
                'end'   => $e->end_date,
                'url'   => route('event.details', ['slug' => $e->slug])
            ])
            ->toArray();

        $this->dispatch('refreshCalendar', $this->events);
    }
    
    public function render()
    {
        return view('livewire.calendar');
    }
}

This ensures all events are always pushed correctly to the frontend.


Step 4: Blade View With Event Click Redirect

<div wire:ignore x-data="calendarComponent()" x-init="initCalendar()">
    <div id="calendar"></div>
</div>

<script>
    function calendarComponent() {
        return {
            calendar: null,

            initCalendar() {
                const calendarEl = document.getElementById('calendar');

                this.calendar = new FullCalendar.Calendar(calendarEl, {
                    initialView: 'dayGridMonth',
                    selectable: true,
                    events: @json($events),
                    headerToolbar: {
                        left: 'prev,next today',
                        center: 'title',
                        right: 'dayGridMonth,dayGridWeek,timeGridDay,listWeek'
                    },

                    datesSet: (info) => {
                        // Date range changed → fetch events
                        Livewire.dispatch('fetchEvents', {
                            start: info.startStr,
                            end: info.endStr
                        });
                    },

                    eventClick(info) {
                        info.jsEvent.preventDefault();
                        if (info.event.url) {
                            window.location.href = info.event.url;
                        }
                    },
                });

                this.calendar.render();

                // Updating events when Livewire refreshes
                Livewire.on('refreshCalendar', (events) => {
                    this.calendar.refetchEvents();
                });
            }
        }
    }
</script>

This creates a perfectly working FullCalendar with:

  • Navigational event loading
  • Correct date range handling
  • Click-to-redirect event pages
  • Safe event refresh

Step 5: Create SEO-Friendly Event URLs

Route::get('/events/{event}', [EventController::class, 'show'])->name('events.show');

Now every event opens its own page, improving SEO with schema-friendly URLs.


Benefits of This Implementation

  • Lightning-fast Livewire updates
  • Works with any event table structure
  • Perfect for admin dashboards, booking systems & CRMs
  • No page reloads
  • Mobile-friendly
  • Great for SEO (event URLs help Google index your content)

FAQ Section

1. Why are my events not appearing in FullCalendar?

Because FullCalendar requires start, end, and title fields in a strict structure.
The tutorial fixes this by mapping events manually.

2. Can I open a popup instead of redirecting on event click?

Yes. You can use Bootstrap, Alpine, Filament modal, or Livewire modal.
Just tell the preferred method.

3. Does this support drag & drop?

FullCalendar supports it.
Livewire can listen to eventDrop and update your event in DB.

4. How do I load events filtered by category or user?

Inside loadEvents(), simply add:

->where('category_id', $this->selectedCategory)

5. Does this support recurring events?

Yes — FullCalendar can expand recurring event rules during load.

Laravel Livewire Tutorial: Add ZIP Download Feature to Your File Explorer

Learn how to add a ‘Download All as ZIP’ feature to your Laravel Livewire file explorer. Compress all files in a folder – grouped by type – into a single ZIP using Laravel Storage and PHP ZipArchive.

When I first built a file explorer using Laravel Livewire, browsing and viewing documents worked great — but there was one feature missing: a simple way to download everything at once.

In this article, I’ll show you how I added a “Download” button that compresses every file in a folder (even grouped by document type) into a single ZIP, ready for instant download. Using just a few lines of code with Laravel’s Storage facade and PHP’s ZipArchive, you’ll learn how to turn your file explorer into a fully functional, production-ready document manager.

Step 1. Preparing Your Storage

All documents are stored inside:

storage/app/public/documents/

and referenced in the database via a file_path column.

Make sure your storage is linked:

php artisan storage:link

Step 2. Update the Livewire Component

Open your ApplicationExplorer Livewire component and add the following import statements at the top:

use Illuminate\Support\Facades\Storage;
use ZipArchive;

Then add the new method:

public function downloadAppDocuments($appId)
{
    $app = \App\Models\Application::with('documents')->findOrFail($appId);

    if ($app->documents->isEmpty()) {
        session()->flash('message', 'No documents to download for this application.');
        return;
    }

    $zipFileName = 'application_' . $app->id . '_documents.zip';
    $zipPath = storage_path('app/temp/' . $zipFileName);

    // Make sure temp directory exists
    if (!file_exists(storage_path('app/temp'))) {
        mkdir(storage_path('app/temp'), 0777, true);
    }

    $zip = new ZipArchive;
    if ($zip->open($zipPath, ZipArchive::CREATE | ZipArchive::OVERWRITE) === TRUE) {
        foreach ($app->documents as $doc) {
            // Access the public disk
            if (Storage::disk('public')->exists($doc->file_path)) {
                // Add subfolder by document type (optional)
                $folder = $doc->type ? $doc->type . '/' : '';
                $zip->addFile(
                    Storage::disk('public')->path($doc->file_path),
                    $folder . basename($doc->file_path)
                );
            }
        }
        $zip->close();
    }

    return response()->download($zipPath)->deleteFileAfterSend(true);
}

How It Works

  1. The method loads the selected application with all its documents.
  2. It creates a temporary ZIP file in storage/app/temp.
  3. It loops through each document, checking if it exists on the public disk.
  4. Each document is added to the ZIP file, optionally organized into subfolders based on document type.
  5. Finally, Laravel’s response()->download() streams the file to the user and deletes it after sending.

Step 3. Add the “Download” Button in the UI

In your Livewire Blade view (application-explorer.blade.php), add this button next to the search bar:

<button wire:click="downloadAppDocuments({{ $selectedApp->id }})" 
        class="btn btn-success">
    Download
</button>

Or, if you prefer to show it beside each folder in the sidebar, update your partial (sidebar-app.blade.php):

<button wire:click.stop="downloadAppDocuments({{ $app->id }})"
        class="btn btn-sm btn-outline-primary me-2"
        title="Download all documents">
    ⬇️
</button>

The .stop modifier ensures this button doesn’t also trigger folder selection.

Step 4. Organizing Documents by Type

If you store files based on type (like invoices, reports, letters), your upload logic should look like this:

$file->store("applications/{$applicationId}/" . strtolower($type), 'public');

Then, in the ZIP creation logic, the $doc->type value creates the corresponding subfolder inside the ZIP.

Example folder structure in ZIP:

application_3_documents.zip
├── invoices/
│   ├── invoice1.pdf
│   └── invoice2.pdf
├── reports/
│   └── report1.pdf
└── letters/
    └── letter1.pdf

Step 5. Handling Missing Files Gracefully

If a document record exists but the file is missing from storage, Storage::disk('public')->exists() safely skips it.

You can also log missing files for auditing:

if (!Storage::disk('public')->exists($doc->file_path)) {
    \Log::warning("Missing file: {$doc->file_path}");
    continue;
}

Step 6. Testing the Download

  1. Select a folder in your explorer.
  2. Click “Download All”.
  3. A .zip file should download automatically.
  4. Extract it — files are grouped by type (if configured).

If you see “file not found” messages, verify:

  • The file_path in the database points to documents/...
  • The disk is correctly set in .env:
FILESYSTEM_DISK=public

Conclusion

And just like that, your Laravel Livewire file explorer now has the power to download everything in one click. No extra packages, no complicated setup — just smart use of Laravel’s Storage facade and PHP’s native ZipArchive.

This simple addition dramatically improves user experience, especially when handling large sets of documents. It also showcases how flexible Livewire can be for real-time, interactive Laravel apps.

From here, you can expand even further: add selective downloads, handle nested folders recursively, or generate temporary signed URLs for secure file sharing. With this foundation in place, your file explorer isn’t just a viewer anymore — it’s a complete, dynamic file management solution.

How I Built a Full File Explorer in Laravel Livewire with Search

Learn how to create a complete file explorer in Laravel using Livewire and Bootstrap – with folders, subfolders, and document search. Step-by-step tutorial with code.

Have you ever wanted to give your Laravel app a professional, desktop-like file explorer – with folders, nested subfolders and document search?

In this tutorial, I’ll walk you through building full file explorer using Laravel Livewire and Bootstrap 5. We’ll create a clean two-pane layout: the left sidebar displays your folder structure (applications and subfolders), while the right pane dynamically lists documents with instant search and filtering.

By the end, you’ll have a fully functional, real-time file manager where users can browse folders, search documents by name and group them by type – all powered by Livewire’s reactivity and Laravel’s filesystem magic.

What We’re Building

We’ll create a two-pane interface like a typical file explorer:

  • Left sidebar → list of applications/folders and nested subfolders.
  • Right pane → list of documents for the selected application.
  • Features:
    • Real-time search
    • Subfolder navigation
    • Document type–based organization

Step 1. Setting Up the Database

We’ll use two tables: applications and documents. applications table holds our folders and subfolders, while documents table holds all documents with name and path with application relation.

Schema::create('applications', function (Blueprint $table) {
    $table->id();
    $table->string('name');
    $table->foreignId('parent_id')->nullable()->constrained('applications')->cascadeOnDelete();
    $table->timestamps();
});

Schema::create('documents', function (Blueprint $table) {
    $table->id();
    $table->foreignId('application_id')->constrained()->cascadeOnDelete();
    $table->string('title');
    $table->string('file_path');  // e.g. "documents/report.pdf"
    $table->string('type')->nullable(); // e.g. "invoice", "report", "letter"
    $table->timestamps();
});

Step 2. Eloquent Relationships

Define relationships in models as follows,

// Application.php
class Application extends Model
{
    protected $fillable = ['name', 'parent_id'];

    public function parent()
    {
        return $this->belongsTo(Application::class, 'parent_id');
    }

    public function children()
    {
        return $this->hasMany(Application::class, 'parent_id');
    }

    public function documents()
    {
        return $this->hasMany(Document::class);
    }
}

// Document.php
class Document extends Model
{
    protected $fillable = ['application_id', 'title', 'file_path', 'type'];

    public function application()
    {
        return $this->belongsTo(Application::class);
    }
}

Step 3. The Livewire Component

Run the following command to create the livewire component:

php artisan make:livewire ApplicationExplorer

It will create 2 files as follows,

  • app/Http/Livewire/ApplicationExplorer.php for file explorer processing.
  • resources/views/livewire/application-explorer.blade.php for file explorer view.

Define all Processes

Open app/Http/Livewire/ApplicationExplorer.php and add the following code:

namespace App\Http\Livewire;

use Livewire\Component;
use App\Models\Application;
use App\Models\Document;
use Livewire\WithPagination;
use Illuminate\Support\Facades\Storage;
use ZipArchive;

class ApplicationExplorer extends Component
{
    use WithPagination;
    protected $paginationTheme = 'bootstrap';

    public $selectedAppId = null;
    public $search = '';
    public $filterType = '';

    public function updatingSearch()
    {
        $this->resetPage();
    }

    public function selectApp($appId)
    {
        $this->selectedAppId = $appId;
        $this->reset(['search', 'filterType']);
        $this->resetPage();
    }

    public function render()
    {
        $applications = Application::with('children')->whereNull('parent_id')->get();

        $selectedApp = $this->selectedAppId ? Application::find($this->selectedAppId) : null;

        $documents = collect();
        if ($selectedApp) {
            $documents = Document::where('application_id', $this->selectedAppId)
                ->when($this->filterType, fn($q) => $q->where('type', $this->filterType))
                ->when($this->search, fn($q) => $q->where('title', 'like', "%{$this->search}%"))
                ->paginate(10);
        }

        return view('livewire.application-explorer', [
            'applications' => $applications,
            'selectedApp'  => $selectedApp,
            'documents'    => $documents,
        ]);
    }
}

Update the View

To update the view, open resources/views/livewire/application-explorer.blade.php and add the below code,

<div class="container-fluid vh-100">
    <div class="row h-100">
        {{-- Sidebar --}}
        <div class="col-3 border-end bg-light p-0 overflow-auto">
            <div class="p-3 border-bottom"><h5 class="mb-0">Applications</h5></div>
            <ul class="list-group list-group-flush">
                @foreach($applications as $app)
                    @include('livewire.partials.sidebar-app', ['app' => $app, 'level' => 0])
                @endforeach
            </ul>
        </div>

        {{-- Right Pane --}}
        <div class="col-9 p-4">
            @if($selectedApp)
                <div class="d-flex justify-content-between align-items-center mb-3">
                    <h4 class="mb-0">Documents in "{{ $selectedApp->name }}"</h4>
                    <div class="d-flex gap-2 align-items-center" style="width:50%;">
                        <select class="form-select w-auto" wire:model="filterType">
                            <option value="">All Types</option>
                            <option value="invoice">Invoice</option>
                            <option value="report">Report</option>
                            <option value="letter">Letter</option>
                        </select>
                        <input type="text" class="form-control" placeholder="Search..." wire:model.debounce.300ms="search">
                    </div>
                </div>

                @if($documents->count())
                    <div class="table-responsive">
                        <table class="table table-striped table-bordered align-middle">
                            <thead class="table-dark">
                                <tr>
                                    <th>#</th>
                                    <th>Document</th>
                                    <th>Type</th>
                                    <th>Created</th>
                                    <th>Actions</th>
                                </tr>
                            </thead>
                            <tbody>
                                @foreach($documents as $i => $doc)
                                    <tr>
                                        <td>{{ $i + 1 }}</td>
                                        <td>📄 {{ $doc->title }}</td>
                                        <td>{{ $doc->type ?? '-' }}</td>
                                        <td>{{ $doc->created_at->format('d M Y') }}</td>
                                        <td><button class="btn btn-sm btn-primary">View</button></td>
                                    </tr>
                                @endforeach
                            </tbody>
                        </table>
                    </div>

                    {{ $documents->links() }}
                @else
                    <div class="text-muted fst-italic">No documents found.</div>
                @endif
            @else
                <div class="text-muted fst-italic">Select an application to view documents.</div>
            @endif
        </div>
    </div>
</div>

For sidebar, create a new file at resources/views/livewire/partials/sidebar-app.blade.php and add the following code,

<li class="list-group-item p-0 d-flex justify-content-between align-items-center">
    <button wire:click="selectApp({{ $app->id }})"
            class="btn flex-grow-1 text-start px-3 py-2 {{ $selectedAppId === $app->id ? 'btn-secondary' : 'btn-light' }}"
            style="padding-left: {{ 12 + ($level * 15) }}px;">
        📁 <span class="ms-2">{{ $app->name }}</span>
    </button>
</li>

@if($app->children->count())
    <ul class="list-group list-group-flush">
        @foreach($app->children as $child)
            @include('livewire.partials.sidebar-app', ['app' => $child, 'level' => $level + 1])
        @endforeach
    </ul>
@endif

Step 4. File Storage Notes

Documents are uploaded to storage/app/public/documents/.... So, make sure that your public link exists:

php artisan storage:link

Always use:

Storage::disk('public')->exists($path);
Storage::disk('public')->path($path);

This ensures correct behavior since your files are under the public disk.

Step 5. Directory Structure by Document Type

When uploading new documents, if you want to make a directory structure based on document types, you can follow this approach:

$file->store("documents/{$applicationId}/" . strtolower($type), 'public');

This automatically creates folders like:

/storage/app/public/documents/3/invoices/file.pdf

Final Result

  • Left Sidebar: Displays all applications + nested subfolders.
  • Right Pane: Shows searchable, paginated, filterable document table.

Conclusion

And there you have it – a complete file explorer built with Laravel Livewire, featuring a responsive sidebar, real-time search and type-based organization.

This approach not only showcases the power of Livewire for dynamic interfaces but also demonstrates how easily Laravel’s Storage, and Eloquent relationships can come together to create a feature-rich, production-ready document management system.

From here, you can take it even further – add drag-and-drop uploads, access control, file previews, download all files in single zip with complete folder structure or even integrate third-party storage like AWS S3. With this foundation, your Laravel app can handle documents as efficiently as any modern file manager.

Mastering CSS Media Queries: Optimizing for Retina & Touch Devices

Learn how to use advanced CSS media queries to optimize sliders for Retina iPhones, high-DPI devices, and hybrid touchscreens.

When building responsive websites, CSS media queries are your best friend. They let you fine-tune layouts for different devices, screen sizes, resolutions, and input types. But sometimes media queries can look complicated — especially when dealing with device widths, pixel ratios, and hover/pointer detection.

In this post, we’ll break down three CSS media queries that are often used to optimize sliders (.ftslider) for iPhones, high-density screens, and hybrid touch devices. By the end, you’ll understand exactly what each query targets, why it’s written that way, and how it affects your design.

Targeting iPhone X–Style Devices

@media only screen and (min-device-width: 375px) and (max-device-width: 812px) 
and (-webkit-min-device-pixel-ratio: 3) {
  .ftslider { height: calc(90vh - 85px); }
}

The above @media query targets iPhone X–style devices (and similar), because:

  • min-device-width: 375px – the device width is at least 375px.
  • max-device-width: 812px – the device width is at most 812px.
    • This matches iPhones in the 375×812 portrait range (like iPhone X, XS, 11 Pro, etc.).
  • -webkit-min-device-pixel-ratio: 3 → ensures the device has a Retina 3x screen density.

Handling High-Resolution Displays (Cross-Browser)

@media only screen and (-webkit-min-device-pixel-ratio: 3),
only screen and (-o-min-device-pixel-ratio: 3/1),
only screen and (min-resolution: 458dpi),
only screen and (min-resolution: 3dppx) {
  .ftslider { height: calc(90vh - 85px); }
}

This @media query targets high-resolution displays (3x pixel density or higher), but in a cross-browser compatible way:

  • -webkit-min-device-pixel-ratio: 3 – WebKit (Safari, Chrome).
  • -o-min-device-pixel-ratio: 3/1 – Opera (old syntax).
  • min-resolution: 458dpi – very high DPI screens (approx 3× standard 96dpi).
  • min-resolution: 3dppx – modern way to express “3 device pixels per CSS pixel”.

Hybrid Devices: Hover + Coarse Pointer

@media only screen and (hover: hover) and (pointer: coarse) {
  .ftslider { height: calc(85vh - 55px); }
}

It targets devices that support hover and use a coarse pointer (e.g., touch + stylus hybrids).

Why This Matters

  • Better UX: Users on high-DPI devices get clean, non-clipped layouts.
  • Cross-platform support: Android, iOS, tablets, and hybrid devices all behave predictably.
  • Future-proofing: By writing broad yet precise queries, your design adapts to new device types.

Conclusion

Media queries may look intimidating at first glance, but each one has a specific purpose. In this case, they ensure sliders adapt smoothly across iPhones, high-DPI displays, and hybrid touch devices.

When building responsive designs, don’t just think in terms of width and height – consider pixel density, hover ability, and pointer type. That’s the key to delivering a seamless user experience on any screen.