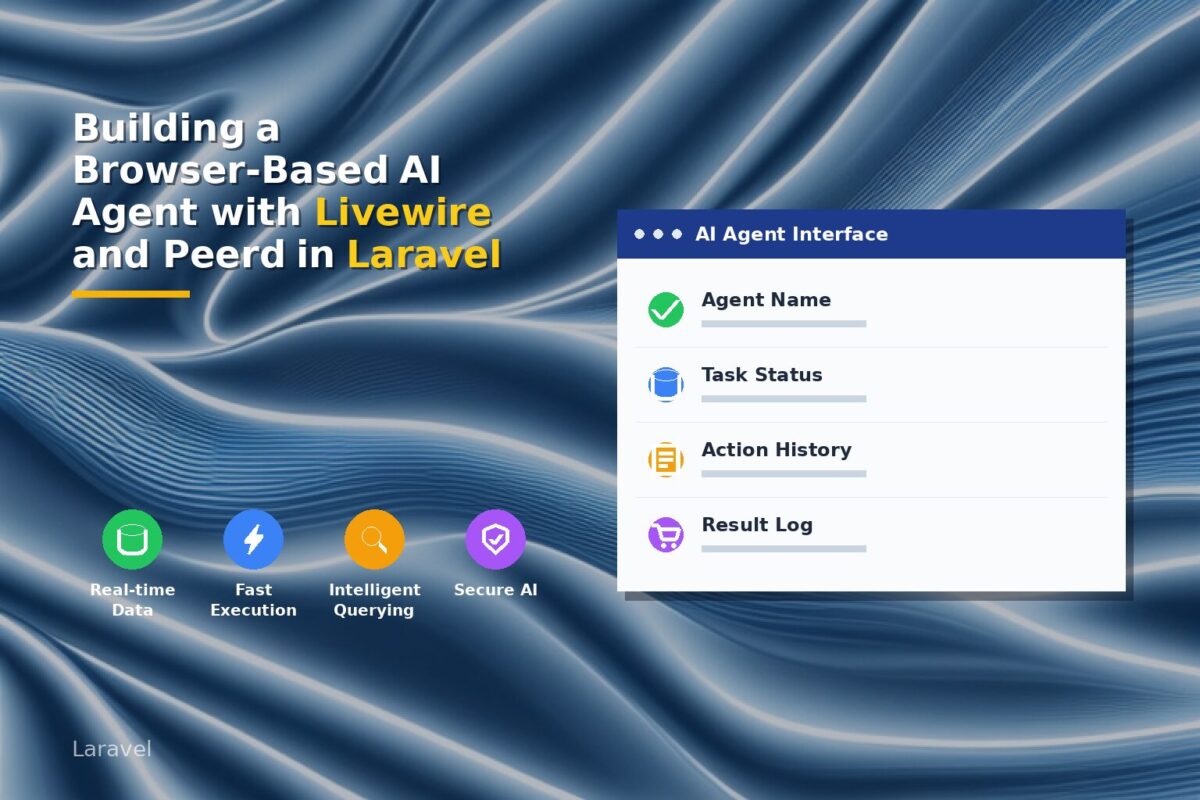
Livewire Event List with Day and Week Filters Using Bootstrap 5

Learn how to build a Laravel Livewire event list with today, next 7 days, and next 30 days filters using Bootstrap 5. Step-by-step tutorial.

Building a dynamic Laravel Livewire event list with date-based filters is a common requirement for dashboards, admin panels, and booking systems.

In this tutorial, you’ll learn how to create a Livewire event list with Today, Next 7 Days, and next 30 Days filters, styled using Bootstrap 5, without page reloads.

Prerequisites

Before starting, make sure you have:

  • Laravel 10+
  • Livewire installed
  • Bootstrap 5 included in your project
  • Basic knowledge of Laravel models and Blade templates

Step 1: Create Events Table

Before building the Livewire component, we need a proper database table to store events. This migration ensures date-based filtering works correctly for today, next 7 days, and next 30 days views.

Run the following artisan command to generate migration:

php artisan make:migration create_events_table

It will create xxxx_xx_xx_xxxxxx_create_events_table.php migration file inside database/migrations folder. Open the generated migration file and update it as follows:

<?php

use Illuminate\Database\Migrations\Migration;
use Illuminate\Database\Schema\Blueprint;
use Illuminate\Support\Facades\Schema;

return new class extends Migration {
    public function up(): void
    {
        Schema::create('events', function (Blueprint $table) {
            $table->id();
            $table->string('title');
            $table->text('description')->nullable();
            $table->date('event_date');
            $table->timestamps();

            // Performance optimization for date filtering
            $table->index('event_date');
        });
    }

    public function down(): void
    {
        Schema::dropIfExists('events');
    }
};

Execute the migration using:

php artisan migrate

It will create events table in your project database.

Step 2: Create the Livewire Component

Run the following artisan command:

php artisan make:livewire EventList

This will generate following 2 files:

  • app/Livewire/EventList.php
  • resources/views/livewire/event-list.blade.php

Step 3: Livewire Component Logic

Open app/Livewire/EventList.php and add the following code:

<?php

namespace App\Livewire;

use Livewire\Component;
use App\Models\Event;

class EventList extends Component
{
    public string $mode = 'month'; // month | week | day

    public function mount()
    {
        $this->mode = 'month';
    }

    public function showMonth()
    {
        $this->mode = 'month';
    }

    public function showWeek()
    {
        $this->mode = 'week';
    }

    public function showDay()
    {
        $this->mode = 'day';
    }

    public function getEventsProperty()
    {
        return match ($this->mode) {

            // Today only
            'day' => Event::whereDate('event_date', today())
                ->orderBy('event_date')
                ->get(),

            // Next 7 days (today + next 6 days)
            'week' => Event::whereDate('event_date', '>=', today())
                ->whereDate('event_date', '<=', today()->copy()->addDays(6))
                ->orderBy('event_date')
                ->get(),

            // Last 30 days (default)
            default => Event::whereDate('event_date', '<=', today()->addDays(30))
                ->orderBy('event_date')
                ->get(),
        };
    }

    public function render()
    {
        return view('livewire.event-list');
    }
}

Why We Use whereDate()

  • Prevents time-related filtering bugs
  • Works correctly for both DATE and DATETIME
  • Avoids issues where week filters accidentally show all events

Step 4: Blade View Using Bootstrap 5

Add following code to resources/views/livewire/event-list.blade.php :

<div>

    <!-- Filter Buttons -->
    <div class="btn-group mb-3" role="group">
        <button
            wire:click="showMonth"
            class="btn {{ $mode === 'month' ? 'btn-primary' : 'btn-outline-primary' }}">
            Next 30 Days
        </button>

        <button
            wire:click="showWeek"
            class="btn {{ $mode === 'week' ? 'btn-primary' : 'btn-outline-primary' }}">
            Next 7 Days
        </button>

        <button
            wire:click="showDay"
            class="btn {{ $mode === 'day' ? 'btn-primary' : 'btn-outline-primary' }}">
            Today
        </button>
    </div>

    <!-- Events List -->
    <div class="card">
        <div class="list-group list-group-flush">
            @forelse ($this->events as $event)
                <div class="list-group-item">
                    <div class="d-flex justify-content-between align-items-center">
                        <h6 class="mb-1">{{ $event->title }}</h6>
                        <small class="text-muted">
                            {{ \Carbon\Carbon::parse($event->event_date)->format('d M Y') }}
                        </small>
                    </div>

                    @if($event->description)
                        <p class="mb-0 text-muted small">
                            {{ $event->description }}
                        </p>
                    @endif
                </div>
            @empty
                <div class="list-group-item text-center text-muted py-4">
                    No events found
                </div>
            @endforelse
        </div>
    </div>

</div>

Step 5: Use the Component

To add the Livewire component, add the following code anywhere in your Blade file:

<livewire:event-list />

Final Result

  • Loads next 30 days by default
  • Shows today’s events instantly
  • Displays next 7 days events correctly
  • No page reloads
  • Clean Bootstrap UI

Conclusion

This Livewire + Bootstrap solution is perfect for dashboards, admin panels, and public event listings. It’s easy to extend with pagination, previous/next navigation, or even a calendar view.

Laravel Livewire Tutorial: Add ZIP Download Feature to Your File Explorer

Learn how to add a ‘Download All as ZIP’ feature to your Laravel Livewire file explorer. Compress all files in a folder – grouped by type – into a single ZIP using Laravel Storage and PHP ZipArchive.

When I first built a file explorer using Laravel Livewire, browsing and viewing documents worked great — but there was one feature missing: a simple way to download everything at once.

In this article, I’ll show you how I added a “Download” button that compresses every file in a folder (even grouped by document type) into a single ZIP, ready for instant download. Using just a few lines of code with Laravel’s Storage facade and PHP’s ZipArchive, you’ll learn how to turn your file explorer into a fully functional, production-ready document manager.

Step 1. Preparing Your Storage

All documents are stored inside:

storage/app/public/documents/

and referenced in the database via a file_path column.

Make sure your storage is linked:

php artisan storage:link

Step 2. Update the Livewire Component

Open your ApplicationExplorer Livewire component and add the following import statements at the top:

use Illuminate\Support\Facades\Storage;
use ZipArchive;

Then add the new method:

public function downloadAppDocuments($appId)
{
    $app = \App\Models\Application::with('documents')->findOrFail($appId);

    if ($app->documents->isEmpty()) {
        session()->flash('message', 'No documents to download for this application.');
        return;
    }

    $zipFileName = 'application_' . $app->id . '_documents.zip';
    $zipPath = storage_path('app/temp/' . $zipFileName);

    // Make sure temp directory exists
    if (!file_exists(storage_path('app/temp'))) {
        mkdir(storage_path('app/temp'), 0777, true);
    }

    $zip = new ZipArchive;
    if ($zip->open($zipPath, ZipArchive::CREATE | ZipArchive::OVERWRITE) === TRUE) {
        foreach ($app->documents as $doc) {
            // Access the public disk
            if (Storage::disk('public')->exists($doc->file_path)) {
                // Add subfolder by document type (optional)
                $folder = $doc->type ? $doc->type . '/' : '';
                $zip->addFile(
                    Storage::disk('public')->path($doc->file_path),
                    $folder . basename($doc->file_path)
                );
            }
        }
        $zip->close();
    }

    return response()->download($zipPath)->deleteFileAfterSend(true);
}

How It Works

  1. The method loads the selected application with all its documents.
  2. It creates a temporary ZIP file in storage/app/temp.
  3. It loops through each document, checking if it exists on the public disk.
  4. Each document is added to the ZIP file, optionally organized into subfolders based on document type.
  5. Finally, Laravel’s response()->download() streams the file to the user and deletes it after sending.

Step 3. Add the “Download” Button in the UI

In your Livewire Blade view (application-explorer.blade.php), add this button next to the search bar:

<button wire:click="downloadAppDocuments({{ $selectedApp->id }})" 
        class="btn btn-success">
    Download
</button>

Or, if you prefer to show it beside each folder in the sidebar, update your partial (sidebar-app.blade.php):

<button wire:click.stop="downloadAppDocuments({{ $app->id }})"
        class="btn btn-sm btn-outline-primary me-2"
        title="Download all documents">
    ⬇️
</button>

The .stop modifier ensures this button doesn’t also trigger folder selection.

Step 4. Organizing Documents by Type

If you store files based on type (like invoices, reports, letters), your upload logic should look like this:

$file->store("applications/{$applicationId}/" . strtolower($type), 'public');

Then, in the ZIP creation logic, the $doc->type value creates the corresponding subfolder inside the ZIP.

Example folder structure in ZIP:

application_3_documents.zip
├── invoices/
│   ├── invoice1.pdf
│   └── invoice2.pdf
├── reports/
│   └── report1.pdf
└── letters/
    └── letter1.pdf

Step 5. Handling Missing Files Gracefully

If a document record exists but the file is missing from storage, Storage::disk('public')->exists() safely skips it.

You can also log missing files for auditing:

if (!Storage::disk('public')->exists($doc->file_path)) {
    \Log::warning("Missing file: {$doc->file_path}");
    continue;
}

Step 6. Testing the Download

  1. Select a folder in your explorer.
  2. Click “Download All”.
  3. A .zip file should download automatically.
  4. Extract it — files are grouped by type (if configured).

If you see “file not found” messages, verify:

  • The file_path in the database points to documents/...
  • The disk is correctly set in .env:
FILESYSTEM_DISK=public

Conclusion

And just like that, your Laravel Livewire file explorer now has the power to download everything in one click. No extra packages, no complicated setup — just smart use of Laravel’s Storage facade and PHP’s native ZipArchive.

This simple addition dramatically improves user experience, especially when handling large sets of documents. It also showcases how flexible Livewire can be for real-time, interactive Laravel apps.

From here, you can expand even further: add selective downloads, handle nested folders recursively, or generate temporary signed URLs for secure file sharing. With this foundation in place, your file explorer isn’t just a viewer anymore — it’s a complete, dynamic file management solution.

How to Use TinyMCE with Livewire and Sortable.js in a Dynamic Form Builder

Learn how to integrate TinyMCE with Livewire and Sortable.js in a dynamic form builder. Build interactive forms with drag-and-drop and rich text editing in Laravel.

When building a drag-and-drop form builder with Laravel Livewire, a common challenge is integrating rich text editors like TinyMCE while also supporting sortable components and repeaters.

Checkout my article to build dynamic form builder using Laravel Livewire here.

This guide walks you through a working setup where:

  • Components can be added dynamically.
  • Fields can include TinyMCE editors.
  • Components can be dragged and reordered using Sortable.js.
  • TinyMCE properly initializes and syncs data back to Livewire.

Step 1: Create Your TinyMCE Field Partial

Inside your Blade view for form fields, create a partial for TinyMCE:

<div wire:ignore>
    <textarea
        id="{{ $editorId }}"
        class="tinymce"
        data-model="{{ $modelPath }}"
    >{{ is_string($value) ? $value : '' }}</textarea>
</div>
  • wire:ignore ensures Livewire doesn’t overwrite the editor.
  • data-model stores the Livewire binding path for syncing.

Step 2: Add TinyMCE + Sortable.js JavaScript

Include TinyMCE and Sortable.js in your layout:

<script src="https://cdn.tiny.cloud/1/no-api-key/tinymce/6/tinymce.min.js" referrerpolicy="origin"></script>
<script src="https://cdn.jsdelivr.net/npm/sortablejs@1.15.0/Sortable.min.js"></script>

Now initialize editors and handle drag-and-drop:

<script>
    function initTinyMCEEditors() {
        document.querySelectorAll('textarea.tinymce').forEach((el) => {
            if (!el.id || tinymce.get(el.id)) return;

            tinymce.init({
                selector: `#${el.id}`,
                menubar: false,
                plugins: 'link lists code image table',
                toolbar: 'undo redo | bold italic underline | alignleft aligncenter alignright | bullist numlist | link image code',
                setup: function (editor) {
                    editor.on('init', () => {
                        editor.setContent(el.value || '');
                    });
                    editor.on('Change KeyUp', () => {
                        const model = el.dataset.model;
                        if (model) {
                            Livewire.dispatch('input', { name: model, value: editor.getContent() });
                        }
                    });
                }
            });
        });
    }

    function destroyTinyMCEEditors() {
        document.querySelectorAll('textarea.tinymce').forEach((el) => {
            const editor = tinymce.get(el.id);
            if (editor) {
                editor.destroy();
            }
        });
    }

    function syncAllTinyMCEDataToLivewire() {
        document.querySelectorAll('textarea.tinymce').forEach((el) => {
            const editor = tinymce.get(el.id);
            if (editor) {
                const model = el.dataset.model;
                if (model) {
                    Livewire.dispatch('input', { name: model, value: editor.getContent() });
                }
            }
        });
    }

    document.addEventListener('DOMContentLoaded', function () {
        const el = document.getElementById('components-sortable');

        if (el) {
            new Sortable(el, {
                animation: 150,
                handle: '.drag-handle',
                onStart: destroyTinyMCEEditors,
                onEnd: () => {
                    setTimeout(() => {
                        Livewire.dispatch('reorderUpdated');
                        initTinyMCEEditors();
                    }, 100);
                }
            });
        }

        initTinyMCEEditors();
        Livewire.hook('message.processed', initTinyMCEEditors);
    });
</script>

Step 3: Sortable Container Blade Example

<ul id="components-sortable">
    @foreach ($components as $index => $component)
        <li class="component-item">
            <div class="drag-handle cursor-move">⠿</div>

            @include('form-fields', [
                'fields' => $component['fields'],
                'modelPath' => "components.{$index}.fields"
            ])
        </li>
    @endforeach
</ul>

Step 4: Sync TinyMCE Data Before Save

Since TinyMCE keeps data internally, Livewire won’t automatically have the latest content.

Fix this by syncing before save:

<button type="button" onclick="syncAllTinyMCEDataToLivewire(); Livewire.find('{{ $this->id }}').save()">Save</button>

And in your Livewire component:

protected $listeners = ['save-form' => 'save'];

public function save()
{
    // At this point, TinyMCE data is synced
}

Conclusion

Integrating TinyMCE with Livewire and Sortable.js in a dynamic form builder may seem complex at first, but once set up correctly, it opens up powerful possibilities for building highly interactive and user-friendly applications. By combining the real-time reactivity of Livewire, the drag-and-drop flexibility of Sortable.js, and the rich editing features of TinyMCE, you can create a seamless experience where users can easily manage, reorder, and edit dynamic content without page reloads.

This approach not only improves usability but also ensures that your forms remain scalable and maintainable as your project grows. With the right configuration and careful handling of event updates, you’ll have a robust solution ready for production.

From Static to Dynamic: Creating a Powerful Form Builder with Livewire

Learn how to build a dynamic form builder in Laravel Livewire with repeaters, file uploads, and component-based fields. Step-by-step guide with code examples.

Building dynamic forms is a common requirement in modern applications. Instead of hardcoding fields, you might want users to add components (like text inputs, dropdowns, file uploads, or repeaters) that automatically render inside a master form. With Laravel Livewire, you can develop dynamic form builder in a clean and interactive way without writing tons of JavaScript.

Step 1: Create a Livewire Component

Run the artisan command to create your base form builder component with livewire:

php artisan make:livewire FormBuilder

This creates two files:

  • app/Http/Livewire/FormBuilder.php (backend logic)
  • resources/views/livewire/form-builder.blade.php (frontend view)

Step 2: Define Available Components

Inside app/Http/Livewire/FormBuilder.php, let’s define a list of available components. Each component has a name and a JSON configuration of its fields.

public $availableComponents = [
    [
        'name' => 'Text Input',
        'fields' => [
            ['type' => 'text', 'label' => 'Enter Text', 'value' => '']
        ]
    ],
    [
        'name' => 'Email',
        'fields' => [
            ['type' => 'email', 'label' => 'Enter Email', 'value' => '']
        ]
    ],
    [
        'name' => 'File Upload',
        'fields' => [
            ['type' => 'file', 'label' => 'Upload File', 'value' => '']
        ]
    ],
    [
        'name' => 'Repeater',
        'fields' => [
            ['type' => 'repeater', 'label' => 'Repeater Field', 'items' => []]
        ]
    ],
];

We’ll store user-selected components in:

public $formComponents = [];

Step 3: Add Components to the Form

When a user clicks a component, push it to the form array:

public function addComponent($index)
{
    $component = $this->availableComponents[$index];
    $this->formComponents[] = $component;
}

Step 4: Render Dynamic Fields

Render all selected components to form-builder.blade.php:

<div>
    <!-- Component Menu -->
    <h3>Available Components</h3>
    @foreach ($availableComponents as $i => $comp)
        <button wire:click="addComponent({{ $i }})">
            {{ $comp['name'] }}
        </button>
    @endforeach

    <hr>

    <!-- Dynamic Form -->
    <form wire:submit.prevent="save">
        @foreach ($formComponents as $cIndex => $component)
            <div class="component">
                <h4>{{ $component['name'] }}</h4>

                @foreach ($component['fields'] as $fIndex => $field)
                    @if ($field['type'] === 'text')
                        <input type="text"
                               wire:model="formComponents.{{ $cIndex }}.fields.{{ $fIndex }}.value"
                               placeholder="{{ $field['label'] }}">
                    @elseif ($field['type'] === 'email')
                        <input type="email"
                               wire:model="formComponents.{{ $cIndex }}.fields.{{ $fIndex }}.value"
                               placeholder="{{ $field['label'] }}">
                    @elseif ($field['type'] === 'file')
                        <input type="file"
                               wire:model="formComponents.{{ $cIndex }}.fields.{{ $fIndex }}.value">
                    @elseif ($field['type'] === 'repeater')
                        <button type="button"
                                wire:click="addRepeaterItem({{ $cIndex }}, {{ $fIndex }})">
                            ➕ Add Row
                        </button>

                        @foreach ($field['items'] as $rIndex => $item)
                            <input type="text"
                                   wire:model="formComponents.{{ $cIndex }}.fields.{{ $fIndex }}.items.{{ $rIndex }}.value"
                                   placeholder="Repeater Item {{ $rIndex + 1 }}">
                        @endforeach
                    @endif
                @endforeach
            </div>
        @endforeach

        <button type="submit">Save Form</button>
    </form>
</div>

Step 5: Handle Repeaters in Form

If clicked component is repeater, push it to the form array as follows:

public function addRepeaterItem($cIndex, $fIndex)
{
    $this->formComponents[$cIndex]['fields'][$fIndex]['items'][] = ['value' => ''];
}

Step 6: Save the Form Data

Finally, handle form saving:

public function save()
{
    // Just dump the data for now
    dd($this->formComponents);

    // In real apps, store in DB as JSON
}

Conclusion

Dynamic form builders don’t have to be complicated. With Laravel Livewire, you can build fully interactive forms that support repeaters, file uploads, and dynamic components without writing heavy JavaScript.

This approach keeps your codebase clean, your forms flexible, and your users happy. Once you have the basics working, it’s easy to extend the builder with drag-and-drop sorting, conditional fields, or rich text editors.

Whether you’re building an admin panel, a survey tool, or a custom CMS, this Livewire-powered dynamic form structure gives you a strong foundation to adapt to almost any use case.

Boost Your Filament Resources with Excel Export in Minutes

Learn how to add an Export to Excel button in Filament using Laravel Excel. Includes filter-aware exports and reusable QueryExport class.

Exporting data is a common requirement in admin panels. If you’re using Filament with Laravel, you can easily integrate Export to Excel functionality using the Maatwebsite/Laravel-Excel package.

This guide will show you step by step how to:

  • Install Laravel Excel
  • Create a reusable export class
  • Add an “Export to Excel” button in your Filament resource
  • Ensure exports respect filters and tabs
  • Match Filament table columns in Excel

Step 1: Install Laravel Excel

Run the following command in your project root folder to install Laravel Excel package:

composer require maatwebsite/excel

Step 2: Create a Generic Export Class

Instead of creating a new export class for every model, you can build one reusable export class:

<?php

namespace App\Exports;

use Illuminate\Database\Eloquent\Builder;
use Maatwebsite\Excel\Concerns\FromCollection;
use Maatwebsite\Excel\Concerns\WithHeadings;
use Maatwebsite\Excel\Concerns\WithMapping;

class QueryExport implements FromCollection, WithHeadings, WithMapping
{
    protected Builder $query;
    protected array $columns;

    public function __construct(Builder $query, array $columns = [])
    {
        $this->query = $query;
        $this->columns = $columns;
    }

    public function collection()
    {
        return $this->query->get();
    }

    public function headings(): array
    {
        return array_merge(
            ['ID'],
            collect($this->columns)
                ->map(fn($col) => $col->getLabel() ?? $col->getName())
                ->toArray()
        );
    }

    public function map($row): array
    {
        return array_merge(
            [$row->id],
            collect($this->columns)
                ->map(fn($col) => data_get($row, $col->getName()))
                ->toArray()
        );
    }
}

This class is reusable across all models/resources.

Step 3: Add Export Action in Filament

In your ListBrands (or any other List<Resource>) page, add a header action:

use App\Exports\QueryExport;
use Maatwebsite\Excel\Facades\Excel;
use Filament\Tables\Actions\Action;

Action::make('export')
    ->label('Export to Excel')
    ->icon('heroicon-o-arrow-down-tray')
    ->action(function ($livewire) {
        $query   = $livewire->getFilteredTableQuery(); // respects filters & tabs
        $columns = $livewire->getTable()->getColumns();

        return Excel::download(new QueryExport($query, $columns), 'brands.xlsx');
    }),

Step 4: How It Works

  • The export respects all filters, search, and tab constraints thanks to getFilteredTableQuery().
  • The export file includes the same columns as your Filament table.
  • The ID column is automatically prepended.

Conclusion

With just a few steps, you can add a powerful Excel export feature to any Filament resource. The approach we used:

  • Reusable QueryExport class
  • Filter & tab aware exports
  • Matching Filament table columns
  • ID column always included

This setup gives your admin panel professional-grade export functionality while staying flexible across different resources.