Install React JS with Laravel Breeze

Install Laravel Breeze, which offers React JS scaffolding via an Inertia frontend implementation to build modern React JS app.

In this React JS tutorial, we learn to install Laravel Breeze with React JS over Laravel Application. Laravel Breeze come equipped with out-of-the-box scaffolding for new Inertia applications, making them the quickest and easiest way to get your Inertia project off the ground with React Js.

For this post, we are using Laravel Breeze. This minimal implementation includes login, registration, password reset, email verification, password confirmation, and a basic “profile” page for updating user information.

Laravel Breeze comes equipped with simple Blade templates styled with Tailwind CSS. However, if you prefer to scaffold your application using React JS and Inertia JS, Laravel Breeze can do that too.

In addition to being an excellent starting point for a new Laravel project, Laravel Breeze is also a great choice for projects that want to elevate their Blade templates using Laravel Livewire.

Install laravel project and setup database

First install a fresh new Laravel application from the composer using the following command,

composer create-project laravel/laravel inertia-react

It will create the laravel project folder named inertia-react .

Now, you have to connect the laravel app to the database. Go inside this folder and open .env to change the database connection details as follows,

DB_CONNECTION=mysql
DB_HOST=127.0.0.1
DB_PORT=3306
DB_DATABASE=database_name
DB_USERNAME=database_username
DB_PASSWORD=database_password

After changing the connection details, run all migrations for the project using the following command,

php artisan migrate

Install Laravel Breeze over Laravel

Once you ready with the Laravel installation, you can proceed with Laravel Breeze installation using Composer using the following command,

composer require laravel/breeze --dev

Once you’ve installed the Laravel Breeze package using Composer, it’s time to run the breeze:install Artisan command as follows,

php artisan breeze:install

This command will publish all the necessary authentication resources, including views, routes, controllers, and more, directly to your application.

Laravel Breeze publishes its code directly to your application, giving you complete control and visibility over its features and implementation. This allows you to easily customize and tailor the authentication experience to fit your unique needs.

If you want to use an Inertia stack with React JS in your Laravel Breeze application, simply specify “react” as your desired stack when running the breeze:install Artisan command as follows,

php artisan breeze:install -react

Once the scaffolding is installed, be sure to compile your application’s frontend assets to ensure proper functionality:
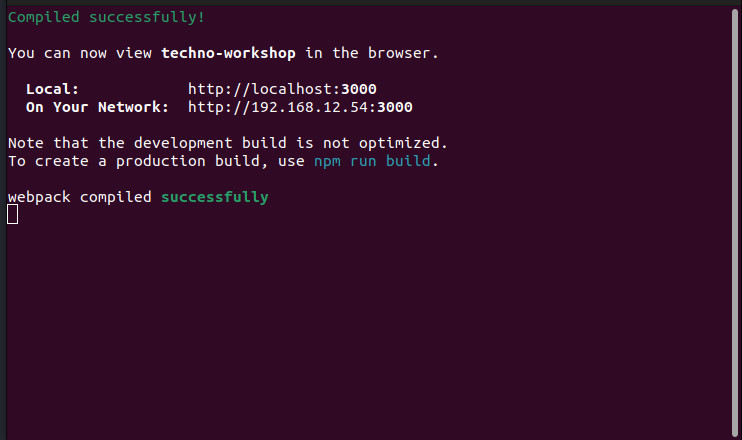
npm install && npm run dev

With the initial setup complete, it’s time to test your application’s authentication functionality. Simply navigate to the /login or /register URLs in your web browser to get started.

All of Laravel Breeze‘s routes are defined in the routes/auth.php file, making it easy to modify or customize the authentication routes as needed.

Getting started with ReactJS

Setting up a local environment is recommended way to learn ReactJS because the local setup allows you to complete the tutorial using your choice of editor, use the latest JavaScript features, provides a nice developer experience, and optimizes your app for production.

Setting up a local environment is recommended way to learn ReactJS because the local setup allows you to complete the tutorial using your choice of editor, use the latest JavaScript features, provides a nice developer experience, and optimizes your app for production.

Let’s start with creating a new ReactJS application.

Create React App

Creating React App is a comfortable environment for learning and building an application in React.

There are few prerequisites for creating a React app as follows,

  • Node.js >= 14.0.0
  • npm >= 5.6

If above requirements are satisfied, you can run the following command to create a new react application,

npx create-react-app my-react-app

You can change my-react-app to anything you want to name your app.

The create-react-app command will set up everything you need to run a React application. Now you are ready to run your first real React application! Go to your application directory using the following command,

cd my-react-app

Now, run the following command inside your application directory to run your application,

npm start

It will compile your application and open it in the new browser window or tab. If not, you can open your browser and write localhost:3000 in the address bar. Your application will look like screenshot below,

If you check your command window, it will show the following output,

You can see that command window is also providing command to create a production build for your application.

Using React JS in the HTML File

We will learn to use ReactJS directly in the HTML file. There are some prerequisites to adding ReactJS script inside the HTML code.

Now that we know what React JS is, we can start with different usage of ReactJS. If you don’t know what React JS is, read the Getting Started with ReactJS.

In this article, we will learn to use React JS directly in the HTML file. There are some prerequisites to adding React JS script inside the HTML code. We need to include the following three javascript in the head section of the HTML file.

The first two allow us to write ReactJS code in our JavaScripts, and Babel Js will allow to write JSX syntax and ES6 in older browsers.

Follow the below steps to add react JS compnent to the HTML file.

Add the DOM container to mount ReactJS Component

Embedding React JS in HTML differs slightly from what we have done with React Js App. In a standard React Js app, the root element in the index.html is the container that mounts the React Js app. Similarly, we need any element to mount our react JS component in HTML file as below,

<div id="example"></div>

In above code, we have added an element with id example in HTML file.

Add required JS files to run ReactJS

We want to run a React app in an HTML file, where no node_modules to provide React Js dependencies. Therefore, we must add React dependencies by including React script tags in the HTML document as below,

<script src="https://unpkg.com/react@18/umd/react.development.js" crossorigin></script>
<script src="https://unpkg.com/react-dom@18/umd/react-dom.development.js" crossorigin></script>

In above code, we have included the required React JS scripts, which are required to execute the React JS code.

React Js code returns JSX. So, we also need Babel JS to transform that JSX as below,

<script src="https://unpkg.com/@babel/standalone/babel.min.js"></script>

Write ReactJS code in HTML

Now, our HTML file is ready for react JS code. But, we have to add our react JS code in text/babel script tag as babel can transpile our react JS code as below,

<script type="text/babel">
  function Hello() {
    return <h1>Hello World!</h1>;
  }
  ReactDOM.render(<Hello />, document.getElementById('example'))
</script>

Example

The complete code of using React JS in the HTML file is as follows,

<!DOCTYPE html>
<html lang="en">
  <head>
    <meta charset="utf-8">
    <meta name="viewport" content="width=device-width, initial-scale=1">
    <script src="https://unpkg.com/react@18/umd/react.development.js" crossorigin></script>
    <script src="https://unpkg.com/react-dom@18/umd/react-dom.development.js" crossorigin></script>
    <script src="https://unpkg.com/@babel/standalone/babel.min.js"></script>
  </head>
  <body>
    <div id="example"></div>
    <script type="text/babel">
      function Hello() {
        return <h1>Hello World!</h1>;
      }
      ReactDOM.render(<Hello />, document.getElementById('example'))
    </script>
  </body>
</html>

This way, we can use ReactJS for testing purposes. But for production use, we have to set up a React environment.

ReactJS Introduction

ReactJS is one of the most popular JavaScript front-end libraries for building user interfaces with a strong foundation. It has a robust and rapidly growing developer community and a declarative, efficient, and flexible library for building reusable UI components. It is an open-source, component-based front-end library responsible only for the application view layer. 

ReactJS is one of the most popular JavaScript front-end libraries for building user interfaces with a strong foundation. It has a robust and rapidly growing developer community and a declarative, efficient, and flexible library for building reusable UI components. It is an open-source, component-based front-end library responsible only for the application view layer. 

Initially, it was developed by Jordan Walke, a software engineer at Facebook and maintained by Facebook. Later, it was used in other Facebook products like WhatsApp & Instagram. Facebook implemented ReactJS in its newsfeed section in 2011, but it was released to the public in May 2013.

The main objective of ReactJS is to develop interactive User Interfaces (UI) with the help of virtual DOM (JavaScript object) to improve application performance because the JavaScript virtual DOM is faster than the regular DOM because, it only changes individual DOM elements instead of reloading complete DOM every time. It uses component and data patterns that improve readability and helps to maintain larger apps.

The components are the heart of all React applications. These component are used to make a React application. Each component is responsible for outputting a small, reusable piece of HTML code and can be nested with other components to allow complicated applications.