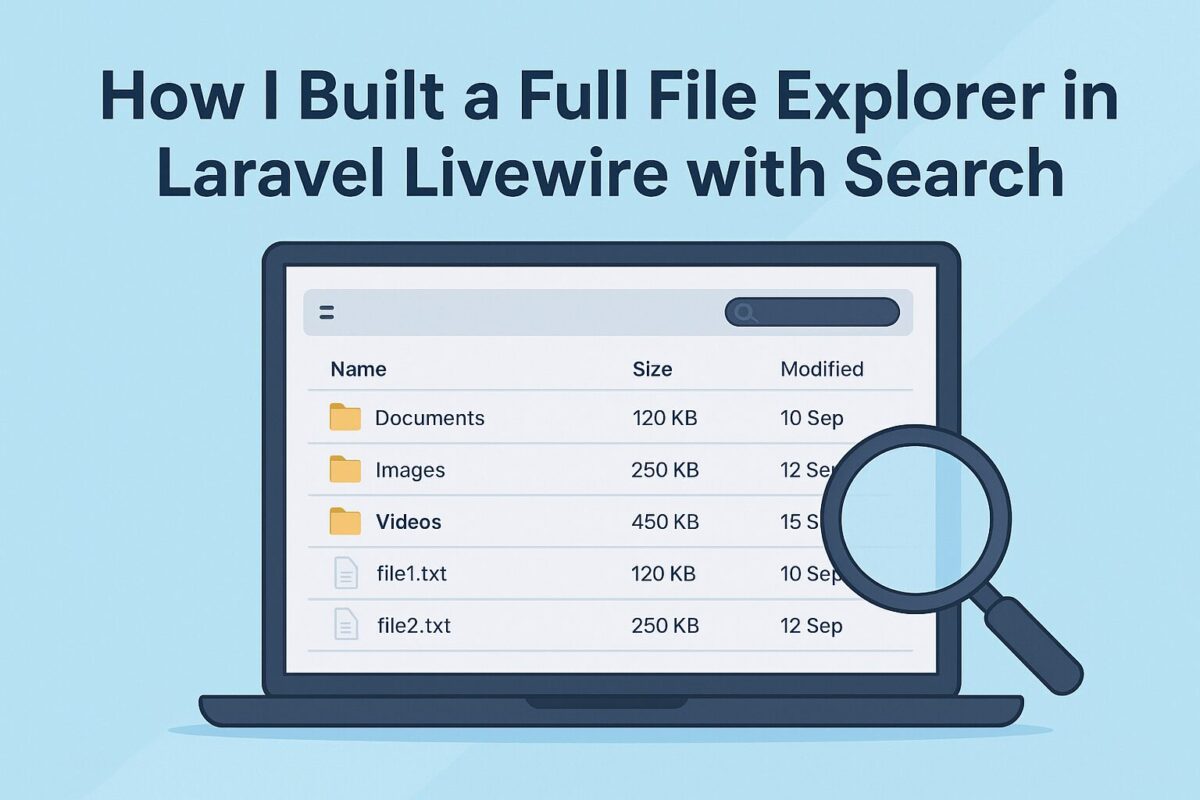
Using .env File in CodeIgniter 3

Learn how to use the .env file in CodeIgniter 3 to securely manage your environment variables and improve your application’s configuration structure.

Using environment variables via a .env file is a common best practice to keep sensitive configuration (like database credentials or any other secret or api keys) out of your codebase. .env file support is not provided in CodeIgniter 3 out of the box, but you can easily integrate it using the vlucas/phpdotenv library.

This guide will show you how to add .env file support in a CodeIgniter 3 application using the vlucas/phpdotenv library with Composer autoload enabled.

Prerequisites

Ensure your CodeIgniter project has Composer enabled by checking the following in application/config/config.php:

$config['composer_autoload'] = TRUE;

Step-by-Step Setup

The following are the steps to implement .env file support.

Step 1. Install vlucas/phpdotenv via Composer

In Codeigniter 3, composer.json is not available at the project root, but inside the application directory. So, to install any composer library, you have to first navigate to the application directory.

cd application/
composer require vlucas/phpdotenv

It will install the core files to add support for .env files.

Step 2. Create the .env File

At the root of your project (same level as index.php), create a file named .env with database configuration variables as a content:

DB_HOST=localhost
DB_USERNAME=root
DB_PASSWORD=secret
DB_NAME=my_database

3. Load the .env in index.php

Open your index.php file and add the following code before the line that bootstraps CodeIgniter:

require_once __DIR__ . '/vendor/autoload.php';

$dotenv = Dotenv\Dotenv::createImmutable(__DIR__);
$dotenv->load();

Add the above code in index.php file before the following line:

require_once BASEPATH.'core/CodeIgniter.php';

For older versions (PHP < 7.1 or Dotenv v2):

$dotenv = new Dotenv\Dotenv(__DIR__);
$dotenv->load();

This will load the .env file variables using the phpdotenv library. Now, all the variables used in .env file can be used in any code of the project.

4. Use Environment Variables in database.php

We defined the database configuration variables inside the .env file. To use these variables, open application/config/database.php and update the code as follows:

$db['default'] = array(
    'hostname' => getenv('DB_HOST'),
    'username' => getenv('DB_USERNAME'),
    'password' => getenv('DB_PASSWORD'),
    'database' => getenv('DB_NAME'),
    'dbdriver' => 'mysqli',
    'db_debug' => (ENVIRONMENT !== 'production'),
    // ... other settings
);

Note: In some cases, getenv function may not work. Use $_ENV as an alternative.

Secutiry Tip

Never commit your .env file to version control. Add it to .gitignore

Conclusion

Now your CodeIgniter 3 app can securely use environment variables just like modern frameworks. This keeps your config clean, safe, and easy to manage across environments.

Build a Custom Multi-Column Checkbox Dropdown in Filament

Learn how to build a user-friendly multi-column custom checkbox dropdown using Laravel Filament to provide improved and better selection options for your users.

Filament is a powerful admin panel for Laravel, but sometimes your UI needs go beyond its built-in fields. In this tutorial, we’ll walk through how to build a custom checkbox dropdown component in Filament that supports multiple columns and compatible with dark mode.

Goal

We want to display a dropdown that, when opened, shows a list of checkboxes (e.g. for selecting items). The checkboxes should:

  • Be selectable via checkboxes
  • Be arranged in multiple columns
  • Store selections in a Livewire model
  • Work with dark mode

The purpose for this component is, I have a list of more than 100 entries. If I take CheckboxList component, all of these entries take so much space in UI. Similarly, If I add multiselect Select component, It will not show all entries at once and user have to type name to search for entries.

So, dropdown will reduce the space in UI and checkboxes solve searching problem.

Step 1: Create the Custom Field Component

Create the filament custom checkbox dropdown field component file at app/Forms/Components/CheckboxDropdown.php and add the following code.

<?php
namespace App\Forms\Components;

use Filament\Forms\Components\Field;

class CheckboxDropdown extends Field
{
    protected string $view = 'forms.components.checkbox-dropdown';

    protected array $options = [];

    protected int $checkboxColumns = 1;

    public function options(array $options): static
    {
        $this->options = $options;
        return $this;
    }

    public function getOptions(): array
    {
        return $this->evaluate($this->options);
    }

    public function checkboxColumns(int $count): static
    {
        $this->checkboxColumns = $count;
        return $this;
    }

    public function getCheckboxColumns(): int
    {
        return $this->evaluate($this->checkboxColumns);
    }
}

Step 2: Create a blade view file for the component

As mentioned in the component class, create a custom checkbox dropdown component view file at resources/views/forms/components/checkbox-dropdown.blade.php and add the following code.

@php
$options = collect($getOptions())->mapWithKeys(fn ($label, $id) => [(string) $id => $label]);
$jsonOptions = $options->toJson();
$gridCols = match ($getCheckboxColumns()) {
    1 => 'grid-cols-1',
    2 => 'grid-cols-2',
    3 => 'grid-cols-3',
    4 => 'grid-cols-4',
    default => 'grid-cols-1',
};
@endphp

<div
    x-data="{
        open: false,
        toggle() { this.open = !this.open },
        selected: @js($getState() ?? []),
        liveSelected: @entangle($attributes->wire('model')).defer,
        options: {{ $jsonOptions }} || {},
        isSelected(id) {
            return this.selected?.includes(id);
        },
        labelFor(id) {
            if (!this.options || typeof this.options !== 'object') return id;
            return this.options[id] ?? id;
        }
    }"
    class="relative">
    <!-- Trigger Button -->
    <button
        type="button"
        @click="toggle"
        class="w-full border rounded px-3 py-2 text-left bg-white dark:bg-gray-900 border-gray-300 dark:border-gray-700 text-gray-800 dark:text-gray-200 shadow-sm">
        <template x-if="selected?.length">
            <span x-text="selected.map(labelFor).join(', ')"></span>
        </template>
        <template x-if="!selected?.length">
            <span class="text-gray-400 dark:text-gray-500">Select items...</span>
        </template>
    </button>

    <!-- Dropdown Panel -->
    <div
        x-show="open"
        @click.away="open = false"
        x-cloak
        class="absolute z-10 w-full mt-1 rounded border bg-white dark:bg-gray-900 border-gray-300 dark:border-gray-700 shadow max-h-60 overflow-y-auto">
        <ul class="p-2 grid {{ $gridCols }} space-y-1 gap-2">
            <template x-for="(label, id) in options" :key="id">
                <li>
                    <label class="flex gap-2 items-start space-x-2 text-gray-800 dark:text-gray-200">
                        <input
                            type="checkbox"
                            class="fi-checkbox-input rounded border-none bg-white shadow-sm ring-1 transition duration-75 checked:ring-0 focus:ring-2 focus:ring-offset-0 disabled:pointer-events-none disabled:bg-gray-50 disabled:text-gray-50 disabled:checked:bg-gray-400 disabled:checked:text-gray-400 dark:bg-white/5 dark:disabled:bg-transparent dark:disabled:checked:bg-gray-600 text-primary-600 ring-gray-950/10 focus:ring-primary-600 checked:focus:ring-primary-500/50 dark:text-primary-500 dark:ring-white/20 dark:checked:bg-primary-500 dark:focus:ring-primary-500 dark:checked:focus:ring-primary-400/50 dark:disabled:ring-white/10 mt-1"
                            :value="id"
                            :checked="isSelected(id)"
                            @change="
                                if (isSelected(id)) {
                                    selected = selected.filter(i => i !== id)
                                } else {
                                    selected.push(id)
                                }
                                liveSelected = selected;
                            ">
                        <span x-text="label"></span>
                    </label>
                </li>
            </template>
        </ul>
    </div>
</div>

Now this component id ready to use. Currently, it can adopt current filament admin panel theme and you can distribute checkboxes to multiple columns using checkboxColumns option.

Step 3: Usage in Filament Resource

You can use this custom checkbox dropdown component in any resource file as follows:

CheckboxDropdown::make('selected_items')
    ->label('Select Items')
    ->options(Item::pluck('name', 'id')->toArray())
    ->checkboxColumns(3)

Conclusion

With this setup, you can develop a fully reusable, dynamic, and user-friendly multi-column checkbox dropdown — perfect for any Laravel Filament project.

Add Missing Migrations to Laravel Database Without executing

Learn how to add missing Laravel migration entries to the database without re-running them. Perfect for restoring synced environments or imported databases.

Sometimes, when working with Laravel projects, especially when migrating databases manually or syncing environments, the migrations table might miss entries — even though the migration files exist and were executed. This causes Laravel to attempt to re-run migrations or show them as pending. And even sometime, you added new migration and try to migrate them, but migration gives error that previous migrations are pending.

This article will guide you through creating an Artisan command that adds missing migration entries to the database without running them, keeping Laravel in sync with the actual DB schema.

Step 1: Create the Command

To create an artisan command, run the following command in your terminal:

php artisan make:command SyncMigrations

It creates a file at app/Console/Commands/SyncMigrations.php.

Step 2: Add the Logic

Now, open this file and paste the following code inside it:

<?php

namespace App\Console\Commands;

use Illuminate\Console\Command;
use Illuminate\Support\Facades\DB;
use Illuminate\Support\Facades\File;

class SyncMigrations extends Command
{
    protected $signature = 'sync:migrations';
    protected $description = 'Add missing migrations to the migrations table without running them';

    public function handle()
    {
        $migrationPath = database_path('migrations');
        $files = File::files($migrationPath);

        $fileMigrations = collect($files)->map(function ($file) {
            return pathinfo($file->getFilename(), PATHINFO_FILENAME);
        });

        $existingMigrations = DB::table('migrations')->pluck('migration');

        $missingMigrations = $fileMigrations->diff($existingMigrations);

        if ($missingMigrations->isEmpty()) {
            $this->info('All migrations are already recorded.');
            return 0;
        }

        $lastBatch = DB::table('migrations')->max('batch') ?? 0;
        $nextBatch = $lastBatch + 1;

        foreach ($missingMigrations as $migration) {
            DB::table('migrations')->insert([
                'migration' => $migration,
                'batch' => $nextBatch,
            ]);
            $this->line("Added migration: <info>$migration</info>");
        }

        $this->info("Added " . $missingMigrations->count() . " missing migration(s) to batch $nextBatch.");
        return 0;
    }
}

Explanation:

  • Get all filenames list from the migrations folder.
  • Get all migrations list from the migrations table.
  • Check a difference between two lists and return 0 if no difference found.
  • If there is a difference, get a last migration batch and create new batch by adding 1 to this batch number.
  • Add all migrations available in the difference with new batch number.

Step 3: Run the Command

If you are running Laravel < 11, register the command file in app/Console/Kernel.php:

protected $commands = [
    \App\Console\Commands\SyncMigrations::class,
];

In Laravel 11+, there’s no need to register commands manually.

Now, run the following command in your terminal:

php artisan sync:migrations

You’ll see output like this:

Added migration: 2024_12_31_235959_create_users_table
Added migration: 2025_01_01_000000_create_orders_table
Added 2 missing migration(s) to batch 4.

Caution

This command does not execute the migrations. It assumes the database schema already reflects them. Use this only when you’re sure the migrations were already applied, e.g. from another environment or a database import.

Conclusion

This approach is a safe and Laravel-friendly way to fix out-of-sync migrations. It’s perfect for developers working across multiple environments or restoring production databases.

Want to take it further? Add a prompt or backup feature to this command. Let me know in the comments!

How to Integrate Sentry with CodeIgniter 3

Learn how to integrate Sentry error tracking with CodeIgniter 3 to monitor and debug PHP application issues in real-time.

Sentry is a powerful error-tracking tool that helps you monitor and fix crashes in real-time. In this post, we’ll walk through how to integrate Sentry with a CodeIgniter 3 application and log all errors to sentry.

Prerequisites

Before you begin, make sure you have:

  • A Sentry account with a created project.
  • A working CodeIgniter 3 setup.
  • PHP 7.2+ (recommended).
  • Composer installed.

Step 1: Install Sentry SDK via Composer

Open your terminal and run:

composer require sentry/sentry

If you haven’t initialized Composer yet in your CI3 project, run composer init first.

Step 2: Enable and Configure Hooks

To enable hook in CodeIgniter 3, Edit your application/config/config.php and update the 'enable_hooks' variable to TRUE if it is FALSE.

$config['enable_hooks'] = TRUE;

Now, register the sentry hook into the application/config/hooks.php file:

$hook['pre_system'][] = array(
    'class'    => '',
    'function' => 'init_sentry', // Function to be called
    'filename' => 'sentry.php', // Filename of the hook
    'filepath' => 'hooks'
);

As mentioned in the hook file, create application/hooks/sentry.php and add the following code:

use Sentry\ClientBuilder;
use Sentry\State\Hub;

function init_sentry()
{
    require_once APPPATH . '../vendor/autoload.php';

    \Sentry\init([
        'dsn' => 'https://your-dsn@sentry.io/project-id',
        'environment' => ENVIRONMENT,
        'error_types' => E_ALL & ~E_NOTICE, // Adjust as needed
    ]);
}

Replace 'https://your-dsn@sentry.io/project-id' with your actual Sentry DSN.

Step 3: Capture Errors or Messages

Now, you can log errors to sentry using multiple ways as follows,

Manually Capture Exceptions

try {
    // Your code here
} catch (Exception $e) {
    \Sentry\captureException($e);
}

Manually Capture Messages

\Sentry\captureMessage('Something happened!', \Sentry\Severity::warning());

Step 4: Automatically Capture Uncaught Exceptions

You can log all uncaught exceptions by extending the CI Exception class.

Create a new exception file at application/core/MY_Exceptions.php and add the following content in it:

class MY_Exceptions extends CI_Exceptions
{
    public function show_exception($exception)
    {
        if (class_exists('\Sentry\State\Hub')) {
            \Sentry\captureException($exception);
        }

        return parent::show_exception($exception);
    }
}

This will overwrite the codeigniter exception to log errors in sentry.

Step 5: Test the Integration

To test the integration, add the following code to generate the fake exception:

throw new Exception("Testing Sentry in CI3");

You should see this exception appear in your Sentry dashboard almost immediately.

Pro Tips

  • Use .env files or config variables to store your DSN securely.
  • Configure environments like development, production, staging in the environment key of the config.
  • You can even capture user context (like logged-in user ID or email) with Sentry.

Conclusion

With this setup, your CodeIgniter 3 project is now integrated with Sentry for powerful real-time error tracking. From catching uncaught exceptions to manually logging messages, Sentry gives you the tools you need to debug faster and ship more reliably.

Have questions or need help capturing user context? Drop a comment below!

Implementing JWT Authentication in CodeIgniter 3

Learn how to implement secure JWT authentication in CodeIgniter 3. Step-by-step guide for token generation, validation, and integration.

Securing your mobile API is critical in modern applications. In this guide, we’ll walk through how to implement JWT (JSON Web Token) based authentication in CodeIgniter 3, including access token and refresh token support for long-lived sessions.

Overview of JWT Auth Flow

Here’s the standard flow:

  1. User logs in → server returns an access token and a refresh token.
  2. Mobile app uses the access token in the Authorization header for every request.
  3. When access token expires, the app sends the refresh token to get a new access token.

Prerequisites

  • CodeIgniter 3 installed
  • firebase/php-jwt JWT library via Composer
  • users table for authentication and user_tokens table for refresh tokens

Step 1: Install JWT Library

Use composer to install JWT library as follows:

composer require firebase/php-jwt

Step 2: Create JWT Helper Class

Create a JWT helper class file at application/libraries/Authorization_Token.php and add the following code to it:

use Firebase\JWT\JWT;
use Firebase\JWT\Key;

class Authorization_Token {
    private $CI;
    private $token_key;

    public function __construct() {
        $this->CI =& get_instance();
        $this->token_key = 'YOUR_SECRET_KEY';
    }

    public function generateToken($user_data) {
        $issuedAt = time();
        $expirationTime = $issuedAt + 3600; // 1 hour
        $payload = [
            'iat' => $issuedAt,
            'exp' => $expirationTime,
            'data' => $user_data
        ];
        return JWT::encode($payload, $this->token_key, 'HS256');
    }

    public function validateToken() {
        $headers = apache_request_headers();
        if (!isset($headers['Authorization'])) return false;
        
        $token = str_replace('Bearer ', '', $headers['Authorization']);
        try {
            $decoded = JWT::decode($token, new Key($this->token_key, 'HS256'));
            return (array) $decoded->data;
        } catch (Exception $e) {
            return false;
        }
    }
}

Step 3: Create Login API

Create a user_tokens table for storing refresh tokens.

CREATE TABLE user_tokens (
    id INT AUTO_INCREMENT PRIMARY KEY,
    user_id INT NOT NULL,
    refresh_token VARCHAR(255) NOT NULL,
    expires_at DATETIME NOT NULL,
    created_at DATETIME DEFAULT CURRENT_TIMESTAMP
);

Create a login API file anywhere inside app/controllers folder and add the following content inside it.

class Auth extends CI_Controller {
    public function login_post()
    {
        $email = $this->post('email');
        $password = $this->post('password');

        $user = $this->db->get_where('users', ['email' => $email])->row();

        if (!$user || !password_verify($password, $user->password)) {
            return $this->response(['status' => false, 'message' => 'Invalid credentials'], 401);
        }

        $this->load->library('Authorization_Token', null, 'authToken');
        $access_token = $this->authToken->generateToken(['id' => $user->id, 'email' => $user->email]);

        $refresh_token = bin2hex(random_bytes(64));
        $this->db->insert('user_tokens', [
            'user_id' => $user->id,
            'refresh_token' => $refresh_token,
            'expires_at' => date('Y-m-d H:i:s', strtotime('+30 days'))
        ]);

        return $this->response([
            'status' => true,
            'access_token' => $access_token,
            'refresh_token' => $refresh_token,
        ], 200);
    }
}

Step 4: Protect API Routes

Create a base controller file BaseApi_Controller.php inside app/controllers folder. Add the following code to base controller file.

class BaseApi_Controller extends REST_Controller
{
    public $user_data;

    public function __construct()
    {
        parent::__construct();
        $this->load->library('Authorization_Token', null, 'authToken');
        $user_data = $this->authToken->validateToken();

        if (!$user_data) {
            $this->response([
                'status' => false,
                'message' => 'Access token expired',
                'token_expired' => true
            ], 401);
            exit;
        }

        $this->user_data = $user_data;
    }
}

This file handles token validations for all requests. But, it will not automatically intercept all requests. So, all your secure API files need to extend this BaseApi_Controller.

class Orders extends Authenticated_Controller {
    public function list_get() {
        $user_id = $this->user_data['id'];
        $orders = $this->db->get_where('orders', ['user_id' => $user_id])->result();

        $this->output
            ->set_content_type('application/json')
            ->set_output(json_encode($orders));
    }
}

Step 5: Token Refresh

Create new api file AuthController.php for refresh token and add the following code in it.

class Auth extends CI_Controller {
    public function refresh_token_post()
    {
        $refresh_token = $this->post('refresh_token');

        $token_data = $this->db->get_where('user_tokens', [
            'refresh_token' => $refresh_token
        ])->row();

        if (!$token_data || strtotime($token_data->expires_at) < time()) {
            return $this->response([
                'status' => false,
                'message' => 'Invalid or expired refresh token'
            ], REST_Controller::HTTP_UNAUTHORIZED);
        }

        // Generate new access token
        $this->load->library('Authorization_Token', null, 'authToken');
        $access_token = $this->authToken->generateToken([
            'id' => $token_data->user_id,
            'email' => 'user@email.com' // Fetch if needed
        ]);

        return $this->response([
            'status' => true,
            'access_token' => $access_token,
            'expires_in' => 900
        ], REST_Controller::HTTP_OK);
    }
}

Summary

  • JWT access tokens: short-lived (e.g., 15 minutes)
  • Refresh tokens: long-lived (e.g., 30 days), stored securely
  • On access token expiry: client uses refresh token to get a new one
  • REST_Controller is used to simplify JSON responses in CodeIgniter 3

Final Thoughts

Implementing access and refresh tokens properly ensures secure and scalable mobile API sessions. Using CodeIgniter 3 with JWT and refresh tokens gives you full control over session lifecycle, security, and logout behavior.