Mastering Version Control in Laravel Filament: Build Your Own Rollback System

Learn how to implement a powerful versioning and rollback system in Laravel using Filament. Track model changes, record history, and rollback updates, deletions, or creations with ease.

When working on Filament admin panels, sometimes you need more than Git history, because git is storing only code changes. You may want to track every change to models/resources directly in your application, and even rollback changes to a previous state. For this reason, you should have a versioning system inside your Laravel Filament admin panel.

This guide shows you how to build a database-driven versioning system for Laravel Filament that:

  • Records model/resource changes (create, update, delete)
  • Stores version history in a dedicated table
  • Lets you rollback individual changes from the Filament admin panel

Step 1: Create the versions Table

Start by creating a migration for versions table to store version details of all model histories as follows:

Schema::create('versions', function (Blueprint $table) {
    $table->id();
    $table->string('version');
    $table->string('change_type'); 
    $table->morphs('versionable'); 
    $table->json('previous_values')->nullable();
    $table->json('new_values')->nullable();
    $table->json('changed_attributes')->nullable();
    $table->foreignId('user_id')->nullable()->references('id')->on('users');
    $table->timestamps();
});

Step 2: Define the Version Model

Create a Version model as follows:

class Version extends Model
{
    protected $fillable = [
        'version', 'change_type', 'versionable_type', 'versionable_id',
        'previous_values', 'new_values', 'changed_attributes', 'user_id',
    ];

    protected $casts = [
        'previous_values'    => 'array',
        'new_values'         => 'array',
        'changed_attributes' => 'array',
    ];

    public function versionable(): MorphTo
    {
        return $this->morphTo();
    }

    public function user(): BelongsTo
    {
        return $this->belongsTo(User::class);
    }
}

Step 3: The Versioning Service

A service to manage version creation and rollbacks. It will perform the following operations:

  • Mute mechanism: Prevent logging during rollback operations.
  • Version bumping: Automatically increments patch version numbers.
  • Recording methods:
    • recordCreated() for creations,
    • recordUpdated() for updates,
    • recordDeleted() for deletions.

Rollback logic:

  • Handles three types—model_created, model_updated, model_deleted.
  • Performs the inverse action (e.g. deletes a created record, restores previous values, or recreates a deleted record).
  • Logs the rollback as a new entry with change_type rollback.
class VersioningService
{
    /** @var int depth counter to silence logging while rolling back */
    protected static int $muted = 0;

    public static function muted(): bool
    {
        return self::$muted > 0;
    }

    public static function mute(callable $callback)
    {
        self::$muted++;
        try {
            return $callback();
        } finally {
            self::$muted--;
        }
    }

    public function currentVersion(): string
    {
        return Version::query()->latest('id')->value('version') ?? '0.0.0';
    }

    protected function bumpPatch(string $changeType, Model $model, array $before, array $after, array $changed): Version
    {
        [$major, $minor, $patch] = array_map('intval', explode('.', $this->currentVersion()));
        $patch++;
        $new = implode('.', [$major, $minor, $patch]);

        return Version::create([
            'version'            => $new,
            'change_type'        => $changeType,
            'versionable_type'   => $model::class,
            'versionable_id'     => $model->getKey(),
            'previous_values'    => $before,
            'new_values'         => $after,
            'changed_attributes' => $changed,
            'user_id'            => optional(auth())->id(),
        ]);
    }

    public function recordCreated(Model $model, array $after): void
    {
        if (self::muted()) return;
        $this->bumpPatch('model_created', $model, [], $after, array_keys($after));
    }

    public function recordUpdated(Model $model, array $before, array $after, array $changed): void
    {
        if (self::muted()) return;
        $this->bumpPatch('model_updated', $model, $before, $after, $changed);
    }

    public function recordDeleted(Model $model, array $before): void
    {
        if (self::muted()) return;
        $this->bumpPatch('model_deleted', $model, $before, [], array_keys($before));
    }

    /**
     * Roll back one specific version row by ID.
     * - model_created  -> delete the created row
     * - model_updated  -> restore previous_values
     * - model_deleted  -> recreate from previous_values
     */
    public function rollback(int $versionId): Version
    {
        $v = Version::query()->findOrFail($versionId);

        return DB::transaction(function () use ($v) {
            $modelClass = $v->versionable_type;
            /** @var Model $proto */
            $proto = new $modelClass;

            $rolledBack = self::mute(function () use ($v, $modelClass, $proto) {
                if ($v->change_type === 'model_created') {
                    $this->rollbackCreated($modelClass, $v);
                } elseif ($v->change_type === 'model_updated') {
                    $this->rollbackUpdated($modelClass, $v);
                } elseif ($v->change_type === 'model_deleted') {
                    $this->rollbackDeleted($modelClass, $v);
                } else {
                    // no-op for "rollback" entries or unknown types
                }
            });

            // Log a rollback entry (visible in history)
            return Version::create([
                'version'            => $this->nextPatchAfter($v->version),
                'change_type'        => 'rollback',
                'versionable_type'   => $v->versionable_type,
                'versionable_id'     => $v->versionable_id,
                'previous_values'    => $v->new_values,
                'new_values'         => $v->previous_values,
                'changed_attributes' => $v->changed_attributes,
                'user_id'            => optional(auth())->id(),
            ]);
        });
    }

    protected function rollbackCreated(string $modelClass, Version $v): void
    {
        /** @var Model $modelClass */
        $instance = $modelClass::query()->withoutGlobalScopes()
            ->find($v->versionable_id);

        if ($instance) {
            $instance->forceDelete(); // if soft deletes are used, you might prefer delete()
        }
    }

    protected function rollbackUpdated(string $modelClass, Version $v): void
    {
        /** @var Model $instance */
        $instance = $modelClass::query()->withoutGlobalScopes()
            ->findOrFail($v->versionable_id);

        $prev = $v->previous_values ?? [];
        // Only set attributes that actually exist/fillable
        $fillable = $instance->getFillable();
        $attrs = $fillable ? array_intersect_key($prev, array_flip($fillable)) : $prev;

        // Quiet update to avoid firing observers
        $instance->unguarded(function () use ($instance, $attrs) {
            $instance->fill($attrs);
            $instance->saveQuietly();
        });
    }

    protected function rollbackDeleted(string $modelClass, Version $v): void
    {
        $prev = $v->previous_values ?? [];
        if (empty($prev)) return;

        /** @var Model $model */
        $model = new $modelClass;
        $model->unguarded(function () use ($model, $prev) {
            // keep original primary key if present
            $model->fill($prev);
            // ensure key is set before save
            if (array_key_exists($model->getKeyName(), $prev)) {
                $model->setAttribute($model->getKeyName(), $prev[$model->getKeyName()]);
            }
            $model->saveQuietly();
        });
    }

    protected function nextPatchAfter(string $base): string
    {
        [$M, $m, $p] = array_pad(array_map('intval', explode('.', $base)), 3, 0);
        return implode('.', [$M, $m, $p + 1]);
    }
}

Step 4: The Versionable Trait

Incorporate this trait to any model you want to track (e.g., Post or Category):

  • On deleted: Record deletion with previous values.
  • On updating: Cache “before” state of attributes.
  • On updated: Compare before/after, then record updates.
  • On created: Save the full initial state.
  • On deleting: Cache attributes before deletion.
trait Versionable
{
    // this is a PHP-only property, never touched by Eloquent
    protected array $versioningCache = [];

    public static function bootVersionable(): void
    {
        // Track "before" snapshot only of fields that are dirty
        static::updating(function ($model) {
            $dirty = $model->getDirty(); // fields being changed
            $before = array_intersect_key($model->getOriginal(), $dirty);

            $model->versioningCache['before'] = $before;
        });

        static::updated(function ($model) {
            if (VersioningService::muted()) return;

            $before = $model->versioningCache['before'] ?? [];
            $after  = array_intersect_key($model->getAttributes(), $before); // only changed
            $changed = array_keys($before);

            app(VersioningService::class)->recordUpdated($model, $before, $after, $changed);

            unset($model->versioningCache['before']);
        });

        // For created: store only filled values
        static::created(function ($model) {
            if (VersioningService::muted()) return;

            $after = $model->getAttributes();
            app(VersioningService::class)->recordCreated($model, $after);
        });

        // For deleted: store full row (since everything is removed)
        static::deleting(function ($model) {
            $model->versioningCache['before'] = $model->getAttributes();
        });

        static::deleted(function ($model) {
            if (VersioningService::muted()) return;

            $before = $model->versioningCache['before'] ?? [];
            app(VersioningService::class)->recordDeleted($model, $before);

            unset($model->versioningCache['before']);
        });
    }

    protected static function snapshot($model, bool $useOriginal = false): array
    {
        $arr = $useOriginal ? $model->getOriginal() : $model->getAttributes();

        foreach ($model->getHidden() as $hidden) {
            unset($arr[$hidden]);
        }

        return $arr;
    }
}

Step 5: Create VersionResource

Create a VersionResource to list all versions stored in the database with rollback action as follows:

class VersionResource extends Resource
{
    protected static ?string $model = Version::class;

    protected static ?string $navigationIcon = 'heroicon-o-clock';

    public static function infolist(Infolist $infolist): Infolist
    {
        return $infolist
            ->schema([
                Section::make()
                    ->schema([
                        TextEntry::make('versionable_type')
                            ->label('Model'),
                        TextEntry::make('created_at')
                            ->label('Date')
                            ->dateTime(),
                        TextEntry::make('user.name')
                            ->label('User'),
                    ])
                    ->columns(3),
                Section::make()
                    ->schema([
                        KeyValueEntry::make('previous_values')
                            ->keyLabel('Field'),
                    ]),
                Section::make()
                    ->schema([
                        KeyValueEntry::make('new_values')
                            ->keyLabel('Field'),
                    ])
            ]);
    }

    public static function table(Table $table): Table
    {
        return $table
            ->columns([
                Tables\Columns\TextColumn::make('version')
                    ->searchable(),
                Tables\Columns\TextColumn::make('change_type')
                    ->colors([
                        'success' => 'model_created',
                        'warning' => 'model_updated',
                        'danger'  => 'model_deleted',
                        'gray'    => 'rollback',
                    ])
                    ->searchable(),
                Tables\Columns\TextColumn::make('versionable_type')
                    ->label('Model')
                    ->wrap()
                    ->searchable(),
                Tables\Columns\TextColumn::make('versionable_id')
                    ->label('ID'),
                Tables\Columns\TextColumn::make('user.name'),
                Tables\Columns\TextColumn::make('created_at')
                    ->dateTime()
                    ->sortable(),
            ])
            ->filters([
                //
            ])
            ->actions([
                Tables\Actions\ViewAction::make(),
                Tables\Actions\Action::make('rollback')
                    ->label('Rollback')
                    ->icon('heroicon-o-arrow-uturn-left')
                    ->requiresConfirmation()
                    ->modalHeading('Confirm Rollback')
                    ->modalDescription('This will revert the model to its previous state for this version. No schema/code will be touched.')
                    ->action(function (Version $record) {
                        app(\App\Services\VersioningService::class)->rollback($record->id);
                        \Filament\Notifications\Notification::make()
                            ->title('Rollback completed')
                            ->success()
                            ->send();
                    })
                    ->visible(
                        fn(Version $record) =>
                        in_array($record->change_type, ['model_created', 'model_updated', 'model_deleted'])
                    ),
            ])
            ->defaultSort('created_at', 'desc');
    }

    public static function getRelations(): array
    {
        return [
            //
        ];
    }

    public static function getPages(): array
    {
        return [
            'index' => Pages\ListVersions::route('/'),
        ];
    }
}

On clicking on any version entry, the details will be opened in popup window.

All entries are also contains rollback action, when triggered, it reverts changes and shows a notification like Rollback completed.

Example Workflow

  • Admin updates a model (e.g., a Post).
  • Version record is created capturing changes.
  • Admin clicks “Rollback” in the panel.
  • Model is reverted to its previous state, without altering schema or code.

This system stores only the changed fields, supports create/update/delete, and provides per-version rollback — ideal for auditing, debugging, or restoring data on the admin side.

Conclusion

You can enhance your Filament admin panel by introducing a system that captures and lets you rollback model changes—right within your application, beyond just Git history. You can also use this same system for auditing purpose as well, like when any changes was done and who has done those changes.

This is a very useful and lightweight database-driven versioning system, which can be used for different purpose.

Guide to Integrate FullCalendar in Laravel Filament Widgets

Laravel Filament provides a fantastic administrative panel builder for Laravel applications. When it comes to displaying dynamic events, tasks, or schedules, integrating a robust calendar solution like FullCalendar is a common requirement. This post will guide you through adding FullCalendar to your Laravel Filament widgets, highlighting key configurations and, crucially, providing solutions to common errors you might encounter.

Why FullCalendar in Laravel Filament?

FullCalendar is a versatile JavaScript calendar library that allows you to create interactive and customizable calendars. Integrating it into Filament widgets empowers you to build powerful dashboards for:

  • Event Management: Displaying conferences, webinars, or social events.
  • Task Scheduling: Visualizing project timelines and deadlines.
  • Resource Booking: Showing availability of rooms, equipment, or staff.
  • Appointment Management: For clinics, salons, or service-based businesses.

The easiest way to achieve this integration is by using the excellent saade/filament-fullcalendar plugin.

Prerequisites

  • Laravel v10+ Installed
  • Filament v3+ Installed with Panel builder

Step 1: Installation and Basic Setup

First, ensure you have a Laravel Filament project set up. Then, install the fullcalendar plugin via Composer:

composer require saade/filament-fullcalendar:^3.0

After installation, this plugin needs to be registered in your Filament panel provider, typically app/Providers/Filament/AdminPanelProvider.php:

use Saade\FilamentFullCalendar\FilamentFullCalendarPlugin;
use Filament\Panel;
use Filament\PanelProvider;

class AdminPanelProvider extends PanelProvider
{
    public function panel(Panel $panel): Panel
    {
        return $panel
            // ... other panel configurations
            ->plugins([
                FilamentFullCalendarPlugin::make()
                    // You can add global configurations here, e.g., ->selectable(true)
            ]);
    }
}

Step 2: Implementing the Calendar Widget

Now, generate a new Filament widget for your calendar:

php artisan make:filament-widget CalendarWidget

It will create a file app/Filament/Widgets/CalendarWidget.php. Update this file to extend Saade\FilamentFullCalendar\Widgets\FullCalendarWidget.

namespace App\Filament\Widgets;

use Saade\FilamentFullCalendar\Widgets\FullCalendarWidget;
use Illuminate\Database\Eloquent\Model; // If you're fetching from a model
use App\Models\Event; // Example: Replace with your event model

class CalendarWidget extends FullCalendarWidget
{
    // If you have a dedicated model for events, you can specify it here.
    // This allows for default create/edit/delete actions.
    public Model | string | null $model = Event::class; // Replace 'Event::class' with your actual model

    /**
     * FullCalendar will call this function whenever it needs new event data.
     * This is triggered when the user clicks prev/next or switches views on the calendar.
     *
     * @param array $fetchInfo An array containing 'start', 'end', and 'timezone' for the current view.
     * @return array
     */
    public function fetchEvents(array $fetchInfo): array
    {
        // Example: Fetch events from your 'Event' model within the visible date range
        return Event::query()
            ->where('start_date', '>=', $fetchInfo['start']) // Assuming 'start_date' and 'end_date' columns
            ->where('end_date', '<=', $fetchInfo['end'])
            ->get()
            ->map(fn (Event $event) => [
                'id' => $event->id,
                'title' => $event->name, // Replace with your event title column
                'start' => $event->start_date, // Replace with your event start date column
                'end' => $event->end_date,     // Replace with your event end date column
                // You can add more FullCalendar event properties here
                // 'url' => EventResource::getUrl(name: 'view', parameters: ['record' => $event]),
                // 'shouldOpenUrlInNewTab' => true,
                // 'color' => '#f00',
            ])
            ->toArray();
    }

    /**
     * You can customize FullCalendar options by overriding the config method.
     */
    public function config(): array
    {
        return [
            'initialView' => 'dayGridMonth',
            'headerToolbar' => [
                'left' => 'prev,next today',
                'center' => 'title',
                'right' => 'dayGridMonth,timeGridWeek,timeGridDay',
            ],
            // ... more FullCalendar options
            // 'editable' => true, // Enable dragging and resizing if your model allows
            // 'selectable' => true, // Enable date selection to create new events
        ];
    }
}

Key Components:

  • $model Property: Crucial for the plugin’s built-in actions (create, edit, view, delete) to understand which database model your events belong to.
use App\Models\Event; // Make sure your Event model exists

class CalendarWidget extends FullCalendarWidget
{
    public Model | string | null $model = Event::class;
    // ...
}
  • fetchEvents(array $fetchInfo): This method is called by FullCalendar to retrieve event data for the currently displayed date range. You should query your database and return an array of event objects, each with at least id, title, start, and end properties.
public function fetchEvents(array $fetchInfo): array
{
    return Event::query()
        ->where('start_date', '>=', $fetchInfo['start'])
        ->where('end_date', '<=', $fetchInfo['end'])
        ->get()
        ->map(fn (Event $event) => [
            'id' => $event->id,
            'title' => $event->name,
            'start' => $event->start_date,
            'end' => $event->end_date,
            // Add more properties like 'color', 'classNames', 'url' etc.
        ])
        ->toArray();
}
  • config(): array: This method is where you configure all of FullCalendar’s JavaScript options for your specific widget instance (e.g., initial view, toolbar buttons, event display format, etc.).
public function config(): array
{
    return [
        'initialView' => 'dayGridMonth',
        'headerToolbar' => [
            'left' => 'prev,next today',
            'center' => 'title',
            'right' => 'dayGridMonth,timeGridWeek,timeGridDay',
        ],
        // 'selectable' => true, // Allows clicking/dragging to select dates
        // 'editable' => true,   // Allows dragging/resizing events
        // ... many more FullCalendar options
    ];
}

Step 3: Final Touches

Add the Widget: Ensure your CalendarWidget::class is listed in the widgets options of your app/Providers/Filament/AdminPanelProvider.php to display it on the dashboard.

use App\Filament\Widgets\CalendarWidget;
use Saade\FilamentFullCalendar\FilamentFullCalendarPlugin;
use Filament\Panel;
use Filament\PanelProvider;

class AdminPanelProvider extends PanelProvider
{
    public function panel(Panel $panel): Panel
    {
        return $panel
            // ... other panel configurations
            ->widgets([
                CalendarWidget::class, // add your calendar widget class here
            ])
            ->plugins([
                FilamentFullCalendarPlugin::make()
                    // You can add global configurations here, e.g., ->selectable(true)
            ]);
    }
}

Composer Autoload & Cache: After any class changes or file movements, always run the following commands:

composer dump-autoload
php artisan optimize:clear
php artisan filament:clear-cached-components # Useful for Filament-specific cache

Verify Data: Use dd() liberally in your fetchEvents() and mountUsing() methods to inspect the data being passed, especially id values, to ensure they match your database primary keys. So, you can extend the development to open event view panel on any event click.

Conclusion

By following these steps, you can successfully integrate and customize FullCalendar within your FilamentPHP widgets, creating a powerful and interactive event management dashboard. For more advanced configurations, always refer to the official FullCalendar documentation
and the saade/filament-fullcalendar plugin’s GitHub repository.

Get Row Level Difference Between Two Tables in MySQL

Learn how to compare two MySQL tables row-by-row using JOINs and dynamic SQL to identify field-level differences efficiently.

To check row level differences between two records from two different tables in MySQL, where you want to see which fields have changed, follow these steps:

Using JOIN with CASE to Identify Row Level Differences in MySQL

You can compare each column individually to check row level difference and mark which ones have changed using this MySQL query.

SELECT
a.id,
CASE WHEN a.column1 = b.column1 THEN 'No Change' ELSE 'Changed' END AS column1_diff,
CASE WHEN a.column2 = b.column2 THEN 'No Change' ELSE 'Changed' END AS column2_diff,
CASE WHEN a.column3 = b.column3 THEN 'No Change' ELSE 'Changed' END AS column3_diff
FROM table1 a
JOIN table2 b ON a.id = b.id;

You can add as many columns as you want.

What this does:

  • Compares each field individually.
  • Marks "Changed" if different, otherwise "No Change".

Want to learn more about MySQL? Get MySQL book from https://amzn.to/45JXmH0

Dynamic Query for Large Tables

If you have many columns and don’t want to manually compare each, you can generate a query dynamically using MySQL Information Schema:

SELECT CONCAT(
'SELECT id, ',
GROUP_CONCAT(
'CASE WHEN t1.', COLUMN_NAME, ' <> t2.', COLUMN_NAME,
' THEN "', COLUMN_NAME, ' changed" ELSE "No Change" END AS ', COLUMN_NAME SEPARATOR ', '
),
' FROM table1 t1 JOIN table2 t2 ON t1.id = t2.id'
) AS query_text
FROM INFORMATION_SCHEMA.COLUMNS
WHERE TABLE_NAME = 'table1' AND COLUMN_NAME != 'id';

This will generate a query that automatically checks differences for all columns. Execute the generated query and you will get the differences, where all cells are marked with "Changed" or "No Change".

Conclusion

These queries can help you identify difference between two tables cell by cell. It can be useful in many ways and reduce your so much time to identify a small difference in large data.

Do you stuck with any such problem? You can write me in the comments.

Disclaimer: This post contains affiliate links. If you use these links to buy something, I may earn a commission at no extra cost to you.

Top 7 Lightweight Linux Distros for Old PCs (2025)

Looking for the best Linux distro for an old PCs? Discover 7 lightweight Linux distributions perfect for reviving aging hardware in 2025.

Lightweight linux distros are popular due to number of benefits it offers. But, which could be the best choice for your old PC and run smoother with your old PC configuration?

In this blog, we’ll discuss various aspects of lightweight distros, some of the top lightwight linux distros and use cases and applications, which can help you to choose best for your old PC.

Why Use a Lightweight Linux Distro?

Lightweight linux distros offers flexibility, efficiency and versatility with minimum resources. Here are few points to consider,

Performance benefits for old hardware

These distributions are often used for reviving older hardware or make your older PC live again because it provides very good performance even on older hardwares.

Power efficiency and minimal resource usage

These distributions require very less resources like they can run on 512MB of RAM on Pentium II processor. Their power consumption is also very low compared to modern distros.

In this blog, we will discuss top 7 lightweight distros for old PCs in 2025. Here is the overview of these distros.

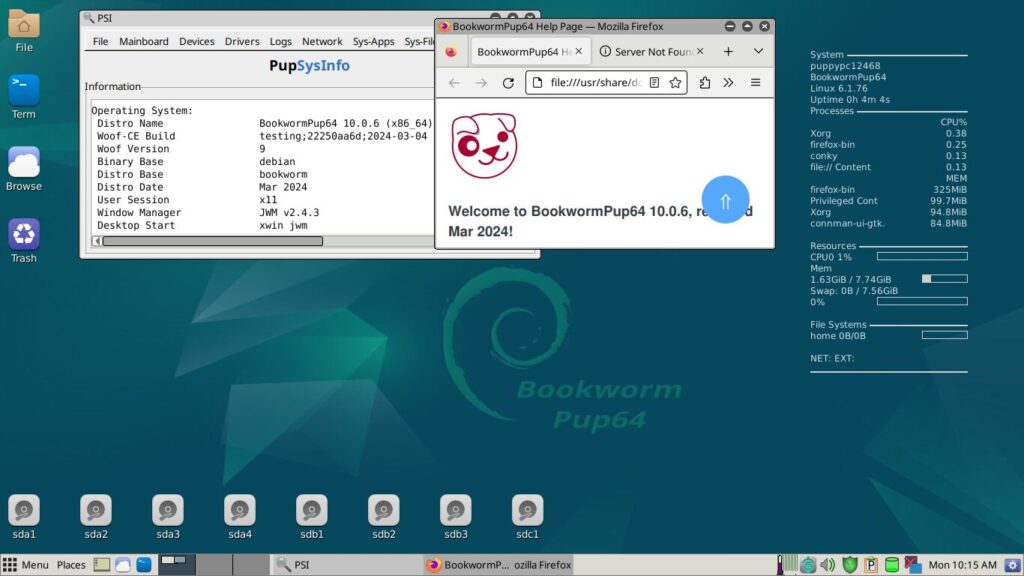
Puppy Linux

Puppy Linux is a unique family of Linux distributions specifically meant for the personal computers created by Barry Kauler in 2003.

It has some unique advantages as follows,

  1. Ready to use: all commonly used tools are already included. So, you can start right after installing it.
  2. Ease of use: lots of helps & hints are included to make it easy to use for even a beginner.
  3. Relatively small size: It will take typically 500 MB or less.
  4. Fast and versatile.
  5. Customisable within minutes: You can make all your customizations and save them as remasters. So, whenever you want to reset your PC, you can use that remaster with all your configurations intact.
  6. Different flavours: It is optimised to support both older & newer computers.
  7. Variety: It has hundreds of derivatives called them as “puplets”, one of which will surely meet your needs.

You can download and try the Puppy Linux from https://puppylinux-woof-ce.github.io/index.html

What to upgrade your Old PC? Install SSD for the better performance: https://amzn.to/45eWAl8

Lubuntu

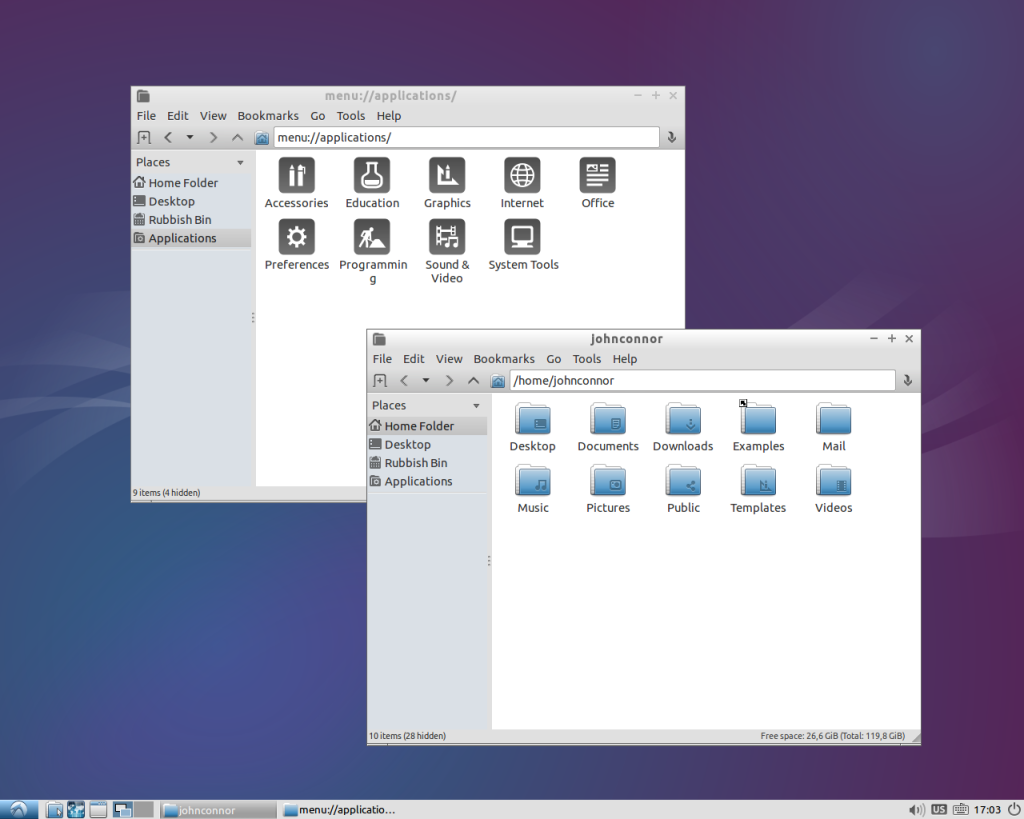
Lubuntu is a fast and lightweight operating system built on Linux system with a clean and easy-to-use UI/UX. It required very low hardware resources, because it uses the minimal desktop LXDE/LXQT, and a selection of light applications. Lubuntu was founded by Mario Behling and has been grown for many years by Julien Lavergne.

You can use Lubuntu operating system for the your latest systems as well as for lower resource computers and older systems.

You can download Lubuntu from https://lubuntu.net/

Linux Lite

Linux Lite is free operating system for everyone. It is easy to use, and suitable for beginner users Linux as it offers a lot of beginner friendly documentation. Due to it’s low requirement of resources, it is also famous amongs the people who want a lightweight environment that is also fully functional. This distribution is easy to set up and use. It provides a great balance of speed, user friendliness, features and stability. Linux Lite was created to make the transition from Windows to a linux based operating system, as smooth as possible.

To install Linux Lite operating system, download the copy from https://www.linuxliteos.com/download.php

antiX

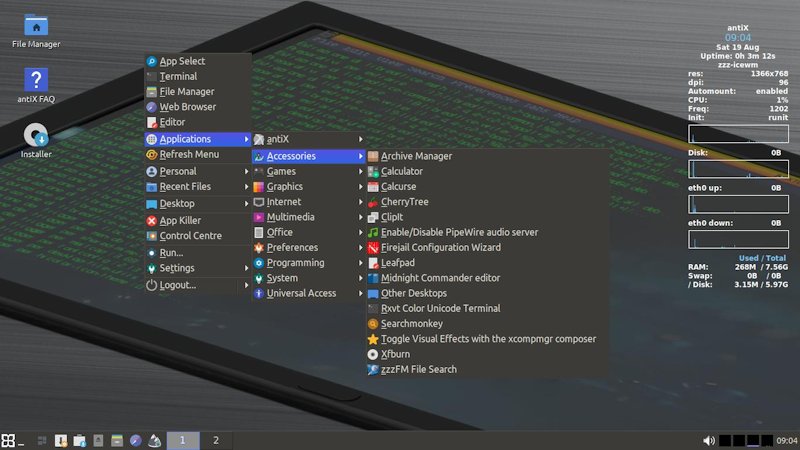
antiX is a fast, lightweight and easy to install systemd-free linux distribution. It is based on Debian Stable for Intel-AMD x86 compatible systems. antiX offers users an environment suitable for old as well as new computers. So don’t throw away that old computer yet!

The goal of antiX is to provide a lightweight, but fully functional and flexible free operating system, which can be useful for both beginners and experienced users of Linux. It can run on any old PC with as low as 256MB RAM with pre-configured swap. 512MB RAM is the recommended minimum requirement for antiX and installation to hard drive requires a minimum 7.0GB hard disk space.

antiX is available in 64 bit (computers built in the last 10 years) or 32 bit (very old computers or newer machines but be aware that a lot of software no longer provides 32 bit versions).

Download the different flavours of antiX from https://antixlinux.com/download/

Bodhi Linux

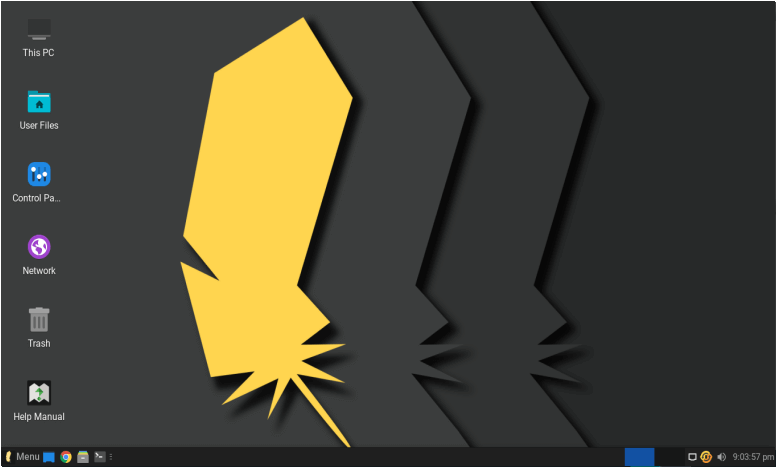
Bodhi Linux 7.0.0 is the lightweight Linux Distribution built on top of Ubuntu LTS (22.04) featuring the Moksha Desktop. It is known for minimalism, resource efficiency, and user choice. The team behind Bodhi Linux works to make the distribution as lean as possible and believes that the end-user should be able to choose the applications that they want rather than have a bunch of pre-installed applications that are unnecessary or unwanted.

The minimum system requirements are as follows,

  • 32bit, 500MHz Processor (including Non-PAE)
  • 512MB of RAM
  • 5GB of drive space

And recommended system requirements are as follows,

  • 64bit, 1.0GHz processor
  • 768MB of RAM
  • 10GB of drive space

Download the Bodhi Linux with Moksha Desktop from https://www.bodhilinux.com/download/

Budget DELL laptop under 30k. https://amzn.to/4k5yFJN

MX Linux

MX Linux has different flavours for different type of requirements.

  • MX Linux – KDE, which provides wide range of advanced applications and require high resources. It can run on newer 64-bit computers.
  • MX Linux – XFCE, which requires mid-weight resource, but it can run on older PCs as well as newer 64-bit computers.
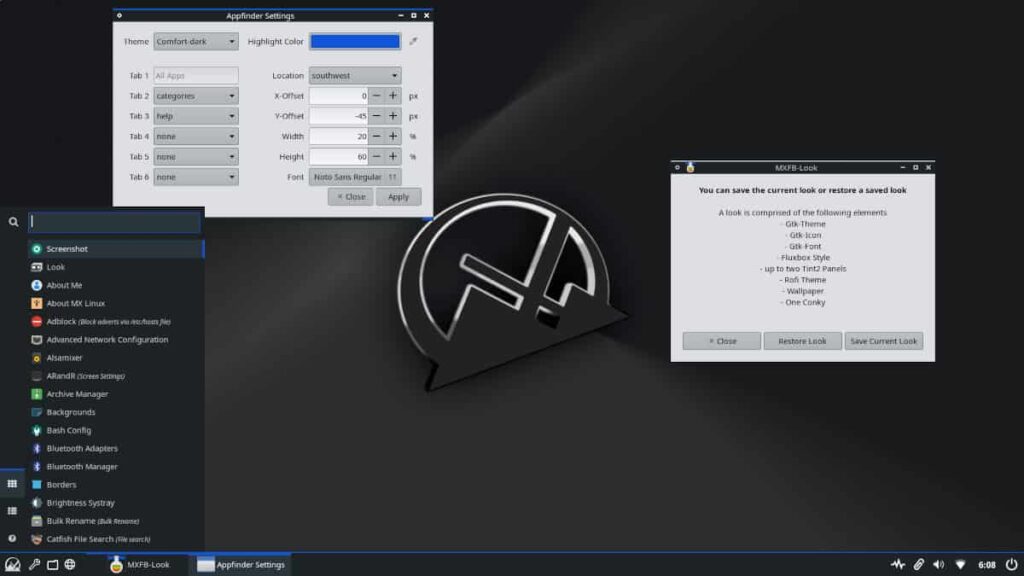
  • MX Linux – Fluxbox, which reauires light weight resources and can run on any older PC as well as newer computers.

The MX Linux – Fluxbox can provide high speed performance using low resources. It is lightweight and fully functional system that has many unique features:

  • Extended hardware support by virtue of low graphical requirements.
  • Restricted base default package set gives the user easy control over components.
  • Many unique apps ease and enliven user experience.
  • Native dock and icon management tools join the tint2 panel for desktop customization.

Download various MX Linux flavours from https://mxlinux.org/download-links/

Tiny Core Linux

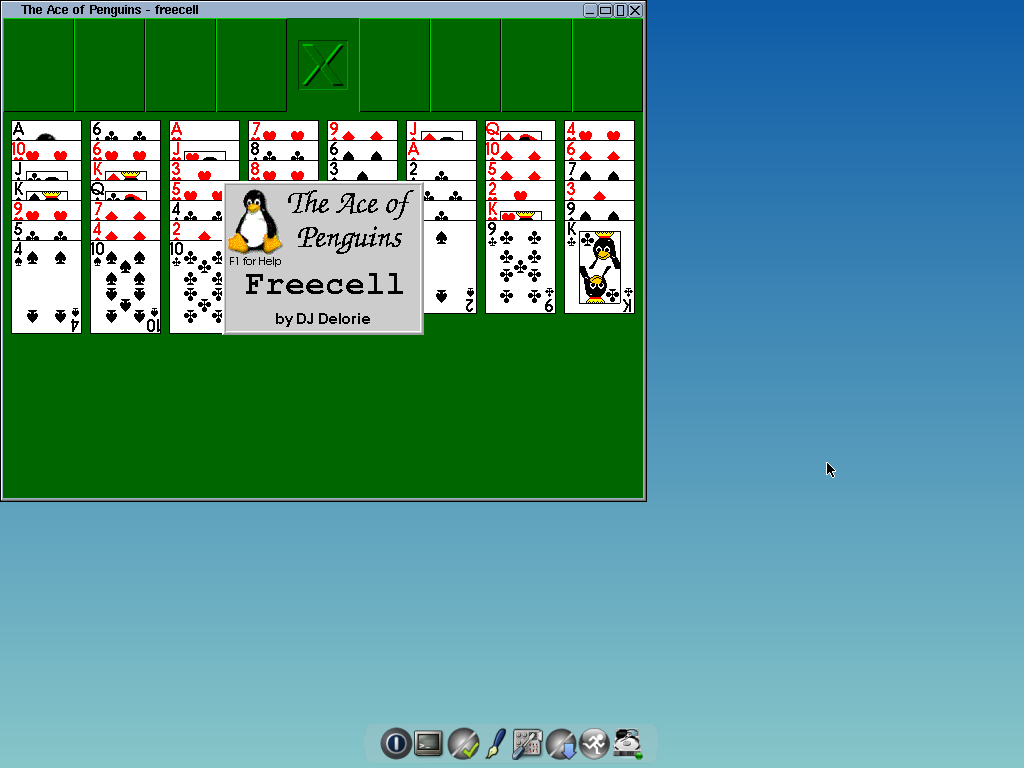
Tiny Core is designed to run from a RAM copy created at boot time. Besides being fast, this protects system files from changes and ensures a pristine system on every reboot.

Very Small. It required 10MB of RAM, which is 1/400 to 1/100 the size. So, It is flexible enough to be stored and run from usb sticks, a full CD, or even embedded devices.

Linux. Tiny Core uses the Linux Kernel and a set of command-line (text interface) tools including busybox.

A GUI Desktop. Tiny Core has a flexible and fully-customizable Graphical User Interface Desktop. You can also quickly install and try out a variety of other desktops and interfaces.

Unusually Stable. Tiny Core uses program ‘extensions’ to avoid damage to the system files. These extensions are re-prepared at each reboot … and they are prepared fast.

Unusually Fast. Unlike most operating systems, the Tiny Core can run completely from RAM. Tiny Core can run in 48 megabytes of RAM … or less.

Internet ready. Tiny Core almost always finds your network card right away. You’ll be adding applications and tools after an unusually quick boot.

Available even smaller. Linophiles that get things done without a GUI can get the MicroCore, a version of Tiny Core without X that is under 7 MB.

An open source community. Tiny Core is under active community development, led by a team of really dedicated people.

Download the most lightweight and fast Linux Distro from http://www.tinycorelinux.net/downloads.html

Final Thoughts + My Recommendation

We have discussed top 7 lightweight linux distros, you can use for your older PC to make them alive again. All of them are unique with their different set of advantages and it is difficult to choose anyone randomly. So, my suggestion is to check all the linux distros and their recommonded requirements to run. Compare these requirements with your computer requirement and choose accordingly. I installed Bodhi Linux for my 10 years old laptop and it is running very smoothly.

Frequently Asked Questions (FAQ)

What is the lightest Linux distro for old PCs?

Tiny Core Linux is one of the lightest Linux distros, with an ISO under 20MB and minimal system requirements.

Can I use Linux on a PC with 1GB RAM?

Yes, distros like Puppy Linux, antiX, and Lubuntu are designed to run smoothly on systems with as little as 512MB–1GB of RAM.

Is Linux better than Windows for old PCs?

Yes, Linux is often more efficient and secure for older hardware compared to Windows, especially when using lightweight distros.

Disclaimer: This post contains affiliate links. If you use these links to buy something, I may earn a commission at no extra cost to you.

Install the Laravel Filament Panel Builder

Learn to install and set up Laravel Filament, a tool for creating customizable admin panels and CRUD applications. This guide covers requirements, installation steps, and user creation. Follow this concise tutorial to get started with Filament in your Laravel project quickly and efficiently.

Laravel Filament is a powerful tool designed to create Admin panels and manage content in Laravel applications. It provides a highly customizable and developer-friendly interface for creating CRUD applications, dashboards, and various business-related applications. Filament is known for its flexibility and ease of use, allowing developers to scaffold forms, tables and pages quickly without writing a lot of boilerplate code.

This article describes the installation process filament panel over laravel with most of the possible configations and steps.

Requirements

Install and configure the following components, before running any filament command.

  • PHP v8.1+
  • Laravel v10.0+
  • Livewire v3.0+ (Filament composer command will install this package automatically. So, no need to install this package separately.)

Install Laravel Filament Panel

To install the filament panel over laravel, run the following command at the root of the project folder,

composer require filament/filament:"^3.2" -W

This command will install the base package of filament. This will also install livewire package, which is in the requirements.

php artisan filament:install --panels

This command will install the filament panel after some information required to install the panels. It will ask the following questions,

What is the ID?

On the basis of this ID, it will create the panel provide for the filament panel and also register this panel provider.

For Example:
If ID is admin, it will create the panel provide to he following location, app/Providers/Filament/AdminPanelProvider.php

If you encounter an error when accessing your panel, ensure that the service provider is registered in bootstrap/providers.php (for Laravel 11 and above) or config/app.php (for Laravel 10 and below). If it isn’t, you’ll need to add it manually.

Create a User

Next step is creating a user to access this panel. But, before running the create user command, check the following laravel configuration and update the configuration as per the requirements,

  • Add Database credentials to .env file.
  • Run the following command to run the migration. It will create users table into the database.
    php artisan migrate

Run the following command to create a user after checking above requirements,

php artisan make:filament-user

It will ask some basic questions like name, email, password, etc. for creating a user.

After creating a user, run php artisan serve, open http://127.0.0.1:8000/admin in your web browser, sign in using the created user credentials, and start building your app!