
If you’ve ever had to manually create backups of your MySQL database for your Laravel project, you know how tedious and error-prone it can be. With a growing application, database sizes can balloon quickly, making manual backups a chore that’s easy to neglect. Before long, you’re facing the nightmare scenario of corrupted data or lost functionality.
You’ll build an automated system that takes care of MySQL backups for you, effortlessly running daily backups without requiring your intervention. Specifically, by the end of this tutorial, you’ll have set up GitHub Actions to run a backup script in Laravel and configured cron jobs to automate the process, ensuring your database is always safe and up-to-date.
Setting up a MySQL Database on a Local Environment
To get started with automating MySQL backups using GitHub Actions, we first need to set up a local environment for our database. I’ll be using XAMPP as my local development stack, but you can use any other setup like MAMP or Laravel Homestead.
First, download and install XAMPP from the official website: https://www.apachefriends.org/en/xampp.html. Follow the installation instructions for your operating system.
Once installed, start the MySQL module from the XAMPP Control Panel, then open a terminal (or click the “Shell” button in the XAMPP Control Panel) and connect to MySQL with the following command:
mysql -u root -pThis will open the MySQL command-line interface. Create a new database with the following SQL query:
CREATE DATABASE laravel_backup;Create a user for our Laravel project and grant privileges to this database:
CREATE USER 'laravel_user'@'%' IDENTIFIED BY 'password';
GRANT ALL PRIVILEGES ON laravel_backup.* TO 'laravel_user'@'%';
FLUSH PRIVILEGES;
Note down the username, password, and database name as we’ll need these later for our Laravel project.
Creating a GitHub Repository for Your Laravel Project
Now that you have your local environment set up with a MySQL database and your Laravel project ready to go, it’s time to create a GitHub repository for your application.
First, log in to your GitHub account and click on the “+” button in the top-right corner of the dashboard. Select “New repository” from the dropdown menu. Fill in the required information:
- Repository name: Give your repository a unique name that reflects your project’s identity.
- Description: Provide a brief description of what your project does.
- Public/Private: Choose whether you want to make your repository public or private.
The same form also offers an “Add a README file” checkbox. Since you’ll be pushing an existing Laravel project (which already contains a README), leave it unchecked so the new repository starts empty. Once you’ve filled out this information, click “Create repository.”
Next, navigate to your project directory in the terminal and, if it isn’t a Git repository yet, run git init. Then run git add . followed by git commit -m "Initial commit" to stage all changes and commit them to your local repository. Then, run git branch -M main to rename your default branch from “master” to “main.” Finally, run git remote add origin https://github.com/your-username/repository-name.git followed by git push -u origin main to link your local repository with the one you just created on GitHub.
# Replace 'your-username' and 'repository-name' with your actual GitHub username and repository name.
$ git init
$ git add .
$ git commit -m "Initial commit"
$ git branch -M main
$ git remote add origin https://github.com/your-username/repository-name.git
$ git push -u origin main
With these steps complete, you now have a GitHub repository set up for your Laravel project.
Defining a Backup Script in Laravel
To automate our MySQL backups, we need to create a script that will dump our database and store it safely somewhere. We’ll do this by creating a new artisan command in our Laravel project.
Create a new file called BackupDatabase.php in the app/Console/Commands directory of your project:
// app/Console/Commands/BackupDatabase.php

namespace App\Console\Commands;

use Illuminate\Console\Command;
use Illuminate\Support\Facades\Process;
use Illuminate\Support\Facades\Storage;

class BackupDatabase extends Command
{
    /**
     * The name and signature of the console command.
     *
     * @var string
     */
    protected $signature = 'backup:database';

    /**
     * The console command description.
     *
     * @var string
     */
    protected $description = 'Backup database to storage';

    public function handle(): int
    {
        $connection = config('database.connections.mysql');

        // Get the dump of our database by running the mysqldump binary
        $result = Process::timeout(300)
            ->env(['MYSQL_PWD' => $connection['password']])
            ->run(sprintf(
                'mysqldump --single-transaction --host=%s --port=%s --user=%s %s',
                escapeshellarg($connection['host']),
                escapeshellarg((string) $connection['port']),
                escapeshellarg($connection['username']),
                escapeshellarg($connection['database'])
            ));

        if ($result->failed()) {
            $this->error($result->errorOutput());

            return self::FAILURE;
        }

        // Compress the dump and store it in our storage directory
        $path = config('backup.storage.directory') . '/mysql_' . now()->format('Ymd_His') . '.sql.gz';

        Storage::disk(config('backup.storage.disk'))->put($path, gzencode($result->output()));

        $this->info("Backup stored at {$path}");

        return self::SUCCESS;
    }
}
This script reads the credentials of our MySQL connection from Laravel’s database configuration and uses Laravel’s built-in Process facade to run the mysqldump command, which dumps our database into a string. The password is passed through the MYSQL_PWD environment variable so it doesn’t appear in the process list. Finally, we gzip this dump and store it in our storage directory with a timestamped filename. The mysqldump client must be installed on any machine that runs this command.
Make sure to configure your storage disk in your .env file, and add the following code to a new config/backup.php file:
// config/backup.php

return [
    'storage' => [
        'disk' => env('BACKUP_DISK', 'local'),
        'directory' => 'backup',
    ],
];
We’ll use this script in the next section to set up a GitHub Action that runs our backup command automatically.
Configuring GitHub Actions to Run the Backup Script
Now that our backup script is defined in Laravel, it’s time to configure GitHub Actions to run this script on each push to the repository. This will ensure our database backups are always up-to-date.
First, navigate to your project’s GitHub repository and create a new file in the .github/workflows directory named backup.yml. The contents of this file should be as follows:
name: Backup

on:
  push:
    branches:
      - main

jobs:
  backup:
    runs-on: ubuntu-latest
    steps:
      - name: Checkout code
        uses: actions/checkout@v7

      - name: Set up PHP
        uses: shivammathur/setup-php@v2
        with:
          php-version: '8.2'

      - name: Install dependencies
        run: composer install --no-interaction --prefer-dist --no-progress

      - name: Prepare environment
        run: |
          cp .env.example .env
          php artisan key:generate

      - name: Run backup script
        env:
          DB_CONNECTION: mysql
          DB_HOST: ${{ secrets.DB_HOST }}
          DB_PORT: ${{ secrets.DB_PORT }}
          DB_DATABASE: ${{ secrets.DB_DATABASE }}
          DB_USERNAME: ${{ secrets.DB_USERNAME }}
          DB_PASSWORD: ${{ secrets.DB_PASSWORD }}
        run: php artisan backup:database

      - name: Encrypt backup file
        env:
          BACKUP_PASSPHRASE: ${{ secrets.BACKUP_PASSPHRASE }}
        run: |
          for file in $(find storage/app -name '*.sql.gz'); do
            echo "$BACKUP_PASSPHRASE" | gpg --batch --yes --pinentry-mode loopback --passphrase-fd 0 \
              --symmetric --cipher-algo AES256 --output "$file.gpg" "$file"
            rm "$file"
          done

      - name: Upload backup file
        uses: actions/upload-artifact@v7
        with:
          name: mysql-backup
          path: storage/app/**/*.sql.gz.gpg
          retention-days: 7
In this YAML file, we’ve defined a job named backup that will be triggered on each push to the main branch. This job checks out our code using the actions/checkout action, installs PHP and the Composer dependencies, and then runs our backup:database Artisan command using the run command. Because the runner is discarded when the job finishes, the last two steps encrypt the generated .sql.gz file with GPG and use actions/upload-artifact to keep it, so you can download it from the workflow run’s summary page.
Don’t skip the encryption step. Workflow artifacts can be downloaded by anyone with read access to the repository — on a public repository, that means anyone at all — so an unencrypted dump would expose your entire database. Add a long, random BACKUP_PASSPHRASE secret, and decrypt a downloaded backup with gpg --decrypt mysql-backup.sql.gz.gpg > mysql-backup.sql.gz. The artifact is kept for seven days; for long-term storage, use the S3 disk described in the production section below.
Note that we’re also using environment variables here to store sensitive database credentials and the backup passphrase as secrets in GitHub. Make sure you’ve already set these up in your repository settings under Settings > Secrets and variables > Actions, and that your database server accepts connections from GitHub’s runners (a database running only on your local machine won’t be reachable).
With this workflow file in place, GitHub Actions will now automatically run our backup script on each push to the repository, ensuring our database backups are always up-to-date and easily recoverable if needed.
Automating Daily Backups with Cron Jobs and GitHub Actions
Now that we have a working backup script in place, let’s automate it to run daily using cron jobs and GitHub Actions.
Step 1: Add a Cron Job
In your Laravel project, open the routes/console.php file, where Laravel 11 defines scheduled tasks. We’ll add our backup command to the schedule:
// routes/console.php

use Illuminate\Support\Facades\Schedule;

Schedule::command('backup:database')->dailyAt('02:00');
This will run our backup script at 2 AM every day. Laravel’s scheduler itself is triggered by a single cron entry on your server, which you can add with crontab -e:
* * * * * cd /path-to-your-project && php artisan schedule:run >> /dev/null 2>&1Step 2: Configure GitHub Actions
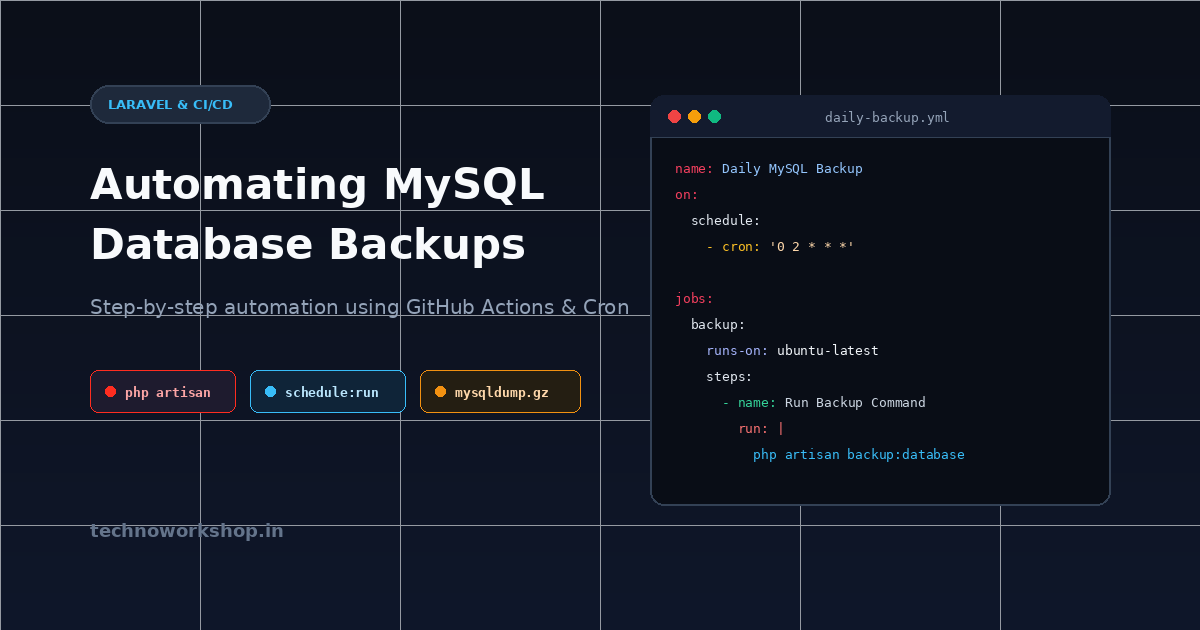
If you’d rather not depend on a server cron entry, GitHub Actions can run the backup on a schedule as well. In your project’s .github/workflows directory, create a new file named daily-backup.yml. We’ll define a workflow that runs the backup command daily:
# .github/workflows/daily-backup.yml

name: Daily Backup
on:
  schedule:
    - cron: '0 2 * * *'
  workflow_dispatch:
jobs:
  backup:
    runs-on: ubuntu-latest
    steps:
      - name: Checkout code
        uses: actions/checkout@v7

      - name: Set up PHP
        uses: shivammathur/setup-php@v2
        with:
          php-version: '8.2'

      - name: Install dependencies
        run: composer install --no-interaction --prefer-dist --no-progress

      - name: Prepare environment
        run: |
          cp .env.example .env
          php artisan key:generate

      - name: Run backup script
        env:
          DB_CONNECTION: mysql
          DB_HOST: ${{ secrets.DB_HOST }}
          DB_PORT: ${{ secrets.DB_PORT }}
          DB_DATABASE: ${{ secrets.DB_DATABASE }}
          DB_USERNAME: ${{ secrets.DB_USERNAME }}
          DB_PASSWORD: ${{ secrets.DB_PASSWORD }}
        run: php artisan backup:database

      - name: Encrypt backup file
        env:
          BACKUP_PASSPHRASE: ${{ secrets.BACKUP_PASSPHRASE }}
        run: |
          for file in $(find storage/app -name '*.sql.gz'); do
            echo "$BACKUP_PASSPHRASE" | gpg --batch --yes --pinentry-mode loopback --passphrase-fd 0 \
              --symmetric --cipher-algo AES256 --output "$file.gpg" "$file"
            rm "$file"
          done

      - name: Upload backup file
        uses: actions/upload-artifact@v7
        with:
          name: mysql-backup
          path: storage/app/**/*.sql.gz.gpg
          retention-days: 7
This workflow uses the schedule trigger to run at 2 AM (UTC) every day. Scheduled workflows only run from the repository’s default branch, and the workflow_dispatch trigger lets you start a run manually from the Actions tab.
Step 3: Test Your Daily Backup
Save and commit your changes. GitHub Actions will automatically pick up the new workflow configuration. You can verify the backup job runs successfully by opening the run in your repository’s Actions tab and checking the step logs for any errors. For scheduled runs on your server, check the storage/logs/laravel.log file.
Testing and Validating Your Automated MySQL Backups
To ensure that your automated MySQL backups are working as expected, it’s essential to test and validate them regularly. Create a new file in the tests/Unit directory of your Laravel project, e.g., BackupTest.php.
// tests/Unit/BackupTest.php

namespace Tests\Unit;

use Tests\TestCase;
use Illuminate\Support\Facades\Process;
use Illuminate\Support\Facades\Storage;

class BackupTest extends TestCase
{
    public function test_backup_successfully_created()
    {
        Storage::fake('local');
        config(['backup.storage.disk' => 'local']);

        // Fake the mysqldump output so the test doesn't need a live MySQL server
        Process::fake([
            '*' => Process::result(output: '-- MySQL dump'),
        ]);

        // Run the backup script manually to create a backup file
        $this->artisan('backup:database')->assertSuccessful();

        // Verify that the backup file exists and is not empty
        $files = Storage::disk('local')->files('backup');
        $this->assertCount(1, $files);
        $this->assertGreaterThan(0, Storage::disk('local')->size($files[0]));
    }
}
Run the test using php artisan test in your terminal. The test should pass if the backup script creates a non-empty backup file successfully.
Additionally, you can also use tools like mysqldump to manually dump your database and compare it with the automated backup. You can also verify the integrity of the backups by checking the MD5 checksum or verifying that the backup can be restored correctly using the mysql command-line tool.
This will give you confidence in your automated MySQL backup system, ensuring that it’s working as expected even when it’s not visible to you. By testing and validating your backups regularly, you’ll catch any issues before they become critical problems.
Deploying Your Automated Backup System to Production
Once you have your automated backup system working on your local environment and GitHub repository, it’s time to deploy it to production.
Assuming you’re using a cloud platform like AWS or DigitalOcean for your Laravel application, the deployment process is relatively straightforward. In this example, we’ll use an AWS EC2 instance with a MySQL database. Update your hosts file to point to the IP address of your EC2 instance and configure your Laravel project’s environment settings accordingly.
To automate the backup deployment on production, you can create another GitHub Actions workflow that connects to your EC2 instance over SSH and pulls the latest code, including the backup:database command. Database credentials stay in the server’s own .env file and never pass through the workflow, ensuring seamless integration with your automated backup system.
# .github/workflows/deploy-production.yml
name: Deploy Production

on:
  push:
    branches:
      - main

jobs:
  deploy:
    runs-on: ubuntu-latest

    steps:
      - name: Deploy backup script to EC2
        env:
          SSH_PRIVATE_KEY: ${{ secrets.EC2_SSH_KEY }}
          EC2_HOST: ${{ secrets.EC2_HOST }}
          EC2_USER: ${{ secrets.EC2_USER }}
        run: |
          mkdir -p ~/.ssh
          echo "$SSH_PRIVATE_KEY" > ~/.ssh/id_ed25519
          chmod 600 ~/.ssh/id_ed25519
          ssh -o StrictHostKeyChecking=accept-new "$EC2_USER@$EC2_HOST" \
            'cd /var/www/laravel && git pull origin main && composer install --no-dev --optimize-autoloader && php artisan config:cache'
Remember to add the EC2_SSH_KEY, EC2_HOST and EC2_USER secrets and to update the /var/www/laravel path according to your server setup. To keep production backups off the server itself, install the S3 Flysystem adapter with composer require league/flysystem-aws-s3-v3 "^3.0", fill in the AWS_* variables and set BACKUP_DISK=s3 in the server’s .env file. Together with the cron entry for php artisan schedule:run, this ensures your automated backup system is up and running.
With this final step, you now have a fully automated MySQL backup system that runs daily on both your local environment and production server.
Frequently Asked Questions
How do I set up a local environment for my MySQL database?
To get started, download and install XAMPP from the official website. Follow the installation instructions for your operating system, then start MySQL from the XAMPP Control Panel, connect with mysql -u root -p from a terminal (or the Control Panel’s Shell), and create a new database.
What is the difference between using GitHub Actions to automate MySQL backups and setting up cron jobs manually?
Both methods can be used to automate MySQL backups, but GitHub Actions provides a more streamlined and automated process. With GitHub Actions, you can integrate your backup script directly into your repository’s workflow, making it easier to manage and maintain.
I’m getting an error saying ‘mysql’ is not recognized as an internal or external command. What should I do?
This error typically occurs when the MySQL executable is not in your system’s PATH environment variable. Try running the mysql command with its full path, such as C:\xampp\mysql\bin\mysql.exe (for Windows), /opt/lampp/bin/mysql (for Linux) or /Applications/XAMPP/xamppfiles/bin/mysql (for Mac).
Can I use a different local development stack instead of XAMPP?
Yes, you can use any other setup like MAMP or Laravel Homestead. Just follow the installation instructions for your chosen environment and create a new MySQL database accordingly.
How do I configure cron jobs to automate the backup process?
Register the backup command with Laravel’s scheduler in routes/console.php (for example, Schedule::command('backup:database')->dailyAt('02:00')) and add a single server cron entry that runs php artisan schedule:run every minute. Alternatively, create a new file in your repository’s .github/workflows directory with a YAML configuration that uses the schedule trigger to specify the cron expression and the command to run.