
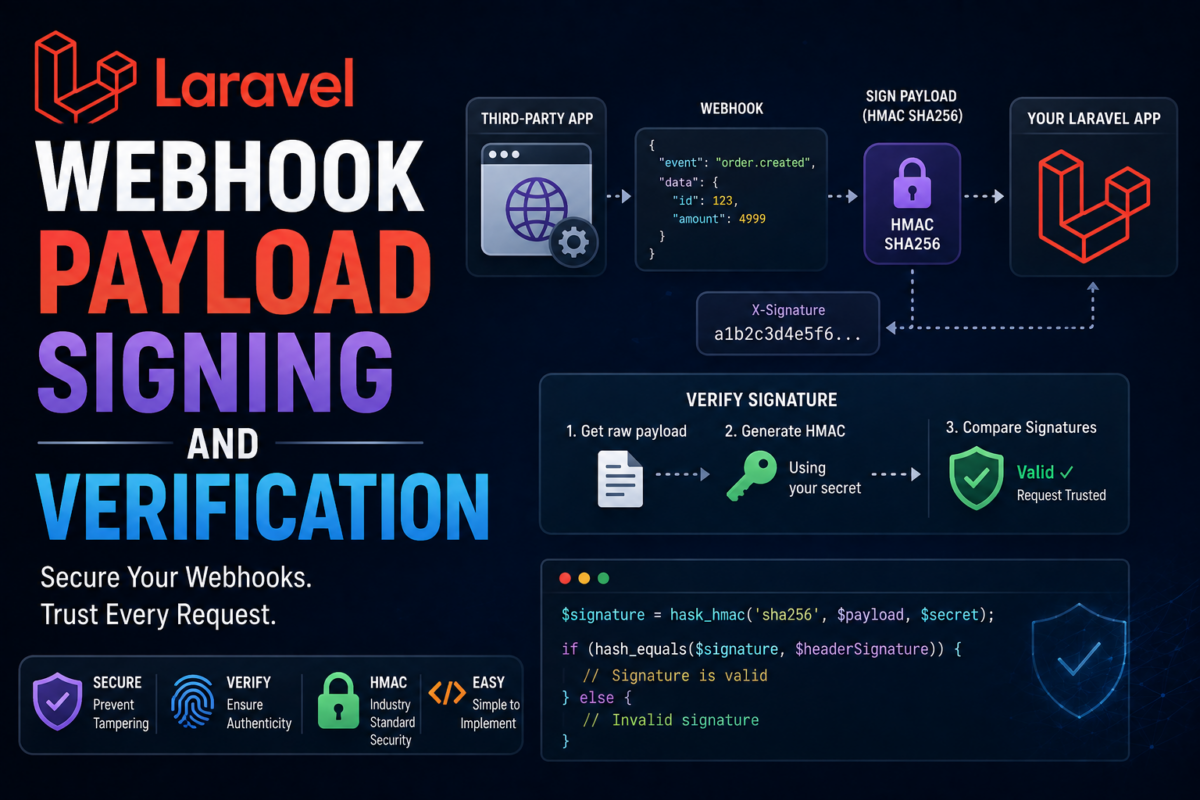
As a Laravel developer, you’ve probably encountered webhooks at some point – perhaps when integrating your application with an external service like GitHub or Stripe. One common challenge arises when verifying the integrity of incoming webhook payloads: how do you ensure they haven’t been tampered with during transit? This is where secure signature verification comes in.
You’ll build a robust and reliable system for signing and verifying webhook payloads using Laravel and PostgreSQL, addressing a crucial security concern that can leave your application vulnerable to attacks. By following this guide, you’ll learn how to set up connection pooling for your PostgreSQL database in Laravel (Step 1), define a model for handling signatures (Step 2), and automate signature generation with event listeners (Step 6).
Setting Up PostgreSQL Connection Pooling in Laravel
To get started with signing webhook payloads using Postgres in Laravel, we first need to set up a connection pool for our database. This allows multiple requests to be handled concurrently without creating new connections each time. Laravel doesn’t pool connections itself (each PHP worker opens its own connection), so we’ll use PgBouncer, a lightweight connection pooler that sits between Laravel and PostgreSQL.
In your config/database.php file, update the connections.pgsql section as follows:
'pgsql' => [
    'driver'   => 'pgsql',
    'host'     => env('DB_HOST', '127.0.0.1'),
    'port'     => env('DB_PORT', '5432'),
    'database' => env('DB_DATABASE', 'forge'),
    'username' => env('DB_USERNAME', 'forge'),
    'password' => env('DB_PASSWORD', ''),
    'charset'  => 'utf8',
    'prefix'   => '',
    // Required for PgBouncer's transaction pooling mode
    'options'  => [
        PDO::ATTR_EMULATE_PREPARES => true,
    ],
],
Next, configure the connection pool settings in PgBouncer’s configuration file (/etc/pgbouncer/pgbouncer.ini):
[databases]
mydatabase = host=127.0.0.1 port=5432 dbname=mydatabase

[pgbouncer]
listen_addr = 127.0.0.1
listen_port = 6432
auth_type = scram-sha-256
auth_file = /etc/pgbouncer/userlist.txt
pool_mode = transaction
min_pool_size = 5
default_pool_size = 20
query_wait_timeout = 10
This enables connection pooling for our Postgres database and sets the minimum and maximum pool size and how many seconds a client waits for a free connection. Because transaction pooling doesn’t keep a client on the same server connection, the PDO::ATTR_EMULATE_PREPARES option in the pgsql configuration above stops server-side prepared statements from breaking.
Make sure to update your .env file with the correct database credentials, pointing Laravel at PgBouncer’s port instead of PostgreSQL’s:
DB_CONNECTION=pgsql
DB_HOST=127.0.0.1
DB_PORT=6432
DB_DATABASE=mydatabase
DB_USERNAME=myuser
DB_PASSWORD=mypassword
With connection pooling set up, we can now move on to creating a model for handling webhook payload signatures.
Defining a Webhook Payload Signature Model
To define a model for our webhook payload signatures, we’ll create a new WebhookSignature Eloquent model in the app\Models directory.
// app/Models/WebhookSignature.php

namespace App\Models;

use Illuminate\Database\Eloquent\Factories\HasFactory;
use Illuminate\Database\Eloquent\Model;

class WebhookSignature extends Model
{
    use HasFactory;

    protected $fillable = [
        'webhook_id',
        'payload',
        'signature',
        'created_at',
        'updated_at'
    ];

    public function webhook()
    {
        return $this->belongsTo(Webhook::class);
    }
}
In this example, our WebhookSignature model belongs to the Webhook model through its webhook_id column. We’ve also defined the $fillable property to specify which columns can be mass-assigned.
Next, we’ll create a migration to create the webhook_signatures table in our database:
// database/migrations/2024_02_20_000000_create_webhook_signatures_table.php

use Illuminate\Database\Migrations\Migration;
use Illuminate\Database\Schema\Blueprint;
use Illuminate\Support\Facades\Schema;

class CreateWebhookSignaturesTable extends Migration
{
    public function up()
    {
        Schema::create('webhook_signatures', function (Blueprint $table) {
            $table->id();
            $table->foreignId('webhook_id')->constrained()->onDelete('cascade');
            $table->text('payload');
            $table->string('signature');
            $table->timestamps();
        });
    }

    public function down()
    {
        Schema::dropIfExists('webhook_signatures');
    }
}
After running this migration, we can use our WebhookSignature model to interact with the database table.
Generating a Signature for Webhook Payloads
To generate a signature for webhook payloads, we’ll use the WebhookSignature class and a static generateSignature method that we’ll add to it. We call it from the controller or service where we handle incoming webhook requests.
// app/Http/Controllers/WebhooksController.php (example)

namespace App\Http\Controllers;

use App\Models\Webhook;
use App\Models\WebhookSignature;
use Illuminate\Http\Request;

class WebhooksController extends Controller
{
    public function handle(Request $request, Webhook $webhook)
    {
        // Sign the raw request body exactly as it was received
        $payload = $request->getContent();

        $signature = WebhookSignature::generateSignature($payload, $webhook->getWebhookSecret());

        // Store the signature in your database, if needed
        $webhook->signatures()->create([
            'payload' => $payload,
            'signature' => $signature,
        ]);
    }
}
The WebhookSignature class combines the raw payload with the webhook’s secret key (stored on the Webhook model) to create a digital signature using the HMAC algorithm. This signature can be used for verification purposes. Add the method to the model using PHP’s hash_hmac() function:
// app/Models/WebhookSignature.php

class WebhookSignature extends Model
{
    // ...

    public static function generateSignature(string $payload, string $secret): string
    {
        return hash_hmac('sha256', $payload, $secret);
    }
}
The secret itself is stored on the Webhook model:
// app/Models/Webhook.php

namespace App\Models;

use Illuminate\Database\Eloquent\Factories\HasFactory;
use Illuminate\Database\Eloquent\Model;
use Illuminate\Database\Eloquent\Relations\HasMany;

class Webhook extends Model
{
    use HasFactory;

    protected $fillable = ['key', 'secret_key'];

    protected $hidden = ['secret_key'];

    protected $casts = [
        'secret_key' => 'encrypted',
    ];

    public function signatures(): HasMany
    {
        return $this->hasMany(WebhookSignature::class);
    }

    public function getWebhookSecret(): string
    {
        return $this->secret_key;
    }
}
This model assumes a webhooks table with key and secret_key columns. Create its migration before the webhook_signatures migration (the foreign key needs the table to exist), and make secret_key a text column, since values stored with the encrypted cast are much longer than the original secret.
In this example, we’re passing the raw payload and the webhook’s secret key to generateSignature. The resulting signature can be stored along with the webhook payload for later verification.
With signature generation in place, we can now use the same method to verify signatures on incoming requests.
Verifying the Signature of Incoming Webhook Payloads
To ensure the authenticity and integrity of our webhook payloads, we need to verify their digital signatures on the server-side. This step is crucial for preventing tampering with or forging of our payload data.
Firstly, let’s update the WebhookSignature model to add a method that verifies an incoming signature:
// app/Models/WebhookSignature.php

class WebhookSignature extends Model
{
    // ...

    public static function verify(string $signature, string $payload, string $secret): bool
    {
        return hash_equals(static::generateSignature($payload, $secret), $signature);
    }
}
This method takes the signature, payload data, and secret as arguments and checks if they match, using hash_equals() for a timing-safe comparison. If they do, it returns true; otherwise, it returns false.
Next, we’ll update our webhook controllers to verify the incoming signatures on every request:
// app/Http/Controllers/WebhookController.php

namespace App\Http\Controllers;

use App\Models\Webhook;
use App\Models\WebhookSignature;
use Illuminate\Http\Request;

class WebhookController extends Controller
{
    public function handle(Request $request, Webhook $webhook)
    {
        $signature = (string) $request->header('X-Signature');
        $payload = $request->getContent();

        if (! WebhookSignature::verify($signature, $payload, $webhook->getWebhookSecret())) {
            return response()->json(['error' => 'Invalid signature'], 401);
        }

        // ...
    }
}
Register the route in routes/api.php, so that it isn’t subject to the CSRF protection applied to web routes, and let route model binding resolve the Webhook:
// routes/api.php
use App\Http\Controllers\WebhookController;
use Illuminate\Support\Facades\Route;

Route::post('/webhooks/{webhook}', [WebhookController::class, 'handle']);
By verifying the signature on every incoming request, we can ensure that our webhook payloads are tamper-proof and authentic. This is a crucial step in maintaining the trust between our application and the services that send it webhooks.
Handling Verification Errors and Exceptions
When verifying webhook payload signatures, it’s essential to handle potential errors and exceptions that may occur during the verification process. In a real-world application, you’ll likely want to log these errors for auditing purposes and consider sending notifications to your development team.
// app/Exceptions/SignatureVerificationFailed.php
namespace App\Exceptions;

// Create a new exception class for signature verification failures
class SignatureVerificationFailed extends \Exception {}
Then, in your webhook controller’s handle method, throw it when verification fails:
// app/Http/Controllers/WebhookController.php
use App\Exceptions\SignatureVerificationFailed;
use App\Models\WebhookSignature;
use Illuminate\Support\Facades\Log;

// Attempt to verify the payload signature
if (! WebhookSignature::verify($signature, $payload, $webhook->getWebhookSecret())) {
    Log::error('Failed to verify webhook payload signature');

    // Rethrow as an application-specific exception
    throw new SignatureVerificationFailed('Failed to verify webhook payload signature');
}
To handle these exceptions, you can create custom error handlers or middleware that catch and log the errors. For example, in Laravel 11 and later, register a render callback in bootstrap/app.php:
// bootstrap/app.php

use App\Exceptions\SignatureVerificationFailed;
use Illuminate\Foundation\Configuration\Exceptions;
use Illuminate\Http\Request;
use Illuminate\Support\Facades\Log;

->withExceptions(function (Exceptions $exceptions) {
    $exceptions->render(function (SignatureVerificationFailed $e, Request $request) {
        Log::error('Signature verification failed: ' . $e->getMessage());

        // Return a custom JSON response with an error code
        return response()->json(['error' => 'SIGNATURE_VERIFICATION_FAILED'], 401);
    });
})
This will allow you to catch and handle signature verification failures in a centralized manner.
Implementing Automatic Signature Generation with Event Listeners
Now that we have a solid understanding of how to generate and verify webhook payloads using signatures, let’s take it to the next level by automating this process. In this final section, we’ll explore how to use Laravel’s event listener mechanism to automatically generate signatures for outgoing webhook payloads.
First, create a new event class in the app/Events directory:
// app/Events/SendWebhookEvent.php

namespace App\Events;

use App\Models\Webhook;
use Illuminate\Foundation\Events\Dispatchable;
use Illuminate\Queue\SerializesModels;

class SendWebhookEvent
{
    use Dispatchable, SerializesModels;

    public $webhook;

    public $webhookData;

    public function __construct(Webhook $webhook, array $webhookData)
    {
        $this->webhook = $webhook;
        $this->webhookData = $webhookData;
    }
}
Next, create a new listener class that will generate the signature for the webhook payload:
// app/Listeners/GenerateSignatureListener.php

namespace App\Listeners;

use Illuminate\Contracts\Queue\ShouldQueue;
use Illuminate\Queue\InteractsWithQueue;
use App\Events\SendWebhookEvent;
use App\Models\WebhookSignature;

class GenerateSignatureListener implements ShouldQueue
{
    use InteractsWithQueue;

    public function handle(SendWebhookEvent $event)
    {
        $payload = json_encode($event->webhookData);

        // Generate signature using the same logic as in the previous sections
        $signature = WebhookSignature::generateSignature($payload, $event->webhook->getWebhookSecret());

        // Store the signature in the database
        $event->webhook->signatures()->create(['payload' => $payload, 'signature' => $signature]);
    }
}
Finally, register the listener with the event. In Laravel 11 and later, listeners in the app/Listeners directory are discovered automatically from the event type-hinted in their handle method, so no provider entry is needed. You can confirm the registration with Artisan:
php artisan event:list --event=SendWebhookEventWith this setup, whenever a webhook event is dispatched (for example, SendWebhookEvent::dispatch($webhook, $data)), the GenerateSignatureListener will automatically generate and store the signature for the corresponding payload. This concludes our tutorial on signing webhook payloads using Postgres in Laravel. By implementing automatic signature generation with event listeners, we’ve taken our application’s security to the next level.
Frequently Asked Questions
How do I configure Postgres connection pooling in Laravel?
Laravel doesn’t pool connections itself, so run PgBouncer in front of PostgreSQL and configure the pool settings in pgbouncer.ini. Then update the connections.pgsql section in your config/database.php file (enabling PDO::ATTR_EMULATE_PREPARES for transaction pooling) and point DB_HOST and DB_PORT in your .env file at PgBouncer, along with the correct database credentials.
What is the purpose of the WebhookSignature model?
The WebhookSignature model is used to store and manage signatures for incoming webhook payloads, ensuring their integrity and authenticity.
Why should I use a connection pool instead of creating new connections each time?
Using a connection pool improves performance by allowing multiple requests to be handled concurrently without creating unnecessary overhead. It also helps reduce the risk of exhausting database connections.
What’s the difference between using Postgres and other databases for signing webhook payloads?
Postgres is a popular choice for many applications due to its reliability, scalability, and robust security features. However, other databases like MySQL or SQLite can also be used depending on your specific needs and requirements.
What happens if I forget to update my .env file with correct database credentials?
If you don’t update your .env file correctly, Laravel may not connect to the Postgres database properly, leading to errors or unexpected behavior. Make sure to double-check your credentials and configurations.