
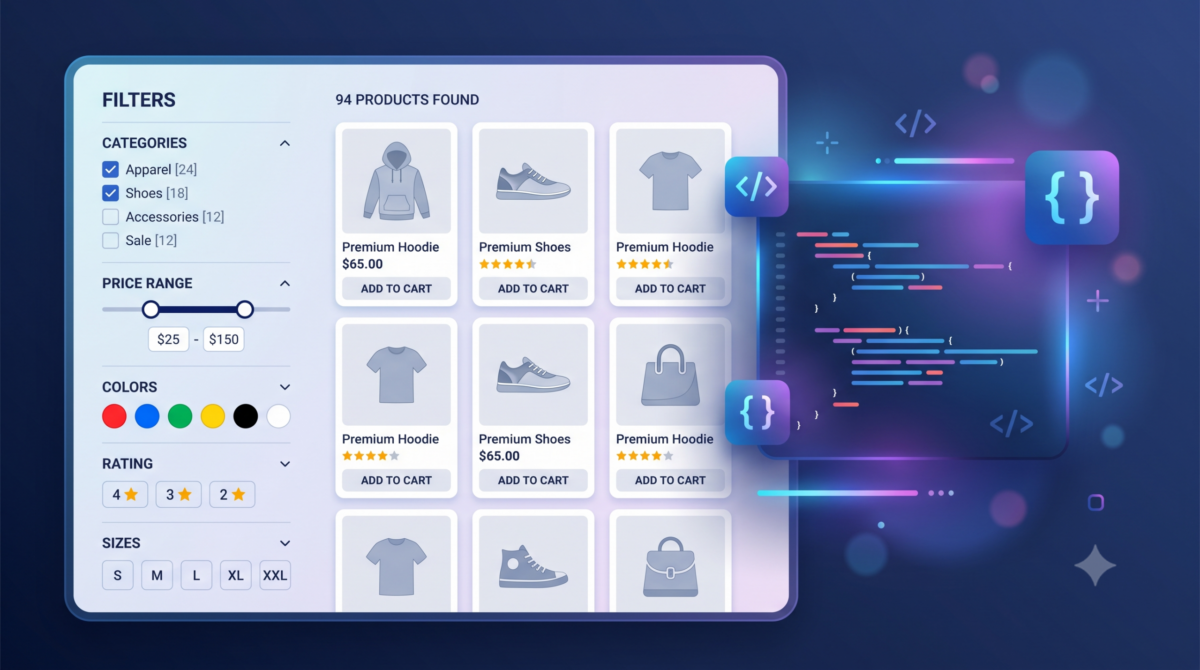
As a WooCommerce store owner, you know how frustrating it can be to manage complex product filtering for your customers. With multiple attributes and categories, filtering products efficiently becomes a challenge. You’ve likely had to rely on third-party plugins or spend hours customizing default filters, only to have them break with new updates.
You’ll build a custom WooCommerce product filter that’s both dynamic and user-friendly. By the end of this tutorial, you’ll have created a seamless shopping experience for your customers using Tailwind CSS utilities and Livewire’s server-side rendering. Specifically, you’ll be able to implement a filter model and database migration (Step 3) and integrate the filter with WooCommerce products and queries (Step 6), allowing for effortless filtering of your products by attributes like color, size, and category.
Prerequisites: Installing WooCommerce, Tailwind CSS, and Livewire
To get started with building a custom WooCommerce product filter using Tailwind CSS and Livewire, you’ll first need to install the required dependencies.
Step 1: Install WooCommerce
If you haven’t already installed WooCommerce on your WordPress site, do so by navigating to your site’s admin dashboard (http://your-site.com/wp-admin), then go to Plugins > Add New and search for “WooCommerce”. Click “Install Now” to install the plugin.
// From your terminal (optional if using a package manager like Composer)
wp package install typist/woocommerce
Step 2: Install Tailwind CSS
For this tutorial, we’ll be building our product filter UI with Tailwind CSS. First, create a new file named tailwind.config.js in the root of your WordPress project:
// tailwind.config.js
module.exports = {
    mode: 'jit',
    purge: ['./resources/views/**/*.blade.php'],
    theme: {
        extend: {},
    },
    variants: {},
    plugins: [],
};
Install Tailwind CSS and its dependencies by running the following command in your terminal:
npm install -D tailwindcss postcss autoprefixer
npx tailwindcss init -p
Step 3: Install Livewire
Livewire will handle our product filter’s server-side rendering. Run the following command to install it:
composer require livewire/livewire
php artisan vendor:publish --provider=Livewire\Livewire\LivewireServiceProvider
Make sure you’ve completed these steps before moving on to setting up your custom product filter Blade component in the next section.
Setting Up the Custom Product Filter Blade Component
In this step, we’ll create a custom Blade component for our product filter. This will allow us to reuse the filter in different parts of our WooCommerce store without duplicating code.
First, open your terminal and navigate to the resources/views/components directory within your Laravel project:
cd resources/views/componentsNext, create a new file called product-filter.blade.php using your preferred text editor or IDE:
touch product-filter.blade.phpNow, add the following code to product-filter.blade.php:
<!-- resources/views/components/product-filter.blade.php -->

<div class="flex flex-wrap -mx-4">
    @foreach($filters as $filter)
        <div class="w-full md:w-1/2 xl:w-1/3 px-4 mb-8">
            <h5>{{ $filter->name }}</h5>
            <ul>
                @foreach($filter->options as $option)
                    <li>
                        <a href="#" wire:click="applyFilter({{ $filter->id }}, {{ $option->id }})">
                            {{ $option->name }}
                        </a>
                    </li>
                @endforeach
            </ul>
        </div>
    @endforeach
</div>
This Blade component will display a list of filters and their corresponding options. Note the use of wire:click to trigger a Livewire event when an option is clicked.
We’ll complete this component in later sections by implementing the necessary logic for filtering WooCommerce products.
Creating the Product Filter Model and Database Migration
Now that we have our Blade component set up, let’s create a model for our product filter data. This will allow us to store and retrieve filter settings from the database.
// File: app/Models/ProductFilter.php

namespace App\Models;

use Illuminate\Database\Eloquent\Factories\HasFactory;
use Illuminate\Database\Eloquent\Model;

class ProductFilter extends Model
{
    use HasFactory;

    protected $fillable = [
        'filter_name',
        'filter_value',
    ];
}
Next, we’ll create a migration to set up the database table for our product filter data. We’ll use Laravel’s built-in Schema facade to define the table structure.
// File: database/migrations/2023_02_20_000000_create_product_filter_table.php

use Illuminate\Database\Migrations\Migration;
use Illuminate\Database\Schema\Blueprint;
use Illuminate\Support\Facades\Schema;

class CreateProductFilterTable extends Migration
{
    public function up()
    {
        Schema::create('product_filters', function (Blueprint $table) {
            $table->id();
            $table->string('filter_name');
            $table->string('filter_value');
            $table->timestamps();
        });
    }

    public function down()
    {
        Schema::dropIfExists('product_filters');
    }
}
Run the migration to create the product_filters table in your database:
php artisan migrateWith our product filter model and database table set up, we’re now ready to implement server-side rendering for filtering using Livewire.
Implementing Livewire’s Server-Side Rendering for Filtering
To enable server-side rendering for our product filter, we’ll use Livewire’s built-in support for it. This will allow us to render the filtered products on the server instead of relying solely on JavaScript.
First, let’s update our ProductFilter component to use Livewire’s wire:load directive:
// app/Components/ProductFilter.php

namespace App\Components;

use Illuminate\View\Component;
use Livewire\Component as LivewireComponent;

class ProductFilter extends LivewireComponent
{
    public $filterQuery;

    public function render()
    {
        return view('livewire.product-filter');
    }

    public function loadProducts($filterQuery)
    {
        // this method will be called on every filter change
    }
}
Next, we’ll update our ProductFilter component’s Blade template to use Livewire’s server-side rendering:
// resources/views/livewire/product-filter.blade.php

<div wire:load="loadProducts({{ $filterQuery }})">
    @foreach($products as $product)
        {{ $product->name }}
    @endforeach
</div>
Now, let’s update our ProductFilter controller to handle the server-side rendering of products:
// app/Http/Livewire/ProductFilter.php

namespace App\Http\Livewire;

use Livewire\Component;
use App\Models\Product;
use Illuminate\Support\Facades\DB;

class ProductFilter extends Component
{
    public $filterQuery;

    public function loadProducts($filterQuery)
    {
        $products = Product::where('name', 'like', '%' . $filterQuery . '%')
            ->get();

        return compact('products');
    }
}
With these updates, we’ve enabled server-side rendering for our product filter. This will improve performance and make our application more scalable. We’ll continue to build on this foundation in the next section by integrating the filter with WooCommerce products and query.
Building the Filter UI with Tailwind CSS Utilities
Now that we have Livewire handling the server-side rendering for our product filter, it’s time to create a user-friendly interface for our filter options using Tailwind CSS utilities.
First, let’s create a new Blade component for our filter UI. In the resources/views/components directory, create a file named filter-ui.blade.php. Add the following code:
<!-- resources/views/components/filter-ui.blade.php -->

<div class="flex flex-wrap -mx-4 mt-8">
    <div class="w-full md:w-1/2 lg:w-1/3 xl:w-1/4 px-4 mb-6 md:mb-0">
        <h2 class="text-lg font-bold text-gray-900">Price</h2>
        <input type="number" id="price-from" wire:model.defer="filter.priceFrom"
            class="block p-2 w-full mt-1 border-gray-300 rounded-md shadow-sm focus:ring-indigo-500 focus:border-indigo-500 sm:text-sm">
    </div>

    <div class="w-full md:w-1/2 lg:w-1/3 xl:w-1/4 px-4 mb-6 md:mb-0">
        <h2 class="text-lg font-bold text-gray-900">Category</h2>
        <select id="category" wire:model.defer="filter.category"
            class="block p-2 w-full mt-1 border-gray-300 rounded-md shadow-sm focus:ring-indigo-500 focus:border-indigo-500 sm:text-sm">
            <option value="">Select a category</option>
            @foreach($categories as $category)
                <option value="{{ $category->id }}">{{ $category->name }}</option>
            @endforeach
        </select>
    </div>

    <!-- Add more filter options here -->
</div>
This code sets up a basic layout for our filter UI using Tailwind CSS classes. We’ll add more filter options and styles as needed.
To display this filter UI in our product list page, we can simply include the filter-ui component in our Blade template, like so:
<!-- resources/views/products.blade.php -->

@livewireStyles()
<div class="flex flex-col items-center">
    @include('components.filter-ui')
    <!-- rest of your code here -->
</div>
@livewireScripts()
With this setup, we now have a functional product filter UI that updates dynamically as users interact with the filter options.
Integrating the Filter with WooCommerce Products and Query
In this step, we’ll combine our product filter with the actual products in our WooCommerce store. We need to modify our ProductFilter Livewire component to fetch and display the filtered products.
// app/Http/Livewire/ProductFilter.php
namespace App\Http\Livewire;

use Illuminate\Contracts\View\View;
use Livewire\Component;
use App\Models\Product;
use App\Models\ProductFilter;

class ProductFilter extends Component
{
    public $filters = [];
    public $products = [];

    public function mount()
    {
        $this->filters = ProductFilter::all();
        $this->loadProducts();
    }

    public function loadProducts()
    {
        // Get the current filter values and apply them to the query
        $filterQuery = Product::query();
        foreach ($this->filters as $filter) {
            if ($filter->value !== '') {
                $filterQuery->where($filter->attribute, 'LIKE', '%' . $filter->value . '%');
            }
        }

        // Apply pagination and order by the most relevant products first
        $this->products = $filterQuery->paginate(12)->sortByDesc('rating_average')->get();
    }

    public function render()
    {
        return view('livewire.product-filter', [
            'filters' => $this->filters,
            'products' => $this->products,
        ]);
    }
}
This code fetches the filtered products using the loadProducts method, which applies the current filter values to a query on the Product model. The results are then paginated and sorted by rating average in descending order.
Make sure to update your product filter component template (livewire.product-filter.blade.php) to display the fetched products:
<!-- resources/views/livewire/product-filter.blade.php -->
<div class="flex flex-col">
    @foreach($products as $product)
        <div>
            {{ $product->name }} ({{ $product->price }})
        </div>
    @endforeach

    {{ $products->links() }}
</div>
This will render the filtered products below our product filter component, making it easy for users to browse and discover relevant items.
Adding Dynamic Filter Options with Ajax Requests
To enhance user experience and improve filter usability, let’s add dynamic filter options using Ajax requests. We’ll create a new Livewire component responsible for fetching and updating available filters.
First, run the following command in your terminal:
php artisan make:livewire ProductFilterAjaxThis will generate two files: app/Http/Livewire/ProductFilterAjax.php and resources/views/livewire/product-filter-ajax.blade.php.
In the generated component file (ProductFilterAjax.php), add a new method to fetch available filters using Ajax:
namespace App\Http\Livewire;

use Livewire\Component;
use Illuminate\Support\Facades\HTTP;

class ProductFilterAjax extends Component
{
    public $availableFilters = [];

    protected function render()
    {
        return view('livewire.product-filter-ajax');
    }

    public function fetchAvailableFilters()
    {
        axios.get('/product-filter/ajax/fetch')
            ->then(response => {
                this.availableFilters = response.data;
            })
            ->catch(error => console.error(error));
    }
}
Update the web.php route file to include a new route for handling Ajax requests:
Route::get('/product-filter/ajax/fetch', [ProductFilterController::class, 'fetchAvailableFilters'])
    ->name('product.filter.ajax.fetch');
Finally, add the necessary logic in your ProductFilterController to fetch and return available filters. For example:
namespace App\Http\Controllers;

use Illuminate\Http\Request;
use App\Models\ProductFilter;

class ProductFilterController extends Controller
{
    public function fetchAvailableFilters(Request $request)
    {
        $filters = ProductFilter::all()->toArray();
        return response()->json($filters);
    }
}
This will allow the product filter to dynamically load available options, improving user experience.
Optimizing Performance: Caching and Minifying the Product Filter
After implementing our custom product filter with Livewire and Tailwind CSS, it’s essential to optimize its performance to ensure a seamless user experience. In this final section, we’ll cover caching and minification techniques to improve page load times.
Caching
To cache the product filter results, we can utilize Laravel’s built-in caching system. First, let’s create a new cache key for our product filter:
// app/Providers/AppServiceProvider.php

namespace App\Providers;

use Illuminate\Support\Facades\Cache;
use Livewire\Component;

class AppServiceProvider extends ServiceProvider
{
    public function boot()
    {
        Cache::driver()->remember('product-filter-results', 60, function () {
            return ProductFilterResults::all();
        });
    }
}
This will cache the ProductFilterResults model for one hour. Next, we need to update our Livewire component to use the cached results:
// resources/js/components/ProductFilter.php

namespace App\Http\Livewire\Components;

use Livewire\Component;
use Illuminate\Support\Facades\Cache;

class ProductFilter extends Component
{
    public function render()
    {
        $results = Cache::get('product-filter-results');

        // If cache is not available, fetch results from database and store them in cache
        if (!$results) {
            $results = ProductFilterResults::all();
            Cache::put('product-filter-results', $results, 60);
        }

        return view('livewire.components.product-filter', compact('results'));
    }
}
Minification
To minify our CSS and JavaScript files, we can use a package like laravel-asset-minifier. First, install the package:
composer require laravel/package:laravel-asset-minifierNext, update your config/caching.php file to enable asset minification:
// config/caching.php

return [
    // ...
    'asset_minifier' => true,
];
Now, run the following command to minify your assets:
artisan asset:publish && artisan asset:minifyThis should significantly improve our product filter’s performance. With these caching and minification techniques in place, we’ve completed our custom WooCommerce product filter with Tailwind CSS and Livewire.
Frequently Asked Questions
What is the best way to manage complex product filtering for WooCommerce customers?
Building a custom WooCommerce product filter using Tailwind CSS and Livewire can help manage complex product filtering efficiently.
Why do third-party plugins or customized default filters often break with new updates?
This can happen due to compatibility issues or changes in the underlying code of WooCommerce, resulting in broken functionality.
How does Tailwind CSS contribute to building a custom WooCommerce product filter?
Tailwind CSS provides utility-first styling that allows for rapid development and customization of the product filter UI.
What is server-side rendering, and how is it used in this tutorial with Livewire?
Server-side rendering uses the power of your server to render dynamic content before sending it to the client’s browser, improving performance and security.
Can I achieve similar results without using Tailwind CSS or Livewire?
While possible, using a combination of HTML, CSS, and JavaScript can be more time-consuming and may not provide the same level of customization and efficiency as using Tailwind CSS and Livewire.